How to put parental controls on iPhone (fast and easy guide)


If your child has an iPhone, you’ve probably wondered how to make it safer. Between social media, games, messaging apps, and the internet in general, kids are spending more time online than ever before, and it’s not always easy to know what they’re seeing or who they’re talking to.
Apple’s built-in parental controls, found in the Screen Time settings, give you tools to manage that. You can limit content, block apps, restrict communication, and keep an eye on how much time is being spent on the device, all from your own iPhone.
This guide walks you through how to set up parental controls on iPhone quickly and easily, using Apple’s native features. It also explains how to monitor your child’s usage over time, adjust settings as they grow, and prevent the common workarounds kids use to bypass restrictions.
What are parental controls, and why use them?
Parental controls are tools that help you manage what your child can see and do on their devices. This includes limiting screen time, blocking inappropriate content, restricting certain apps or features, and managing how and when your child can communicate with others.
But parental controls aren't about spying or taking away freedom; they're about setting healthy boundaries that match your child’s age and stage. The real impact comes when those limits are part of an ongoing, honest conversation about navigating the online world safely.
No tool is perfect, but parental controls can give you more visibility and more peace of mind. If you use them well, they can reduce the risk of exposure to harmful content, help prevent screen addiction, and create space for better digital habits as your child grows.
Setting up parental controls on iPhone
It’s pretty straightforward to set up parental controls on your child’s iPhone and start managing their activity. Here are the steps you need to take.
Initial step: Set up Family Sharing
To manage your child’s Screen Time from your iPhone, they need to be part of your Family Sharing group. Once they’re added, you’ll be able to set limits and monitor their usage remotely.
Here’s how to add them:
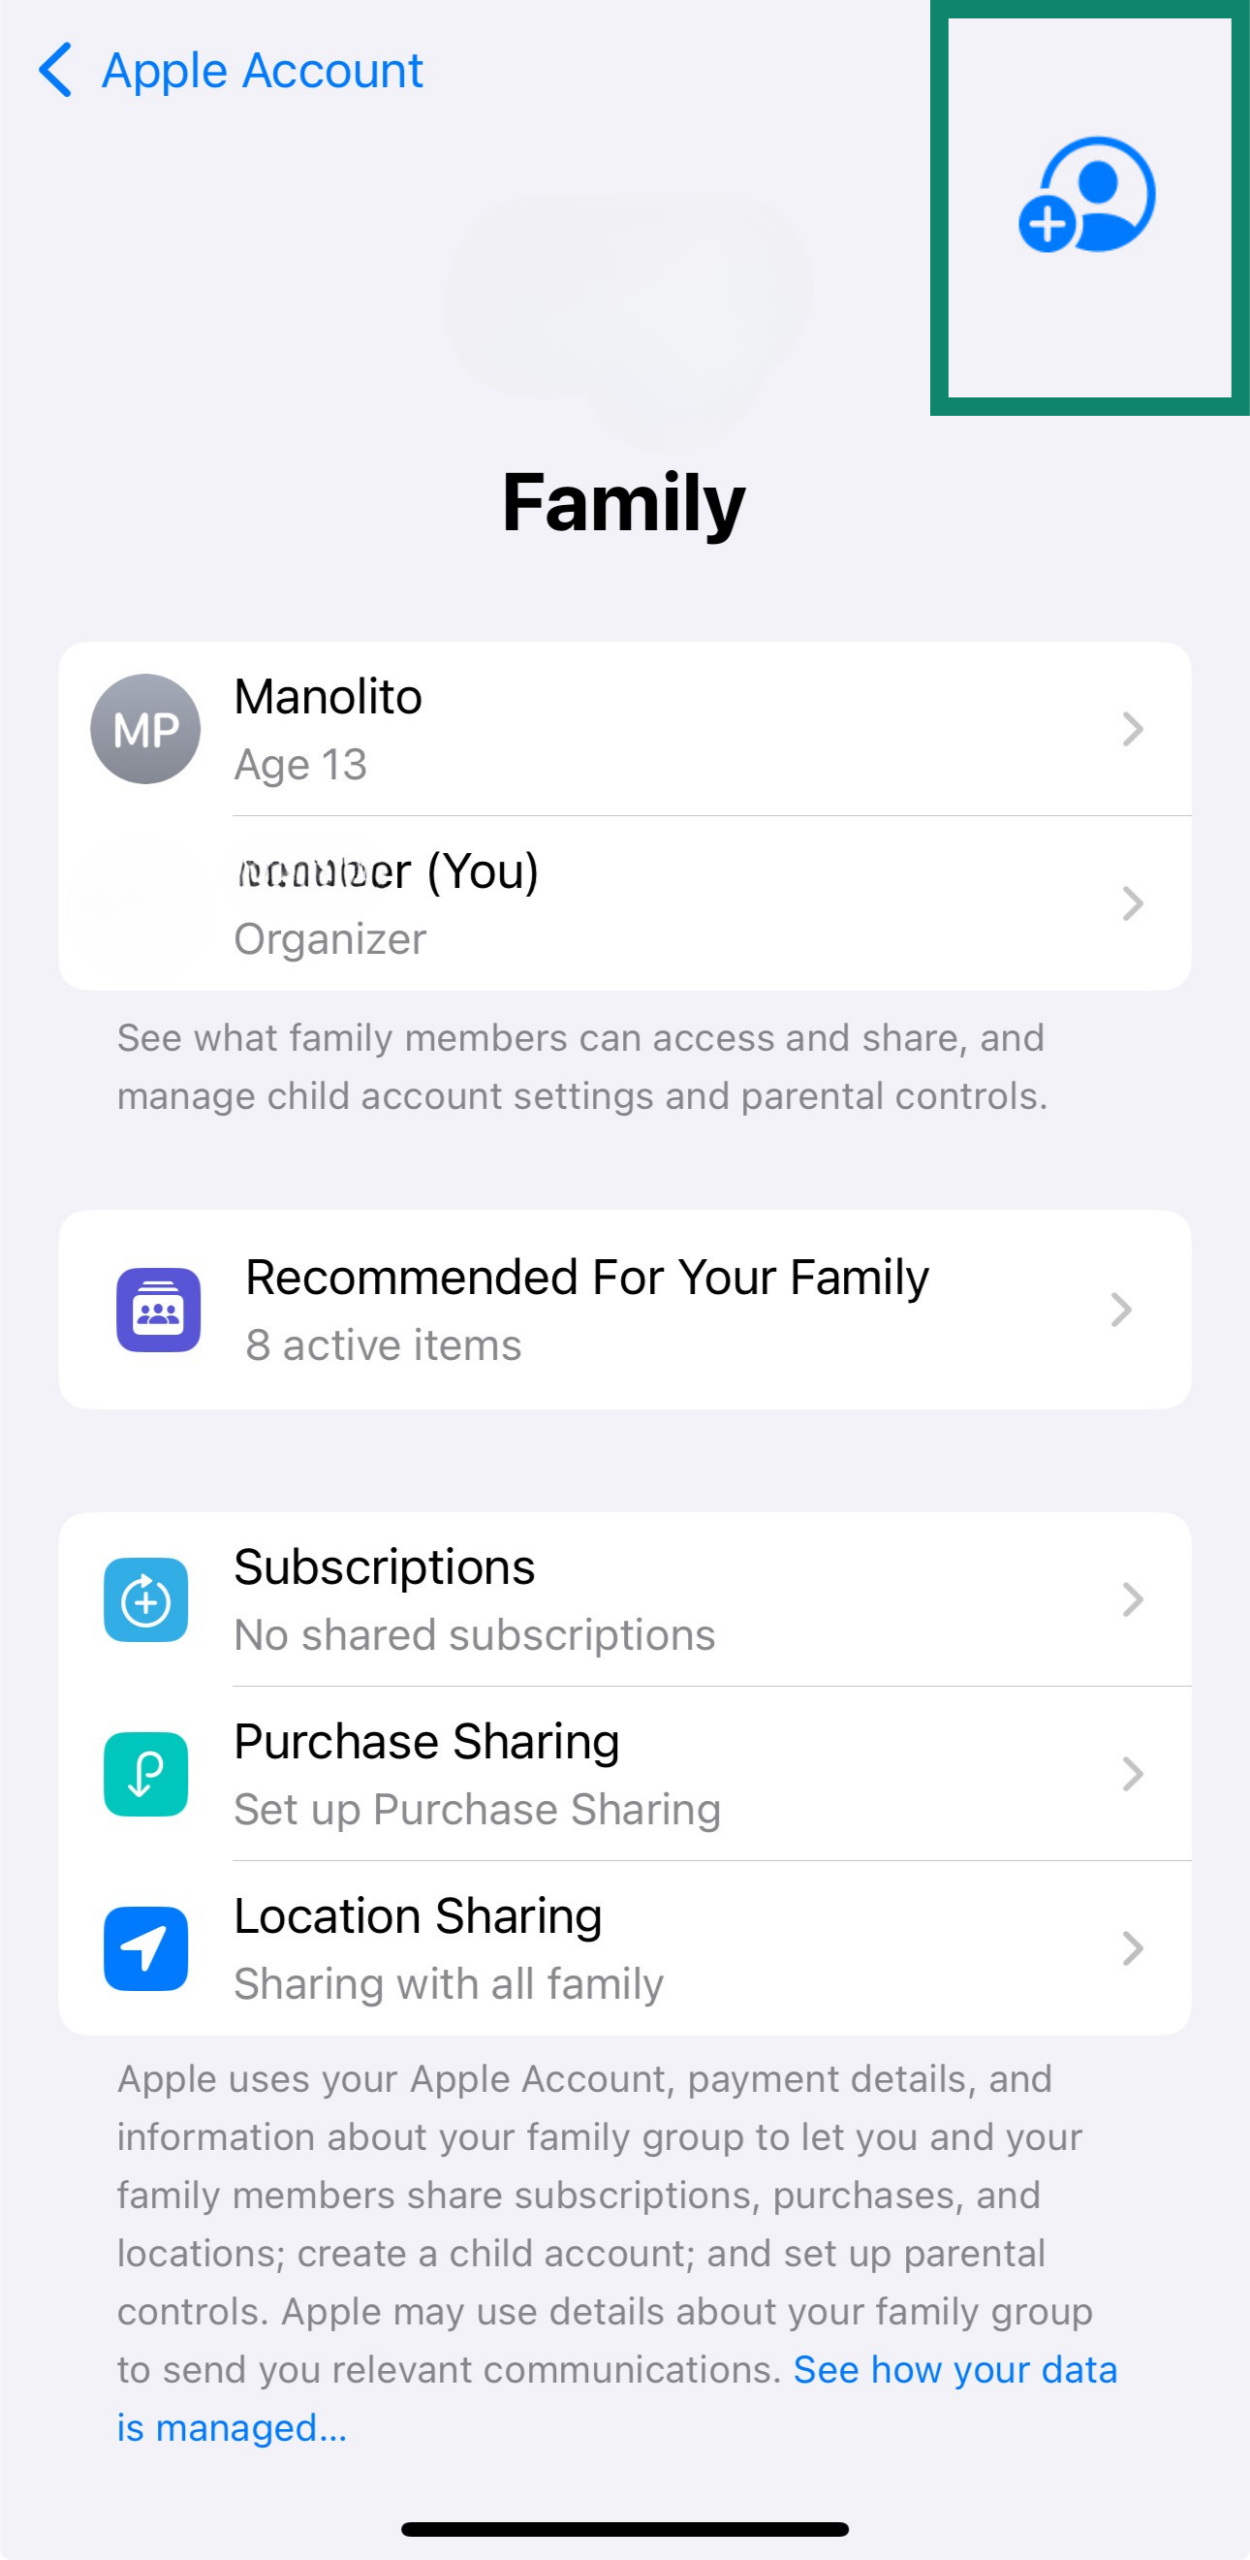
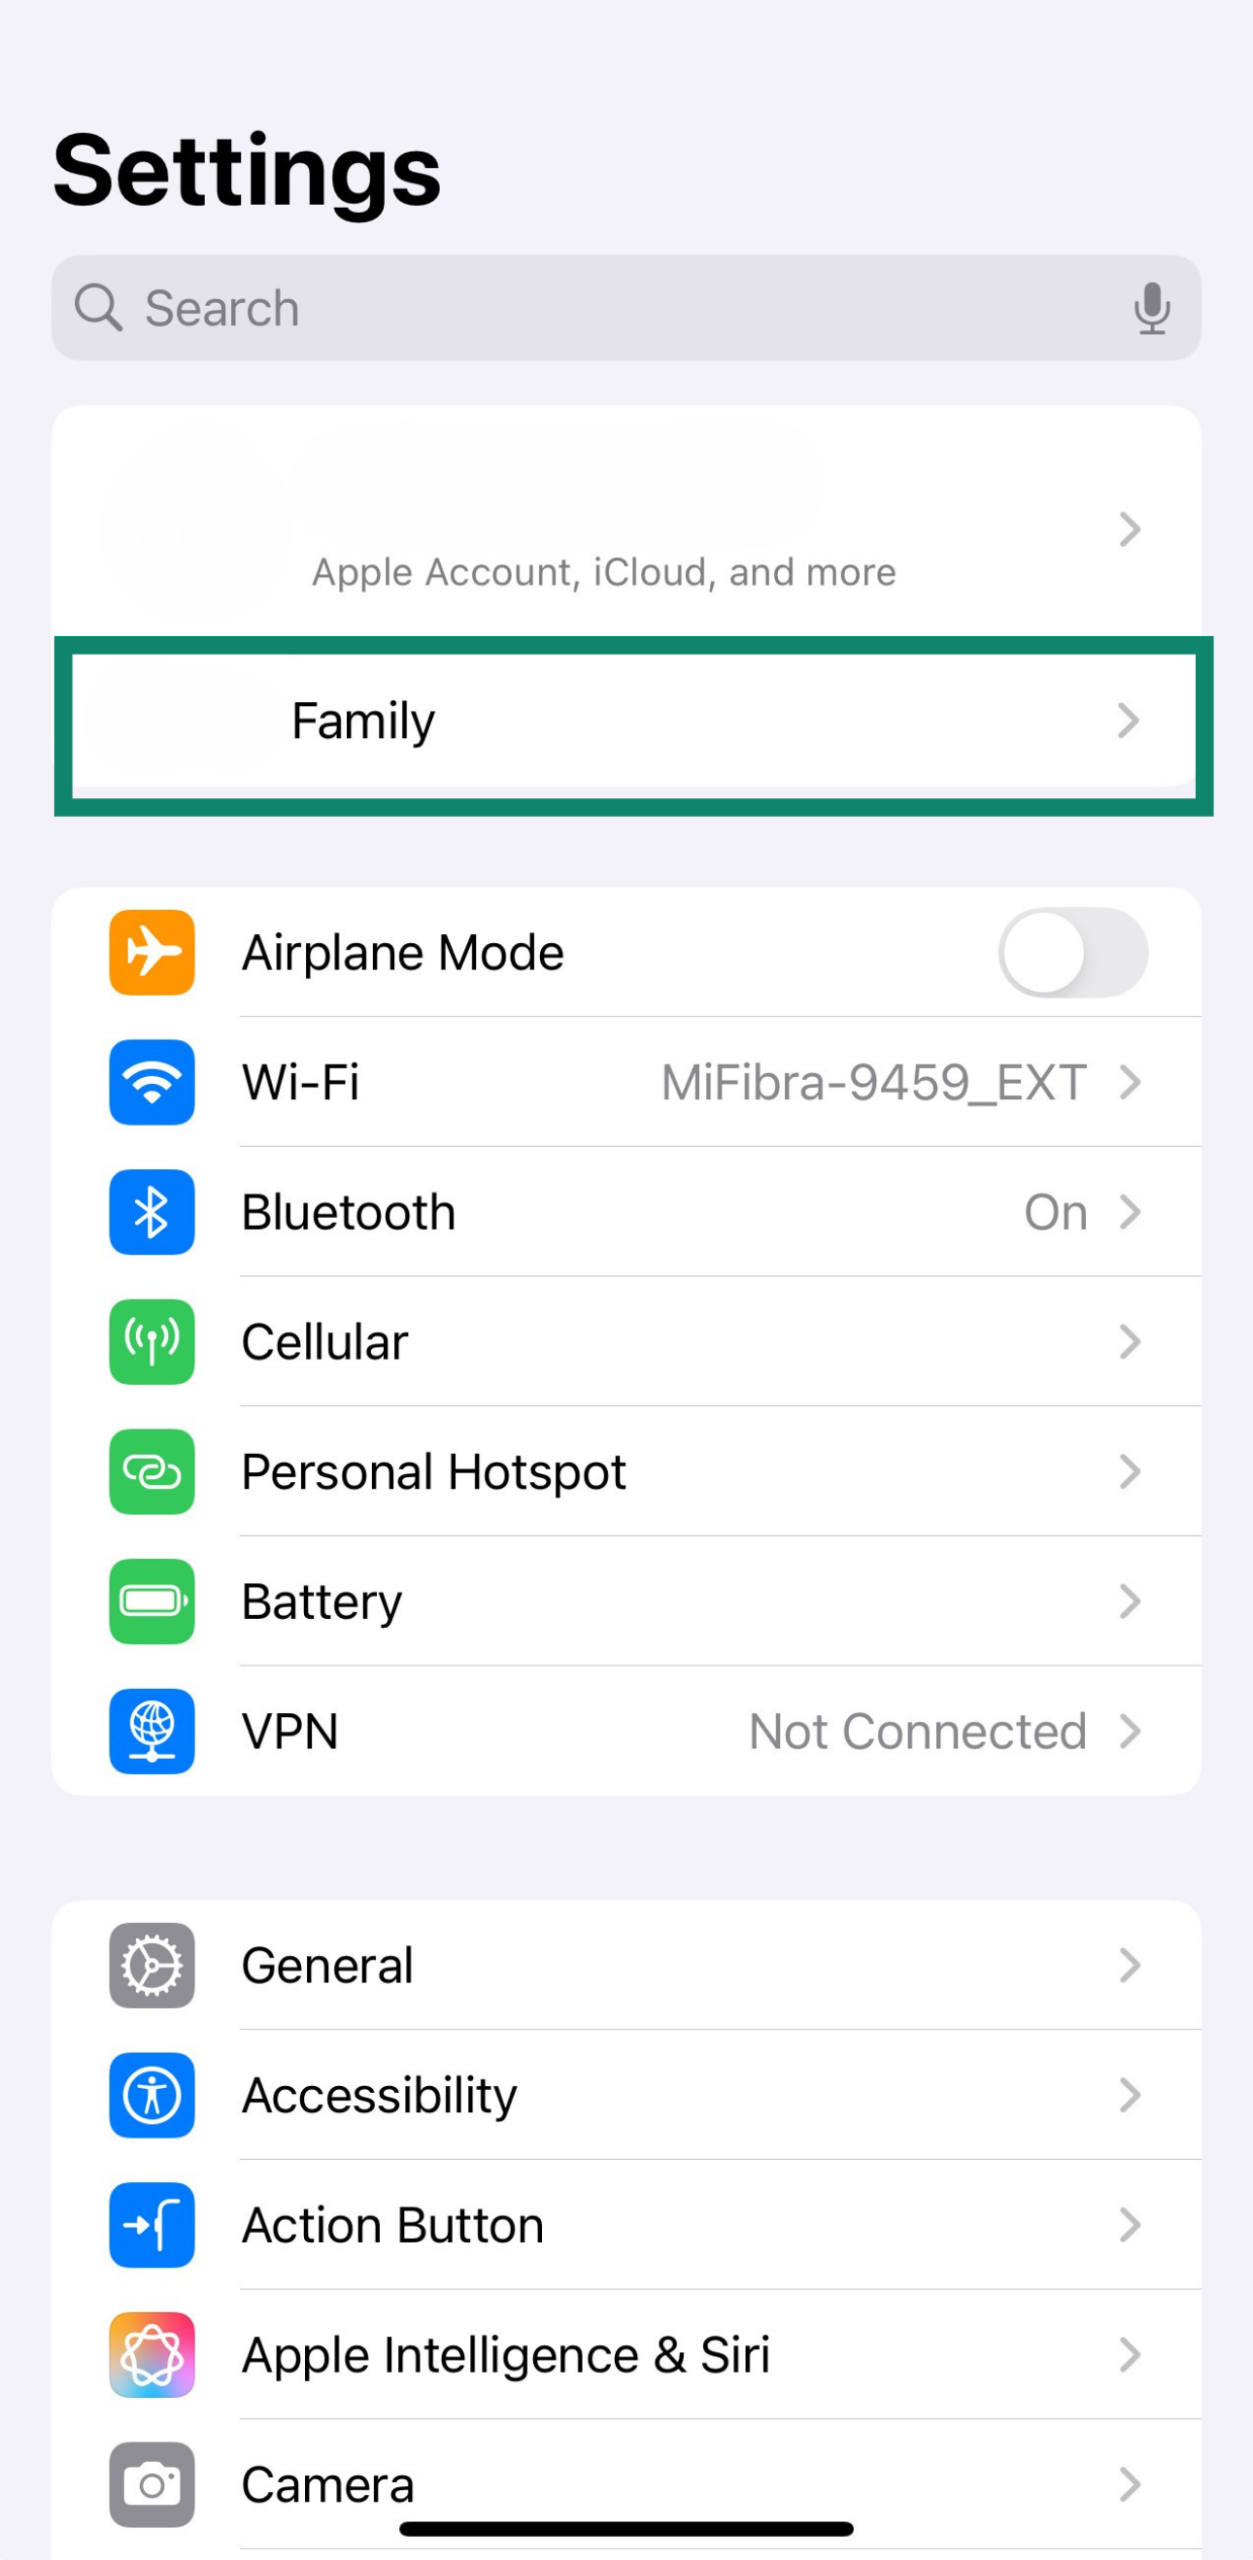
- Open Settings, then tap your Apple ID at the top of the screen.
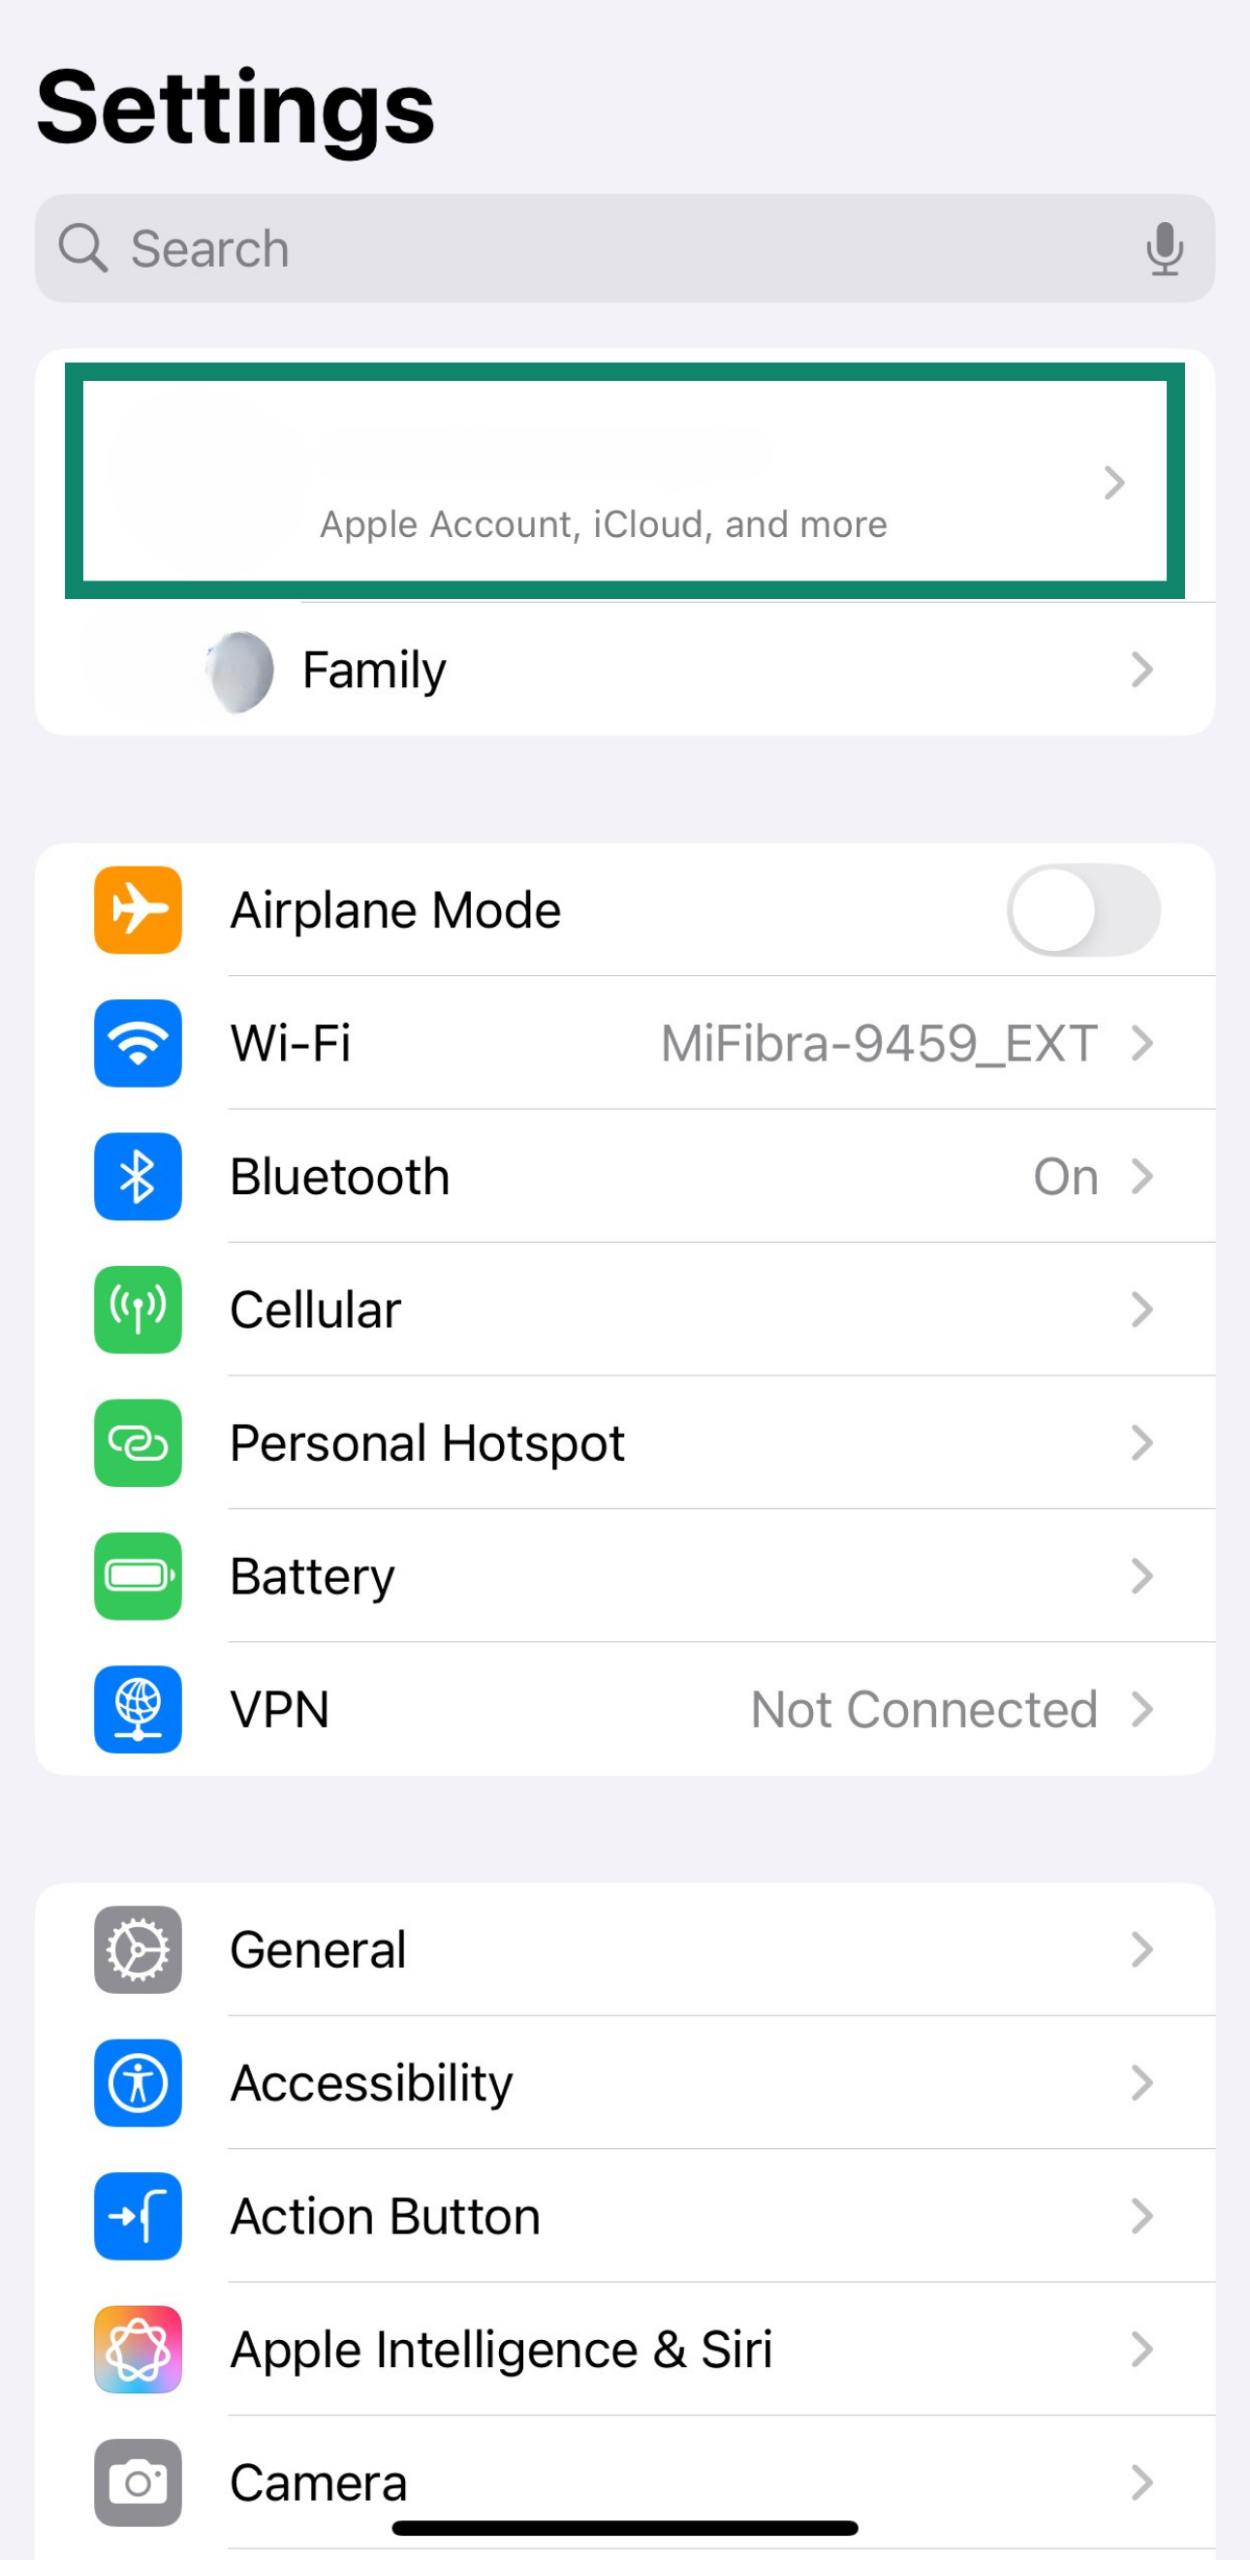
- Tap Family.
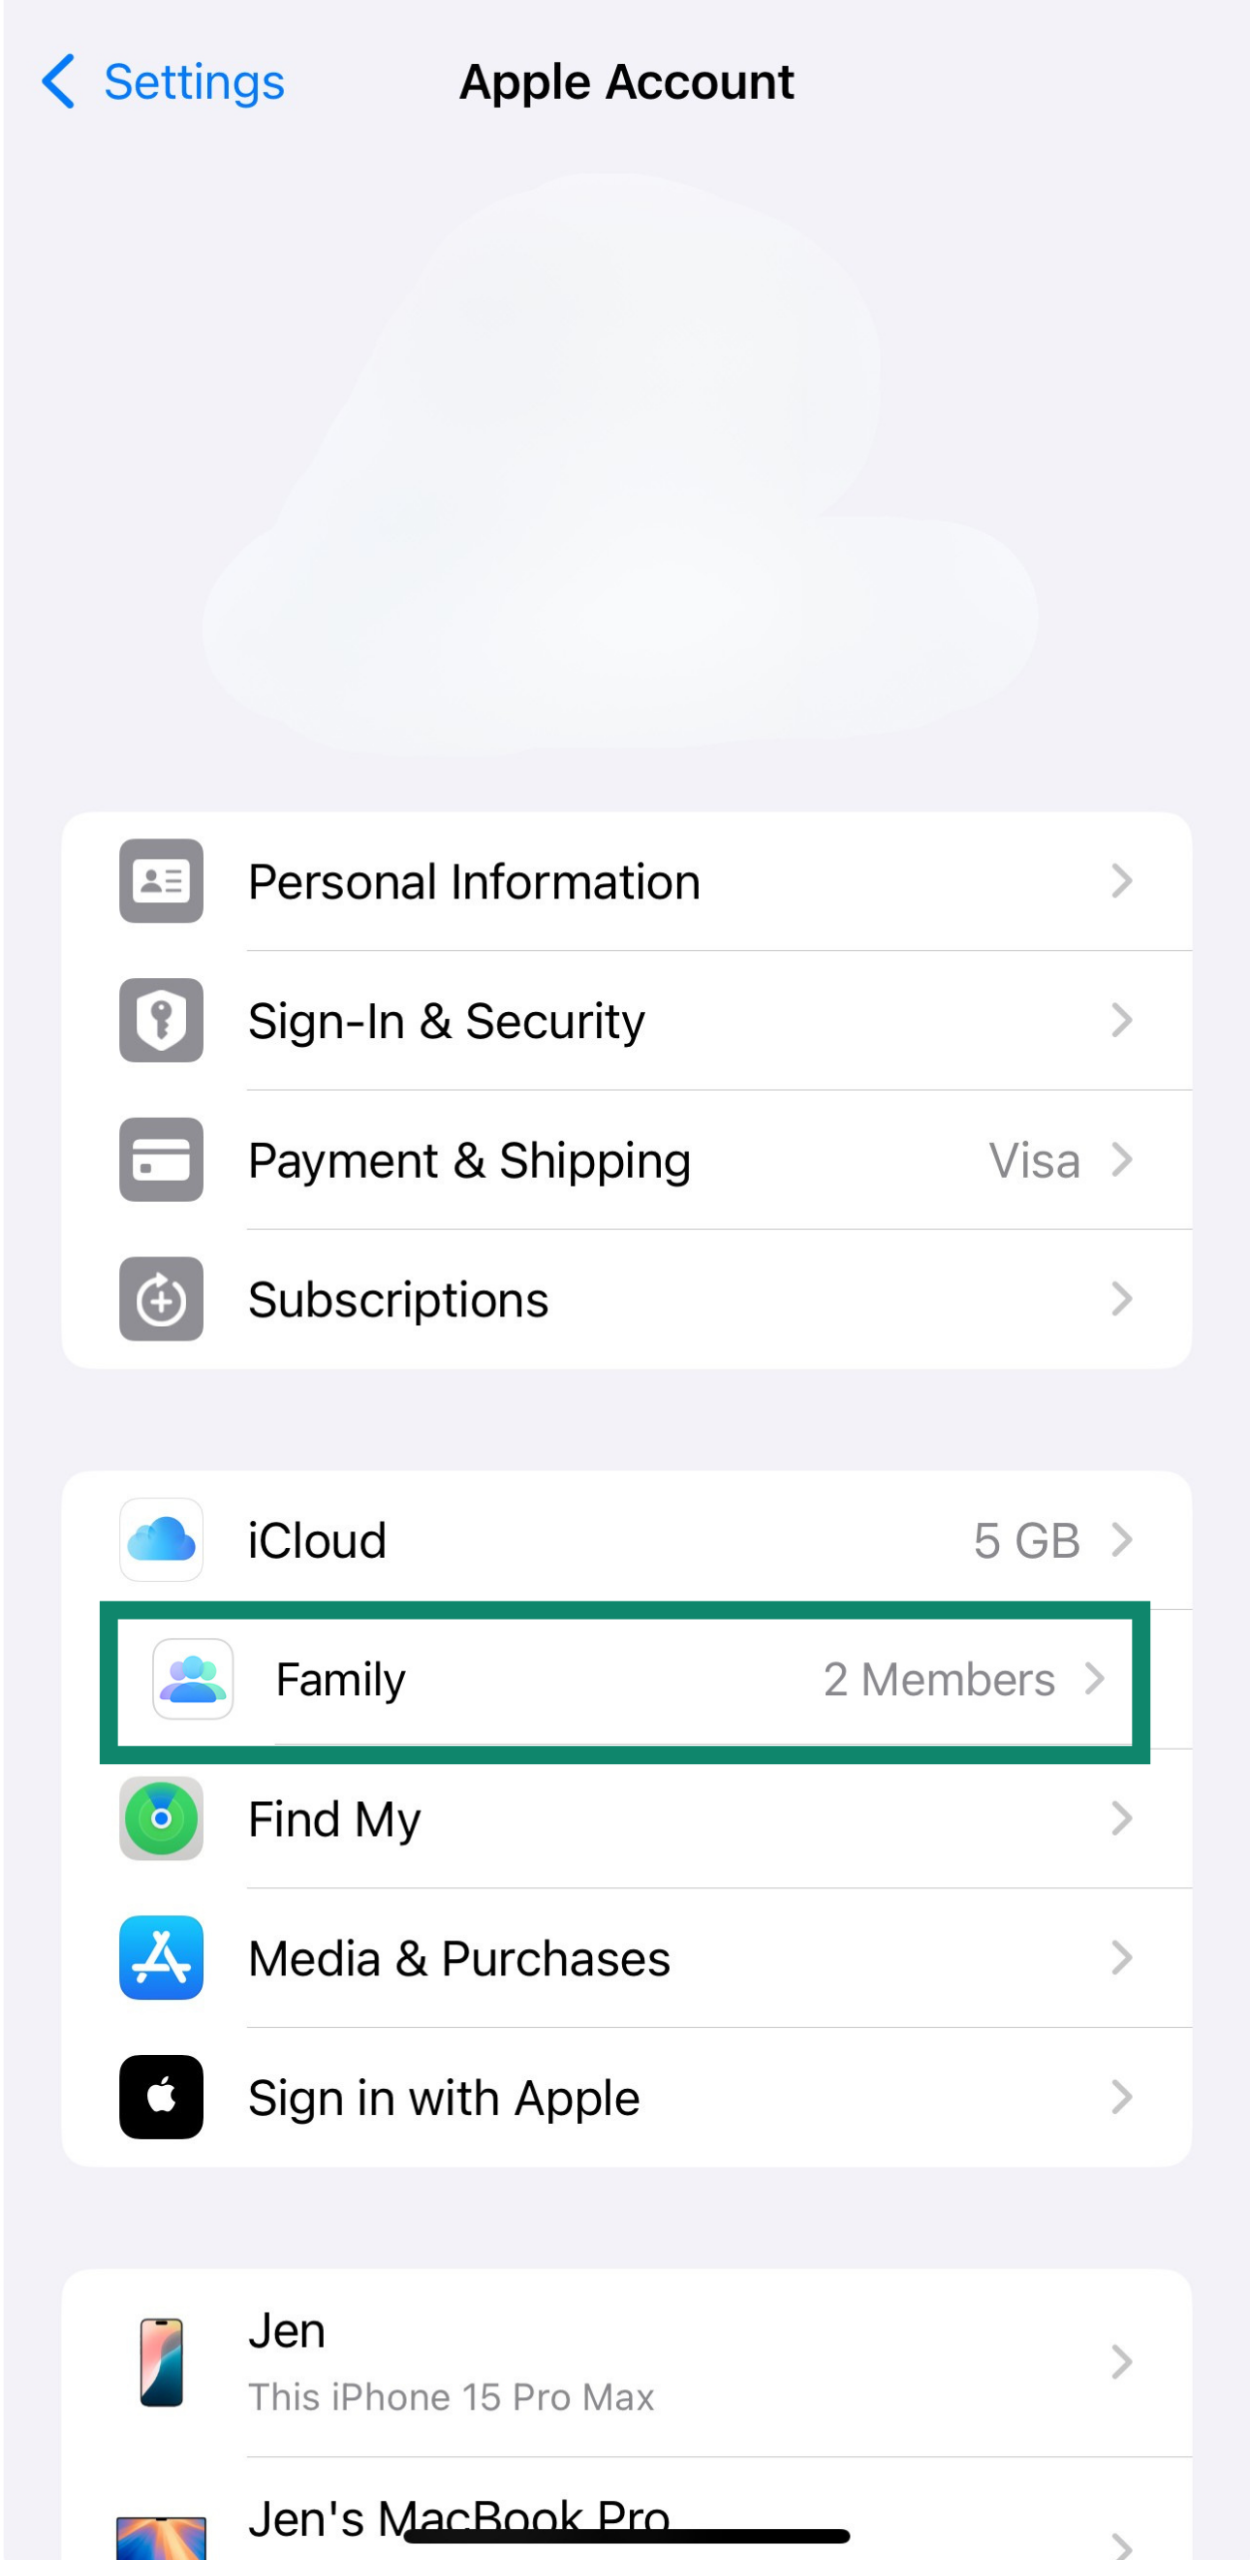
- Tap Add Member in the top right.
- If your child already has an Apple account, tap Invite Others to invite them to the family group.
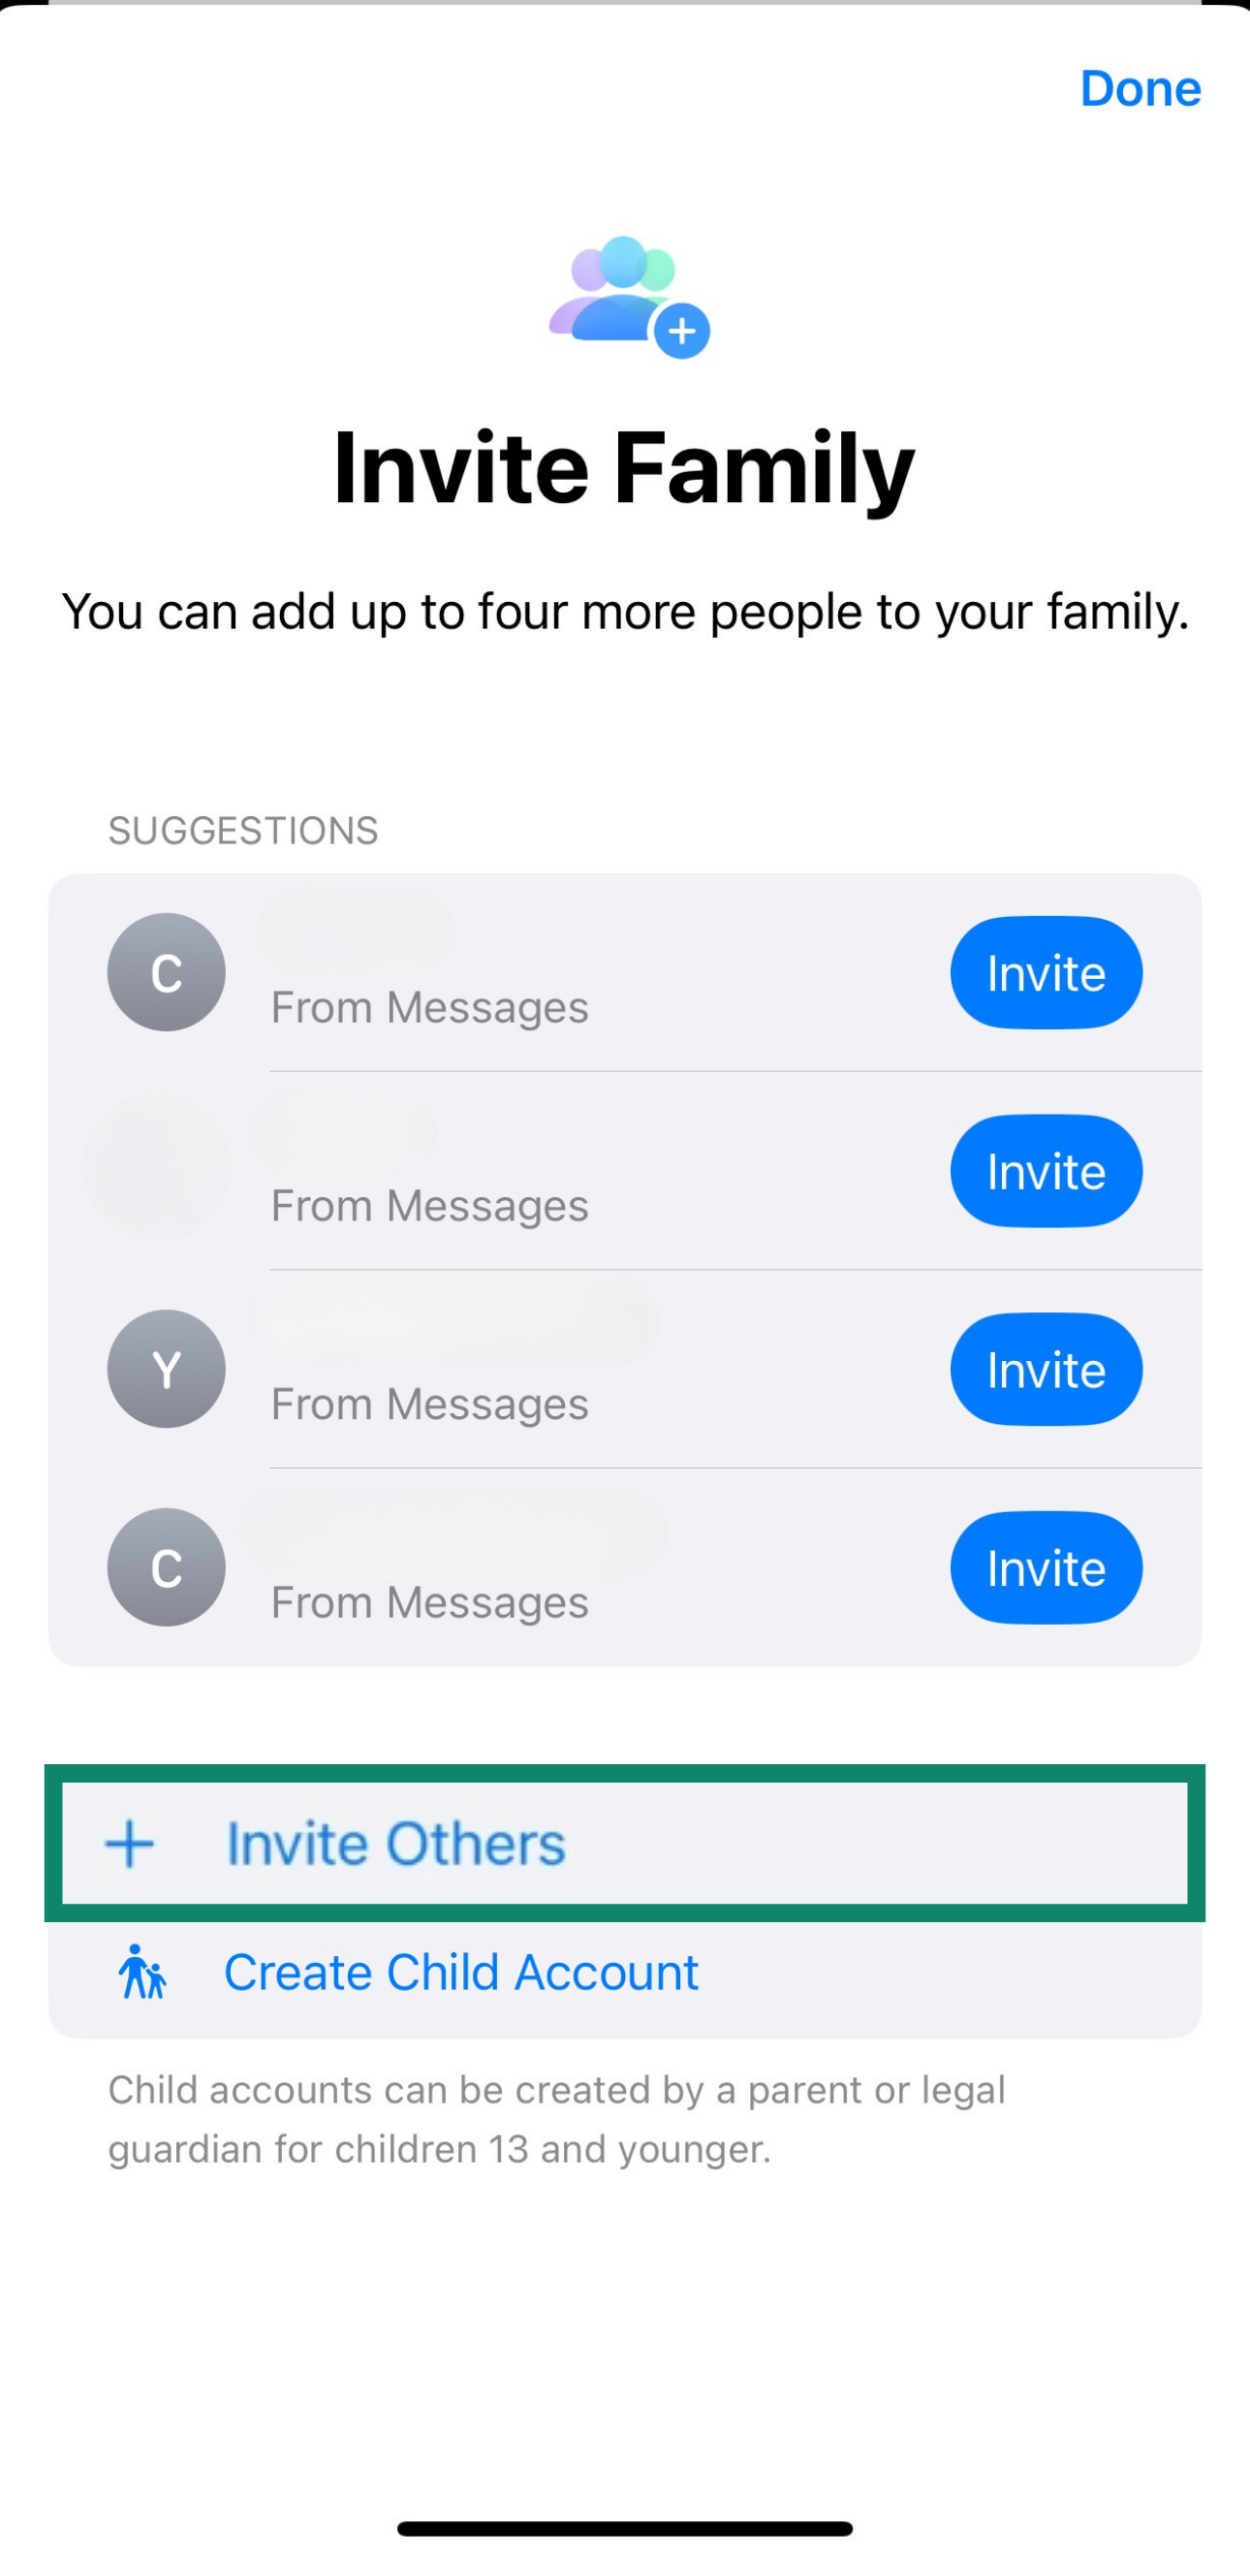
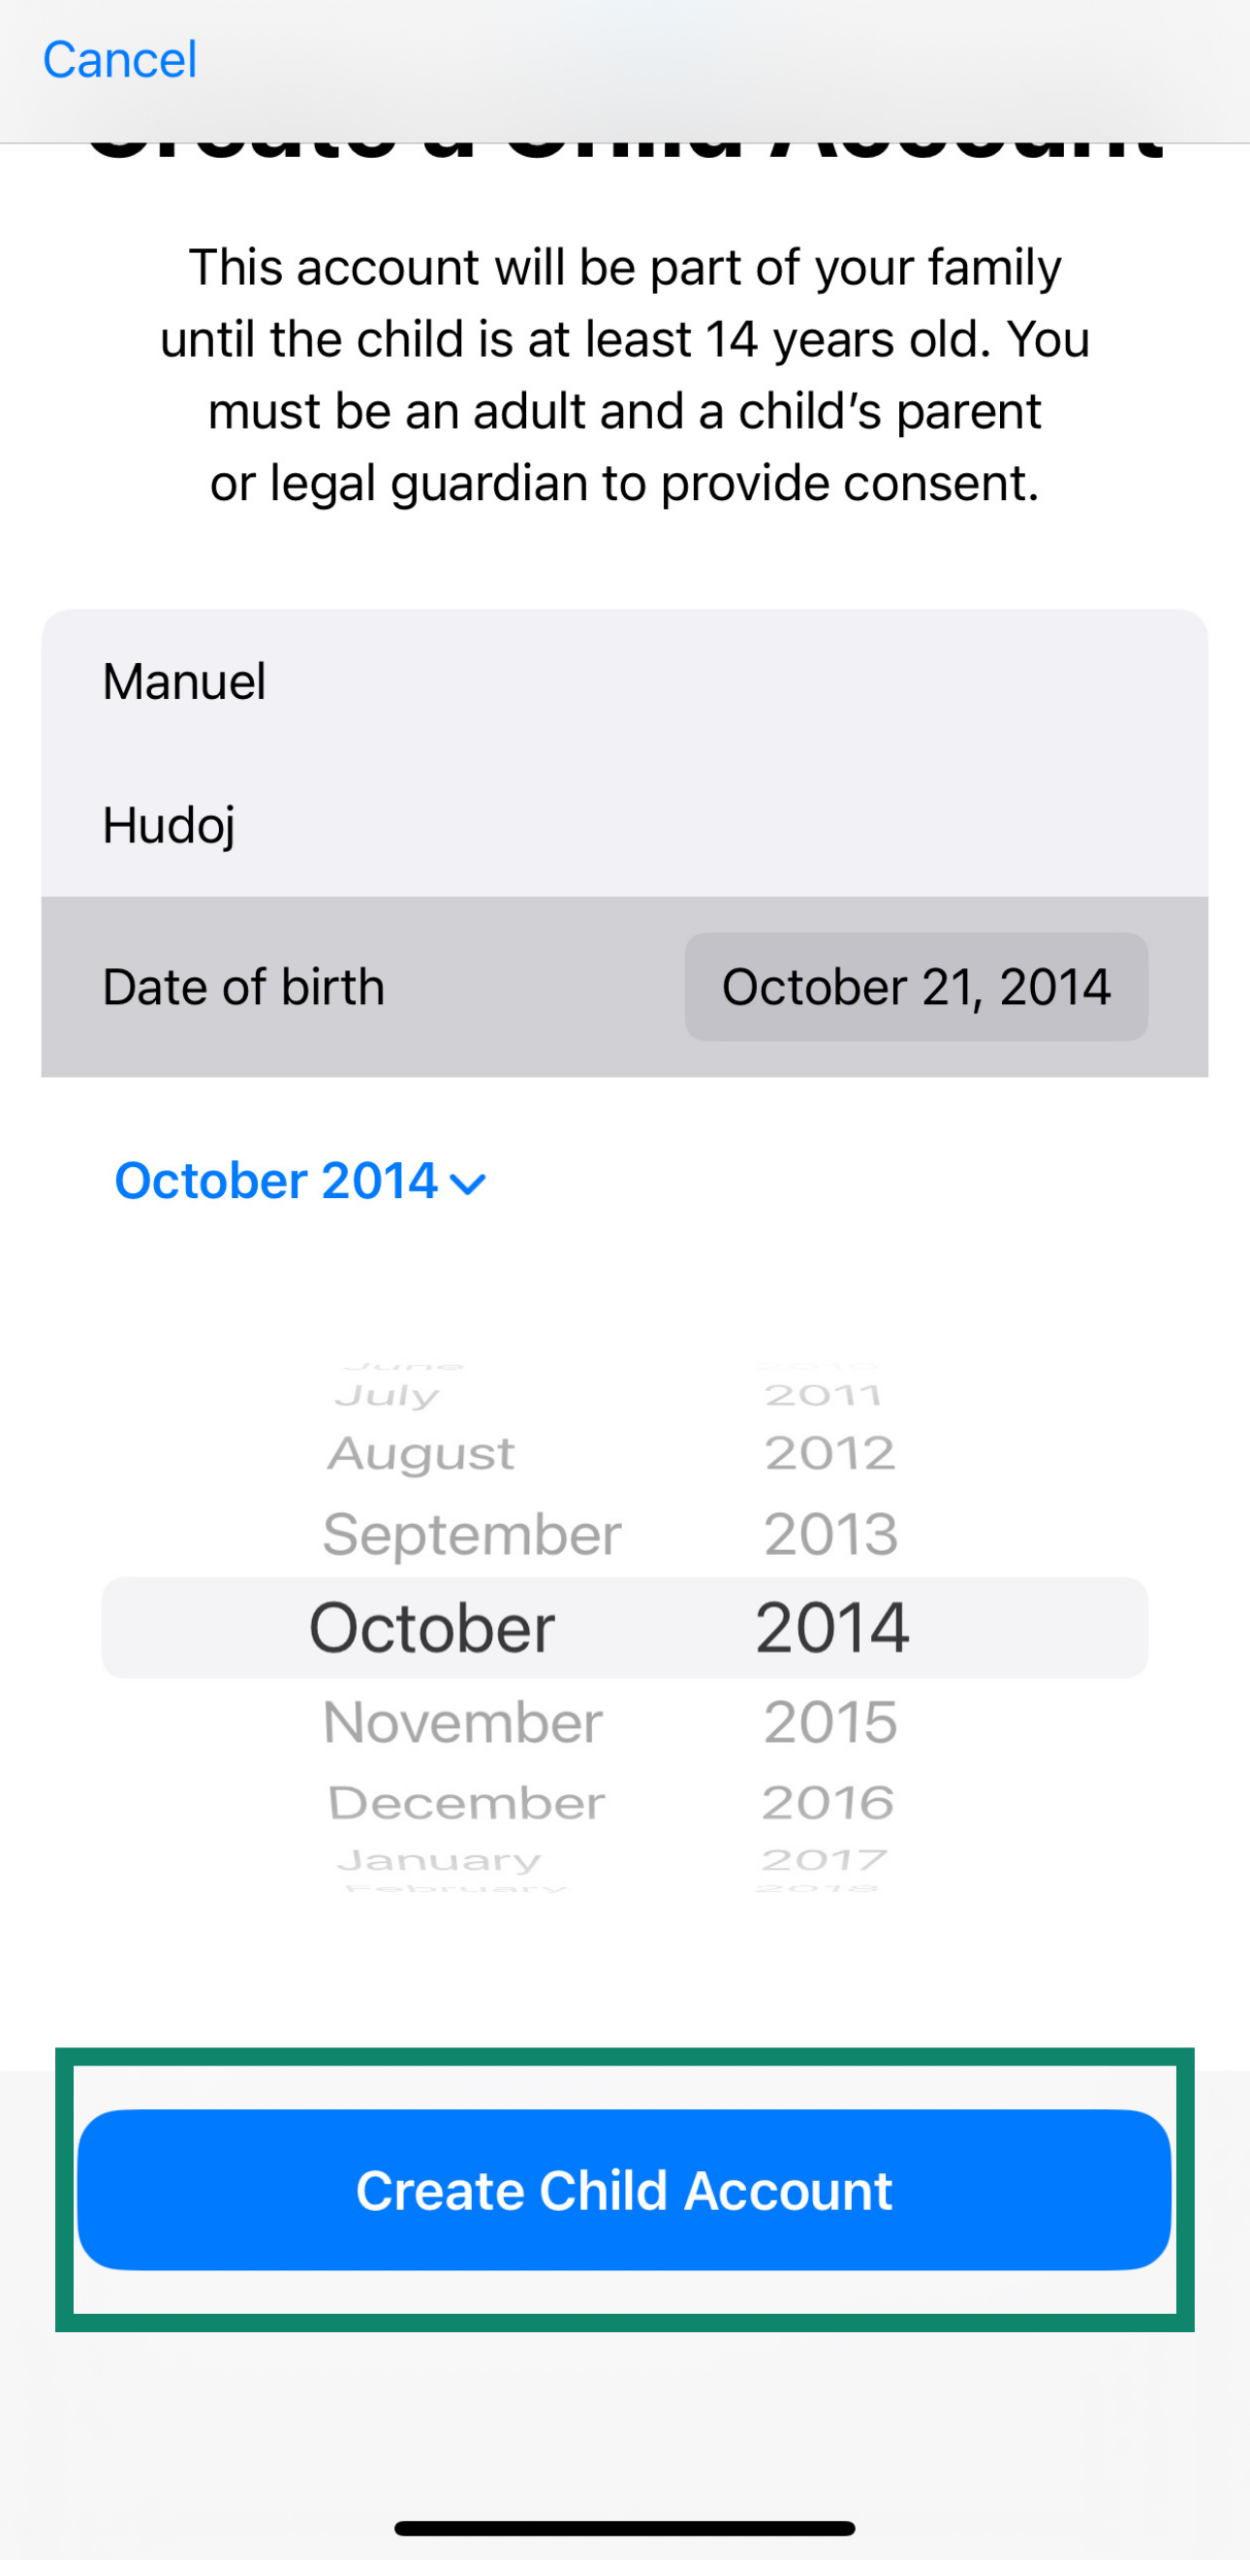
- If not, tap Create Child Account, fill in the information, and tap Create Child Account again.
Once they accept the invitation, you’ll see their name in your Family group. From there, you can set up Screen Time, manage app limits, and apply content restrictions directly from your own iPhone.
How to enable Screen Time
Apple’s Screen Time feature lets you view the time your child spends on their device, schedule downtime for them, and set time limits. Here’s how to set it up.
- Go to Settings, then tap on Family.
- Tap your child’s name from the list of family members.
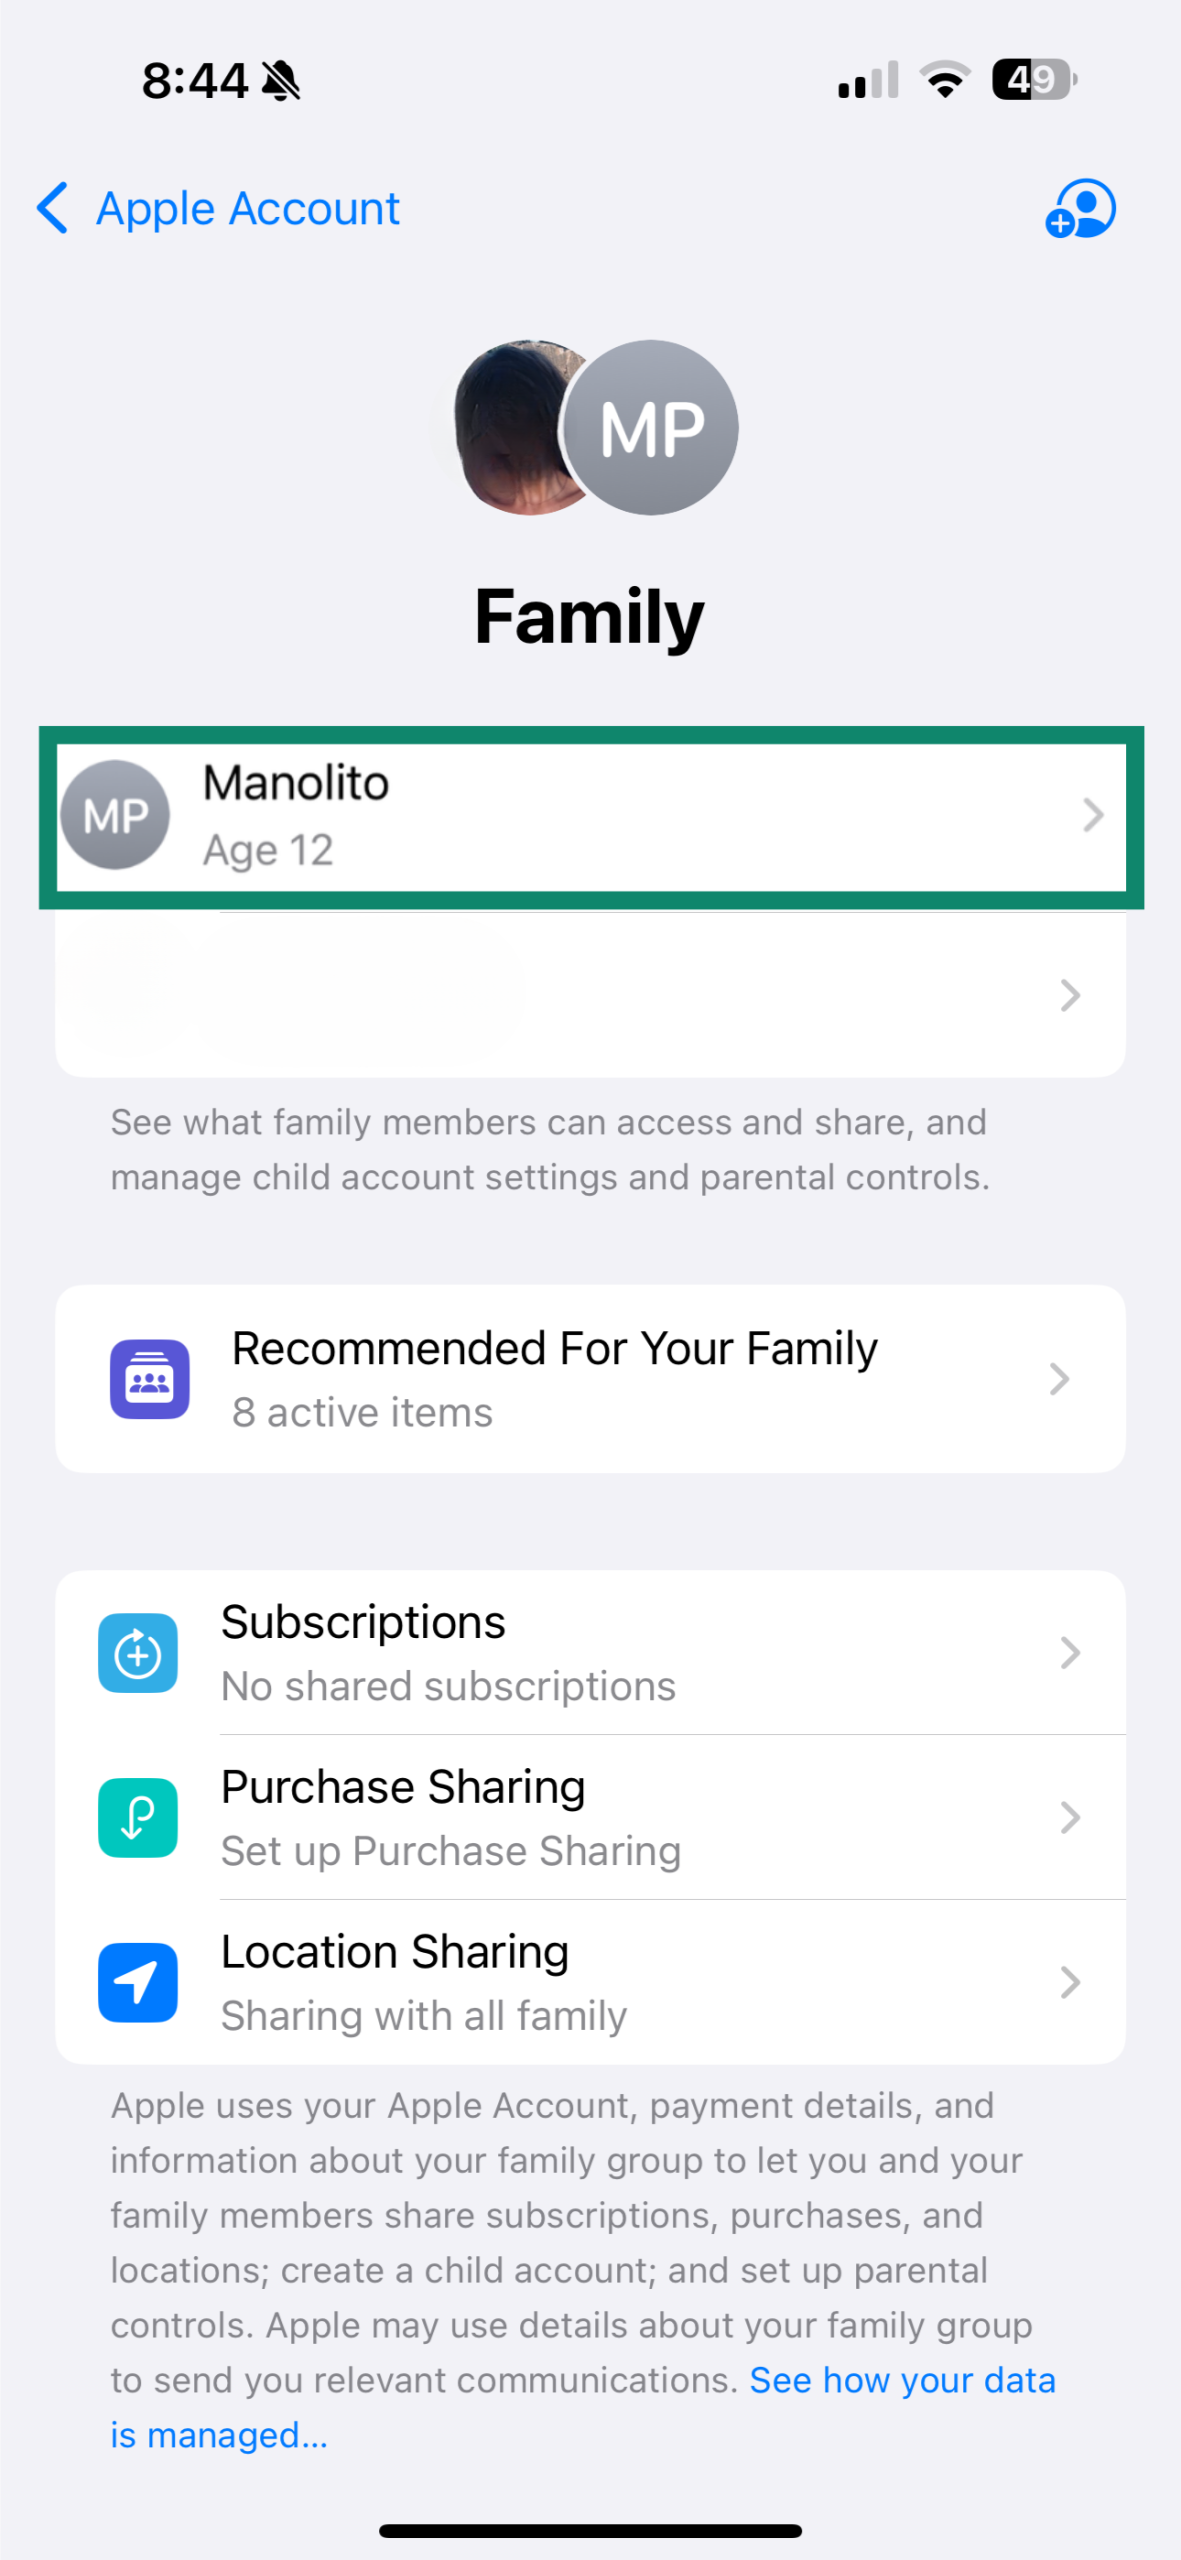
- Tap Screen Time.
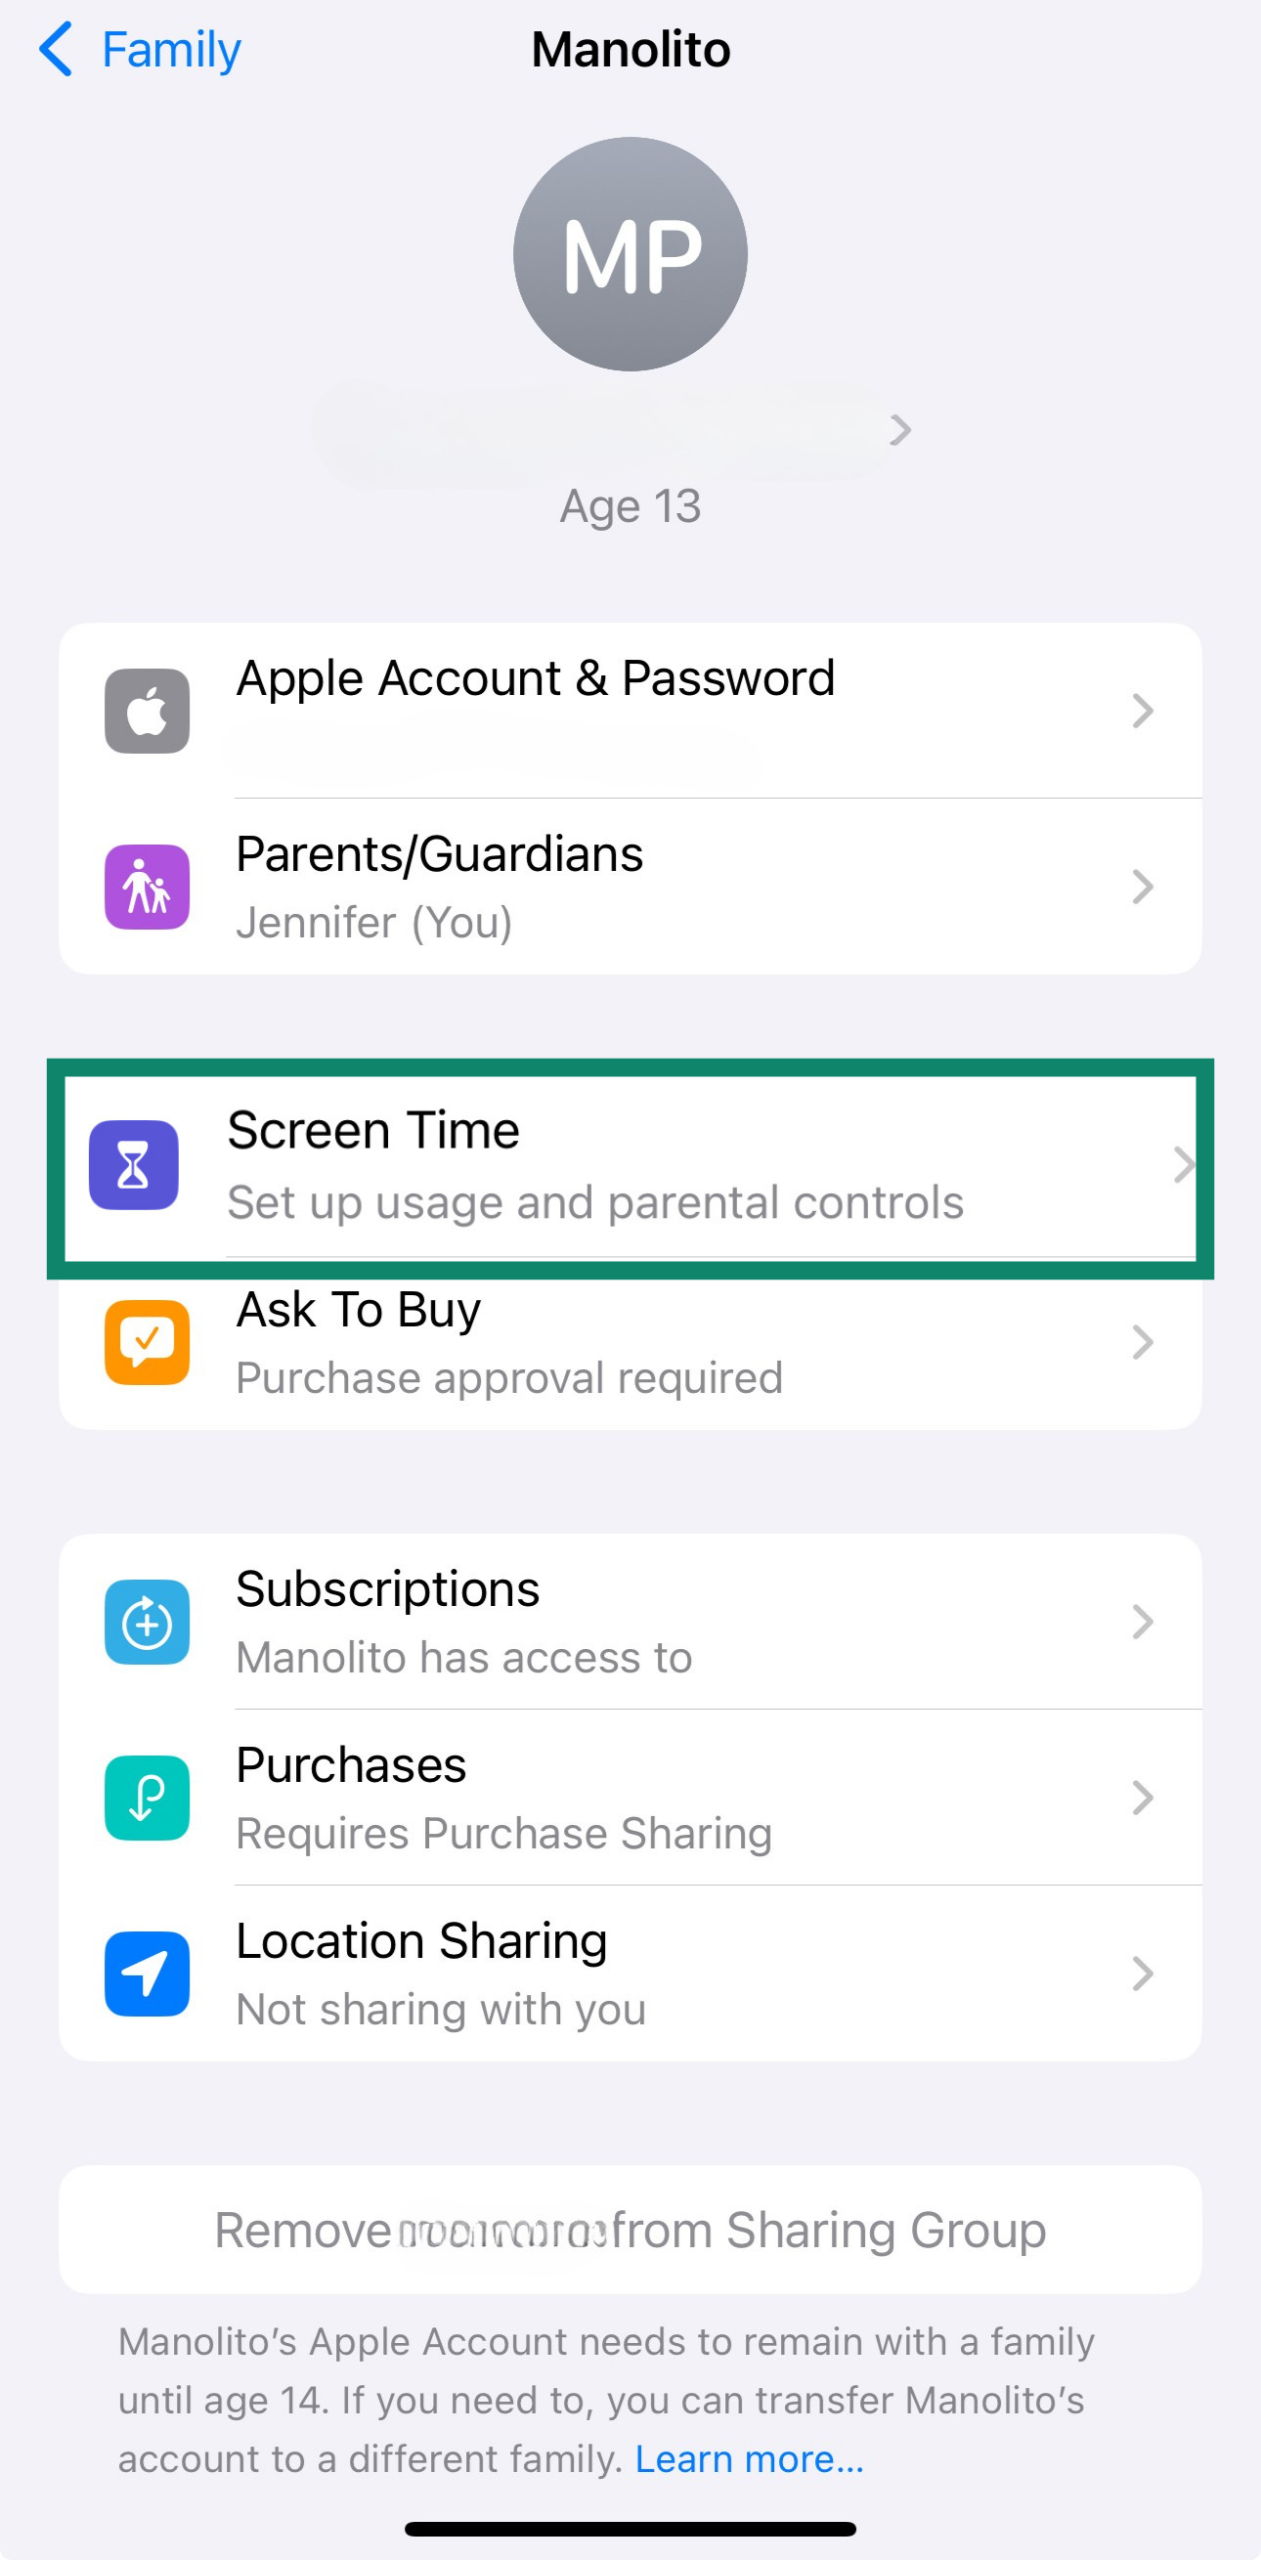
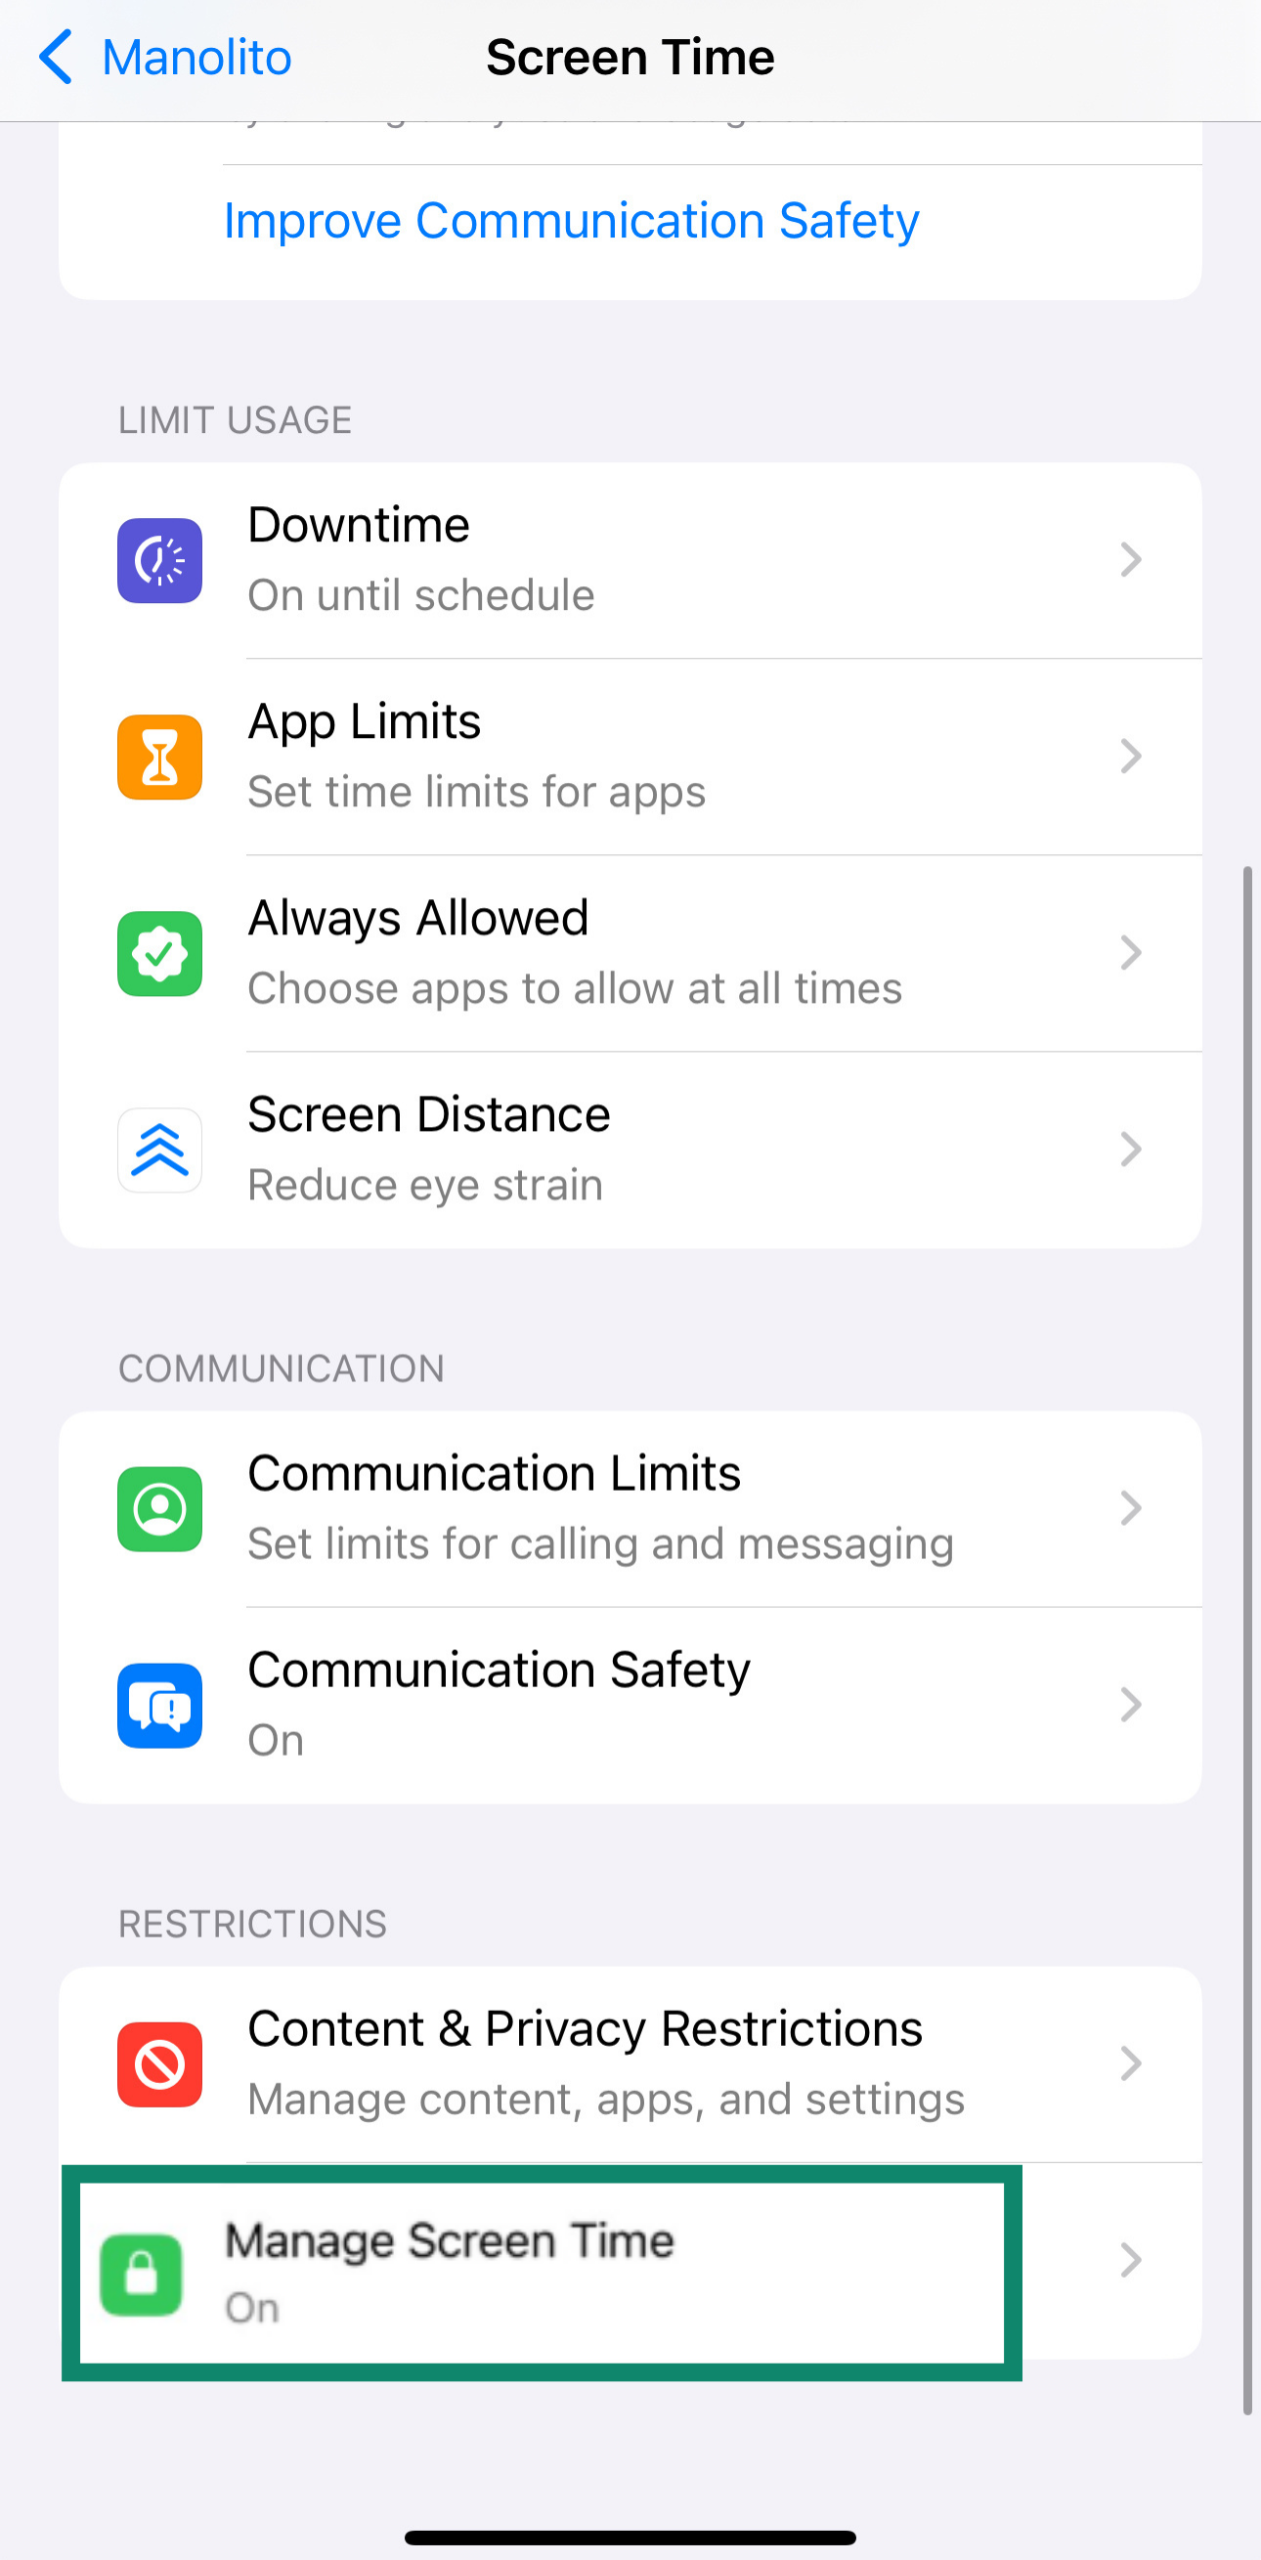
- Tap Manage Screen Time.
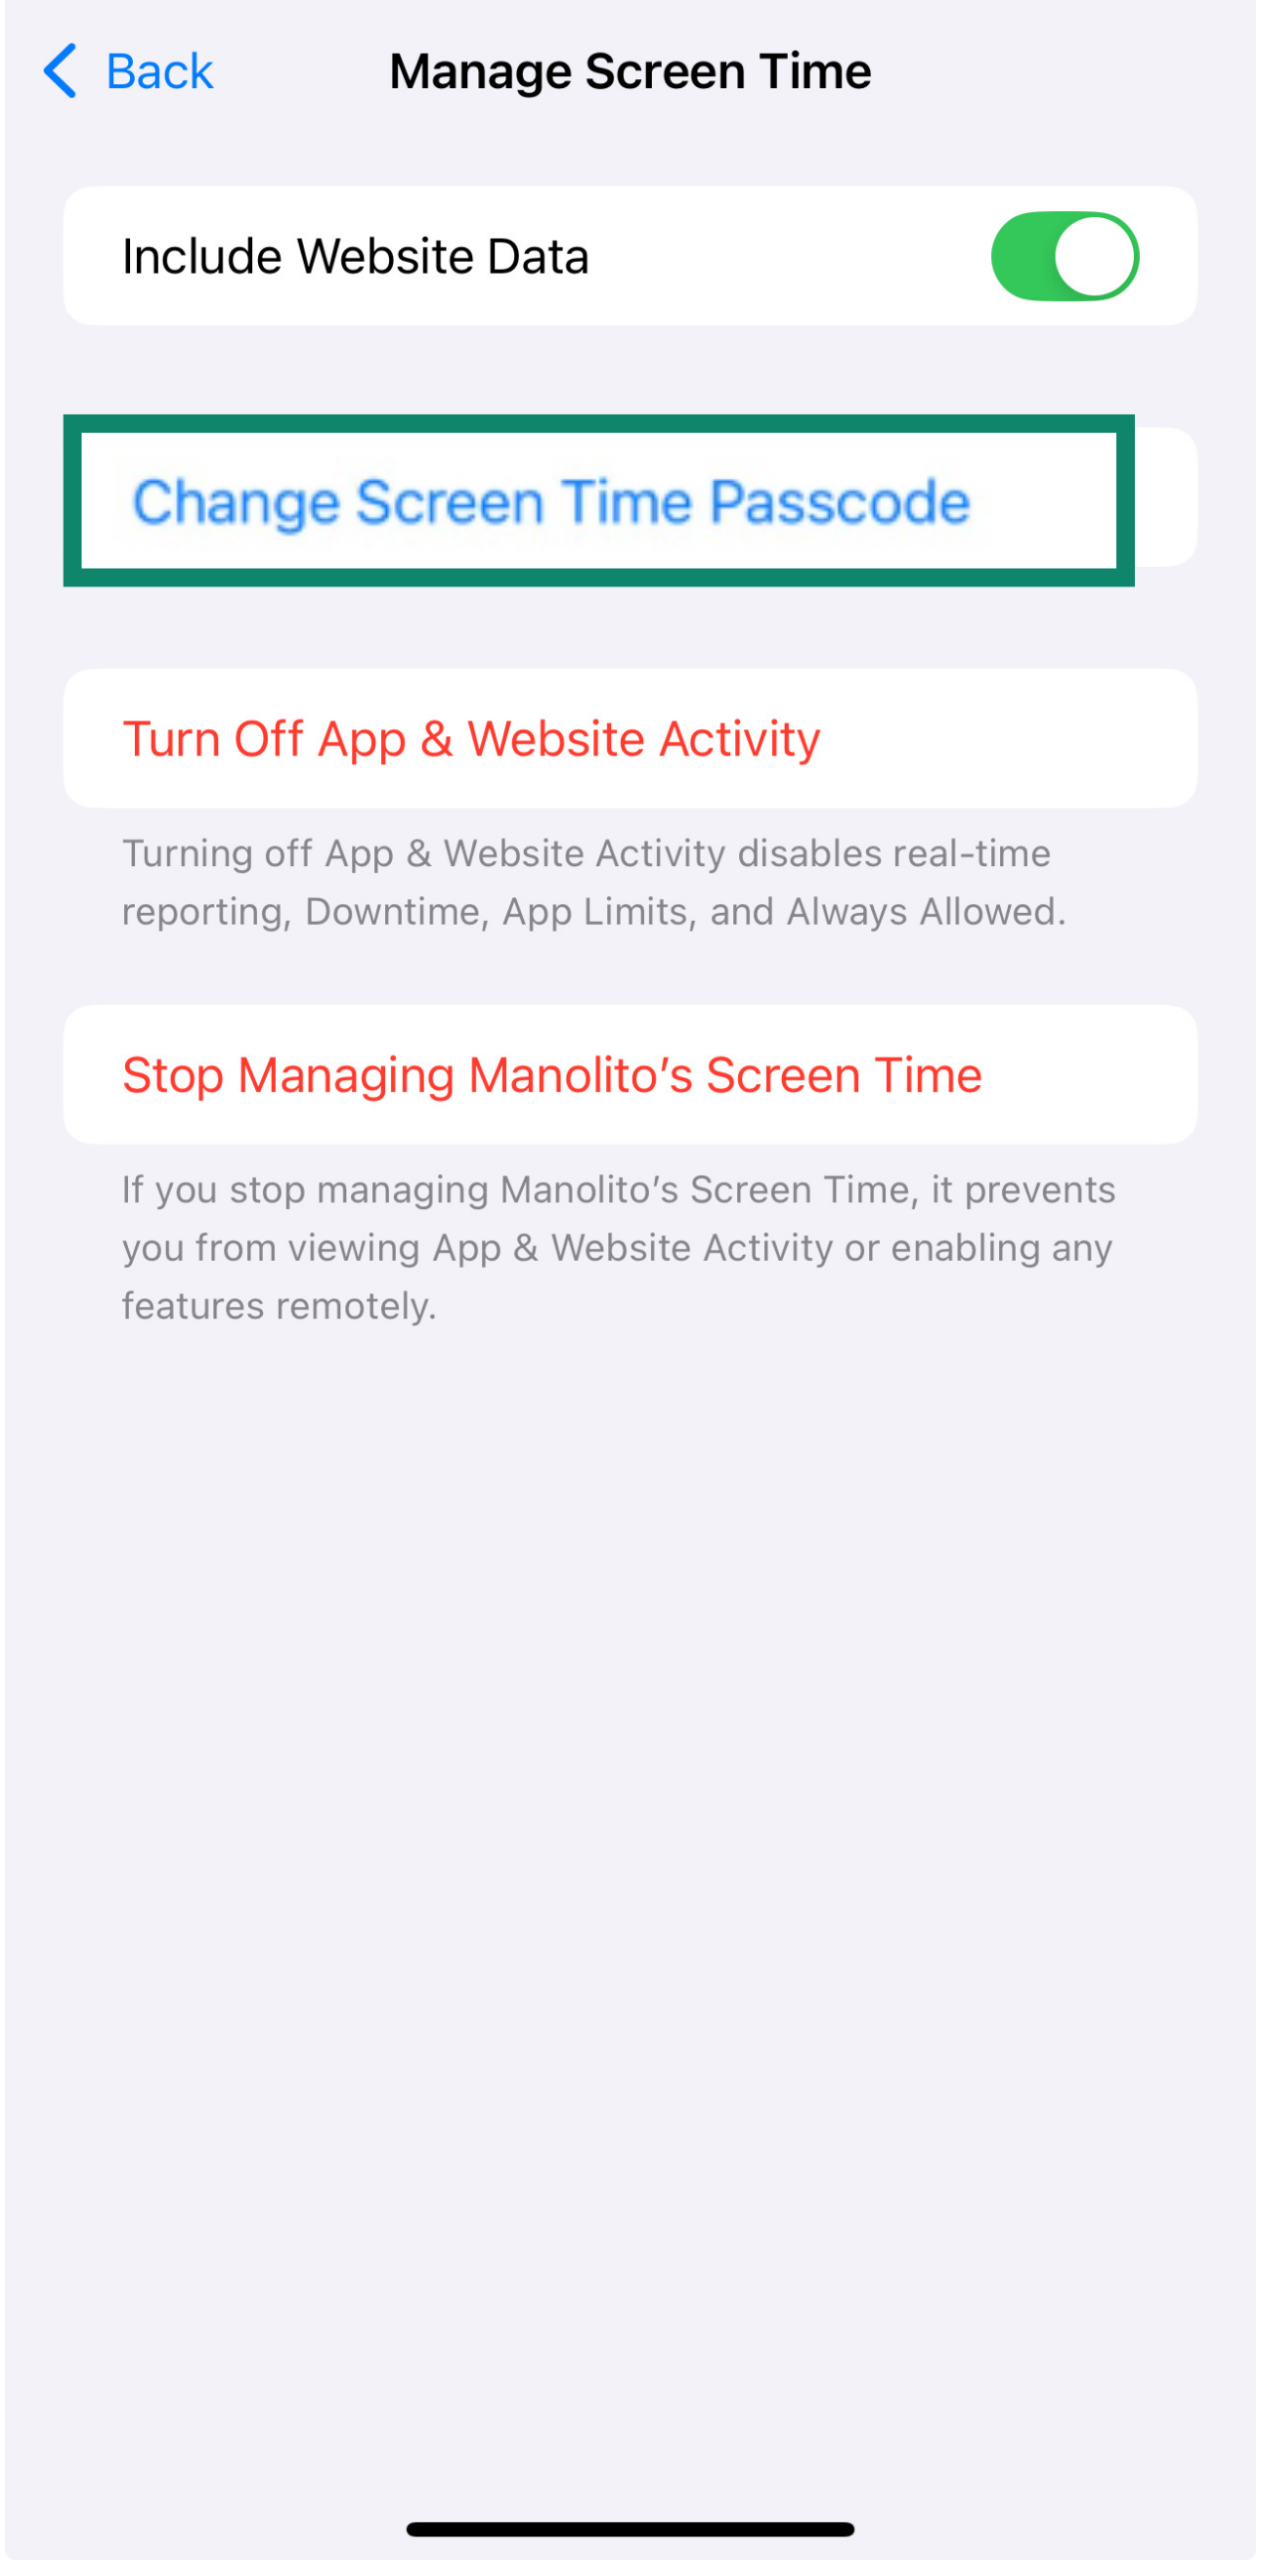
- Select Change Screen Time Passcode and set a passcode.
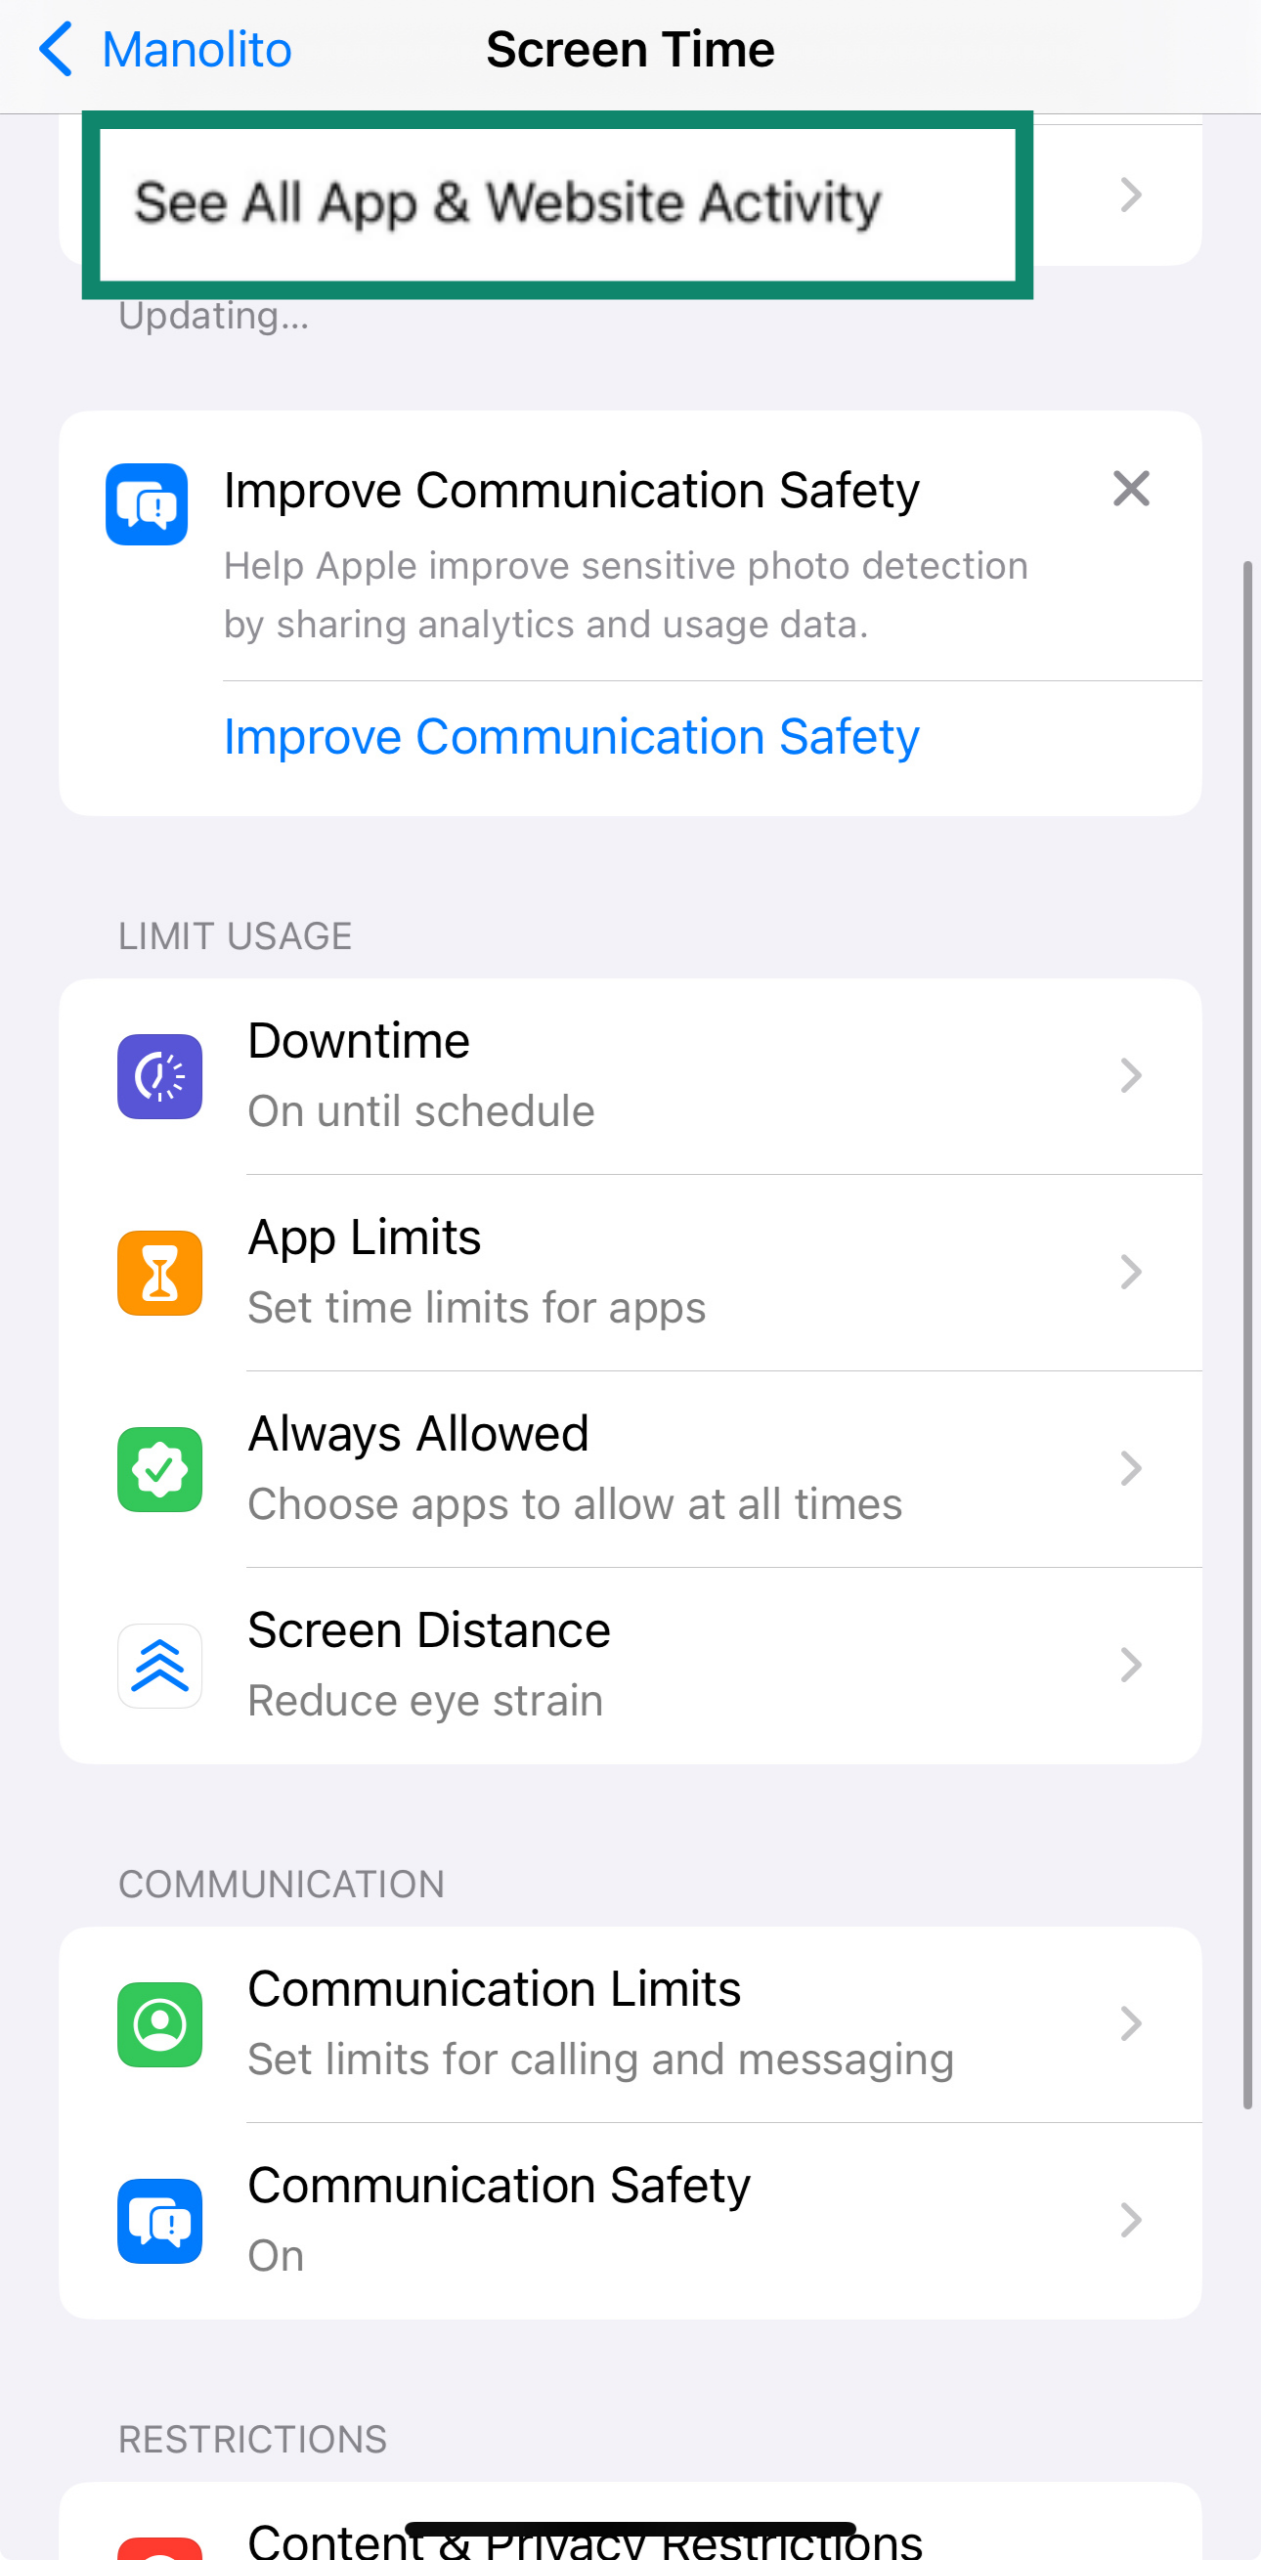
- Once the passcode is set, tap See All App & Website Activity to turn on and review your child’s usage.
Setting up Downtime
Downtime lets you set times when only phone calls and apps you choose to allow will be available to your child.
- From Screen Time in your child’s account profile, tap on Downtime.

- Enter the Screen Time passcode and turn on Downtime Until Tomorrow or enable Scheduled and set the start and end times.
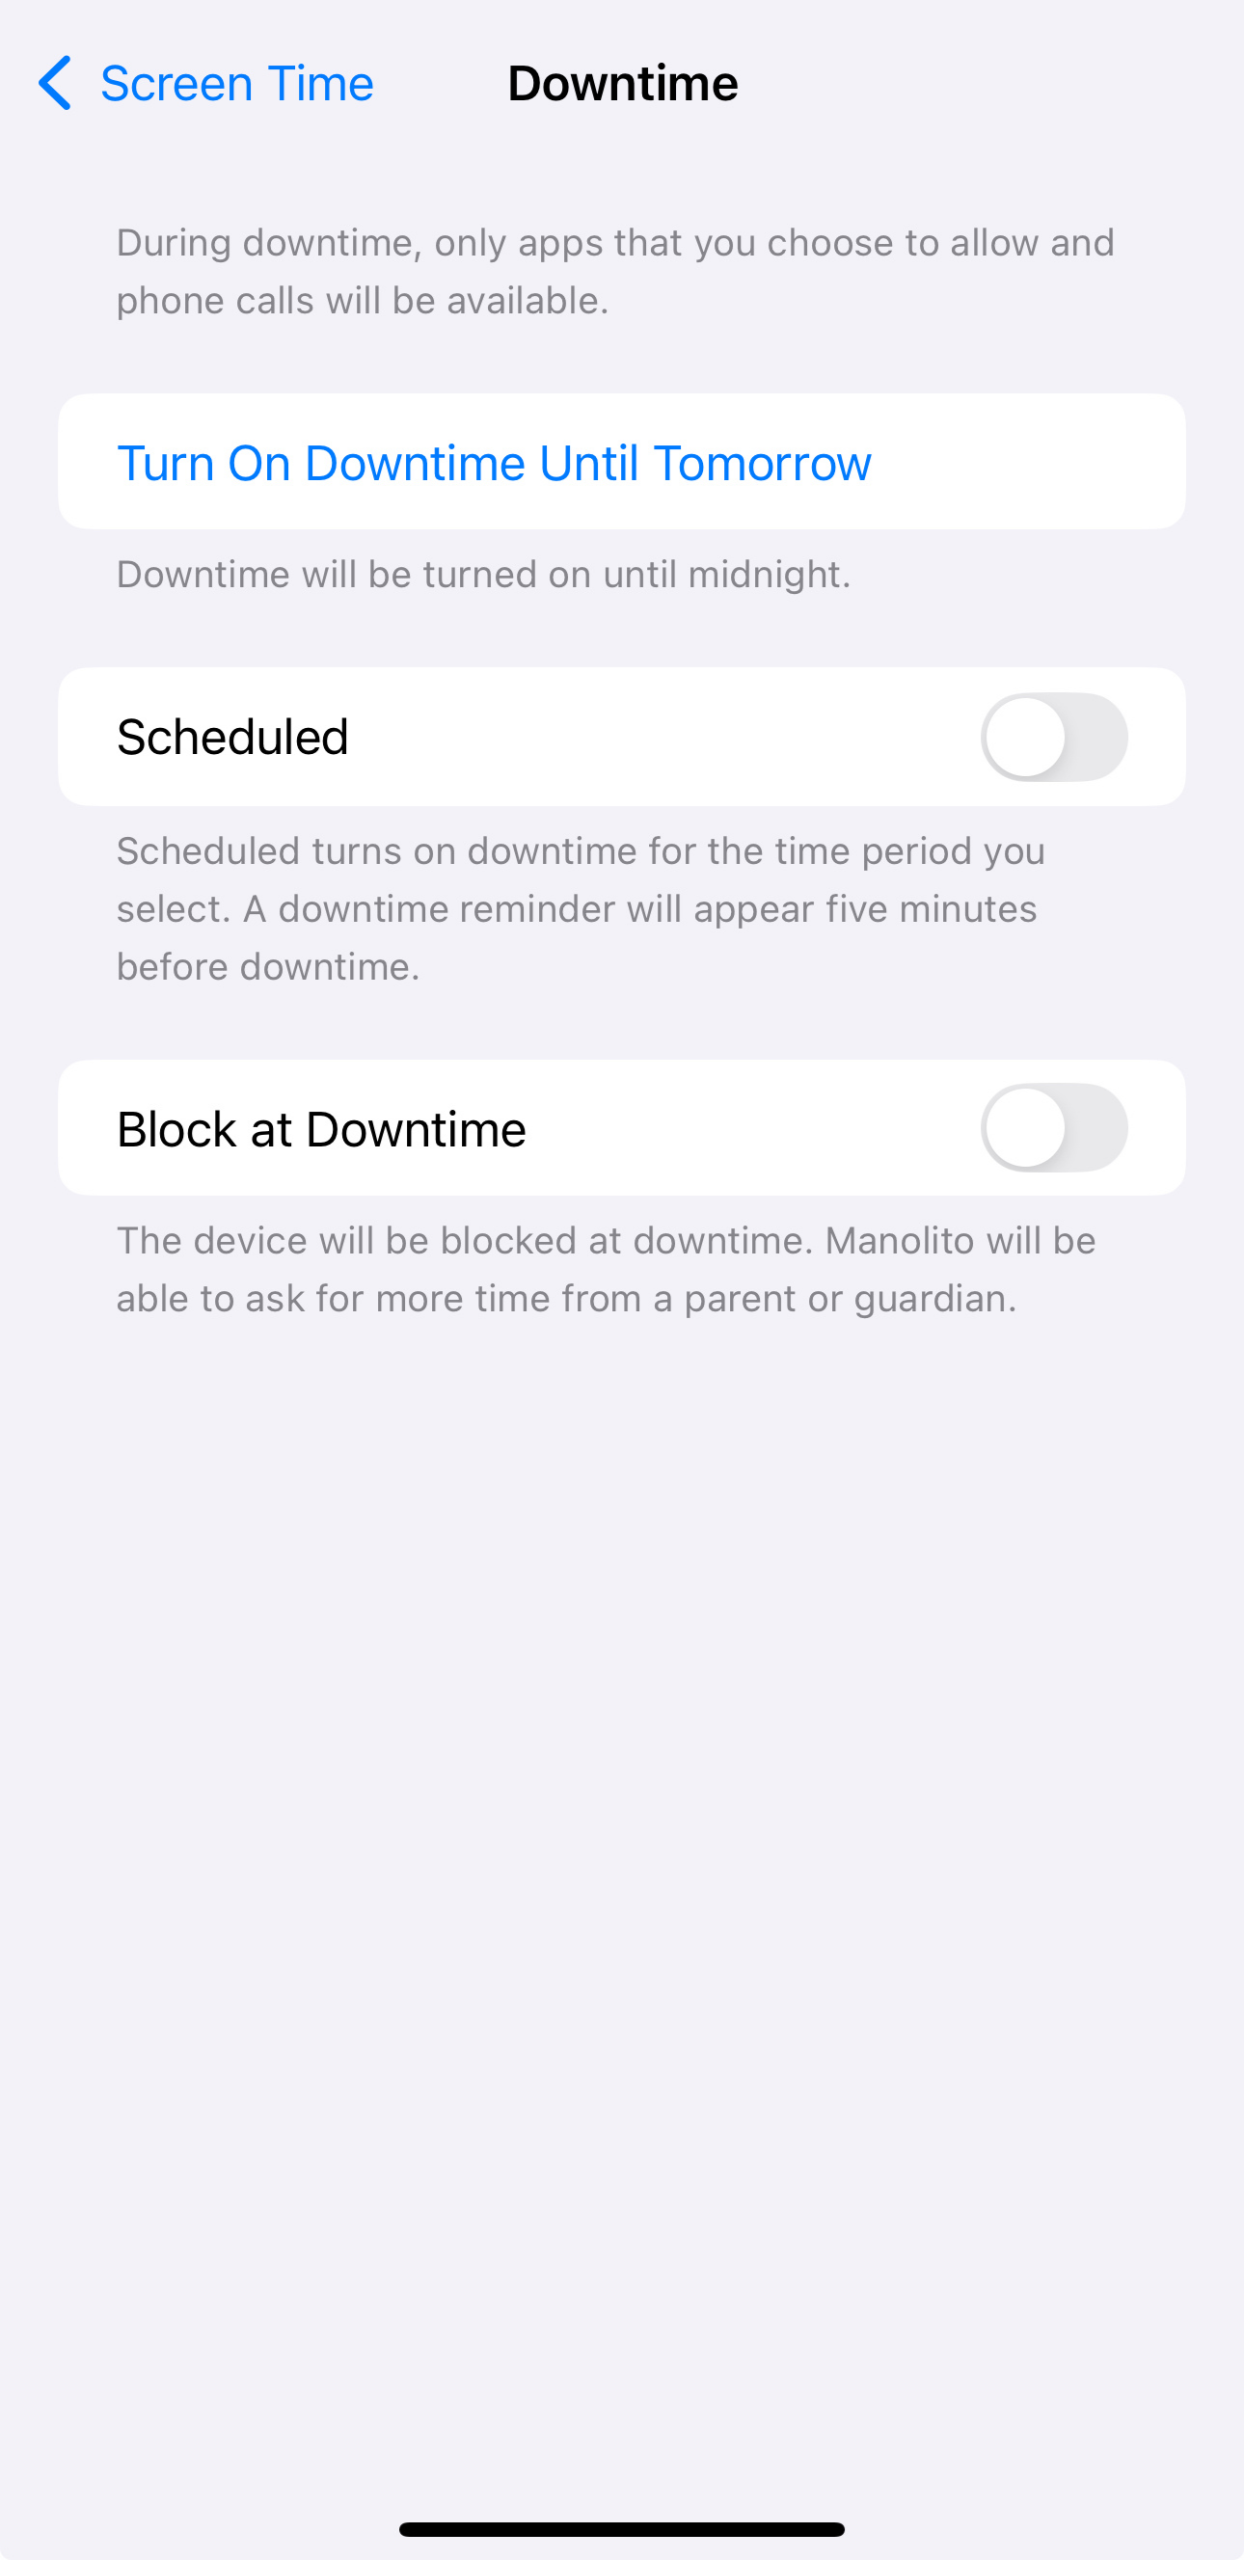
You can also toggle Block at Downtime on to block the device entirely during downtime. There’s an option for your child to ask for more time, and you can enter the passcode to allow this.
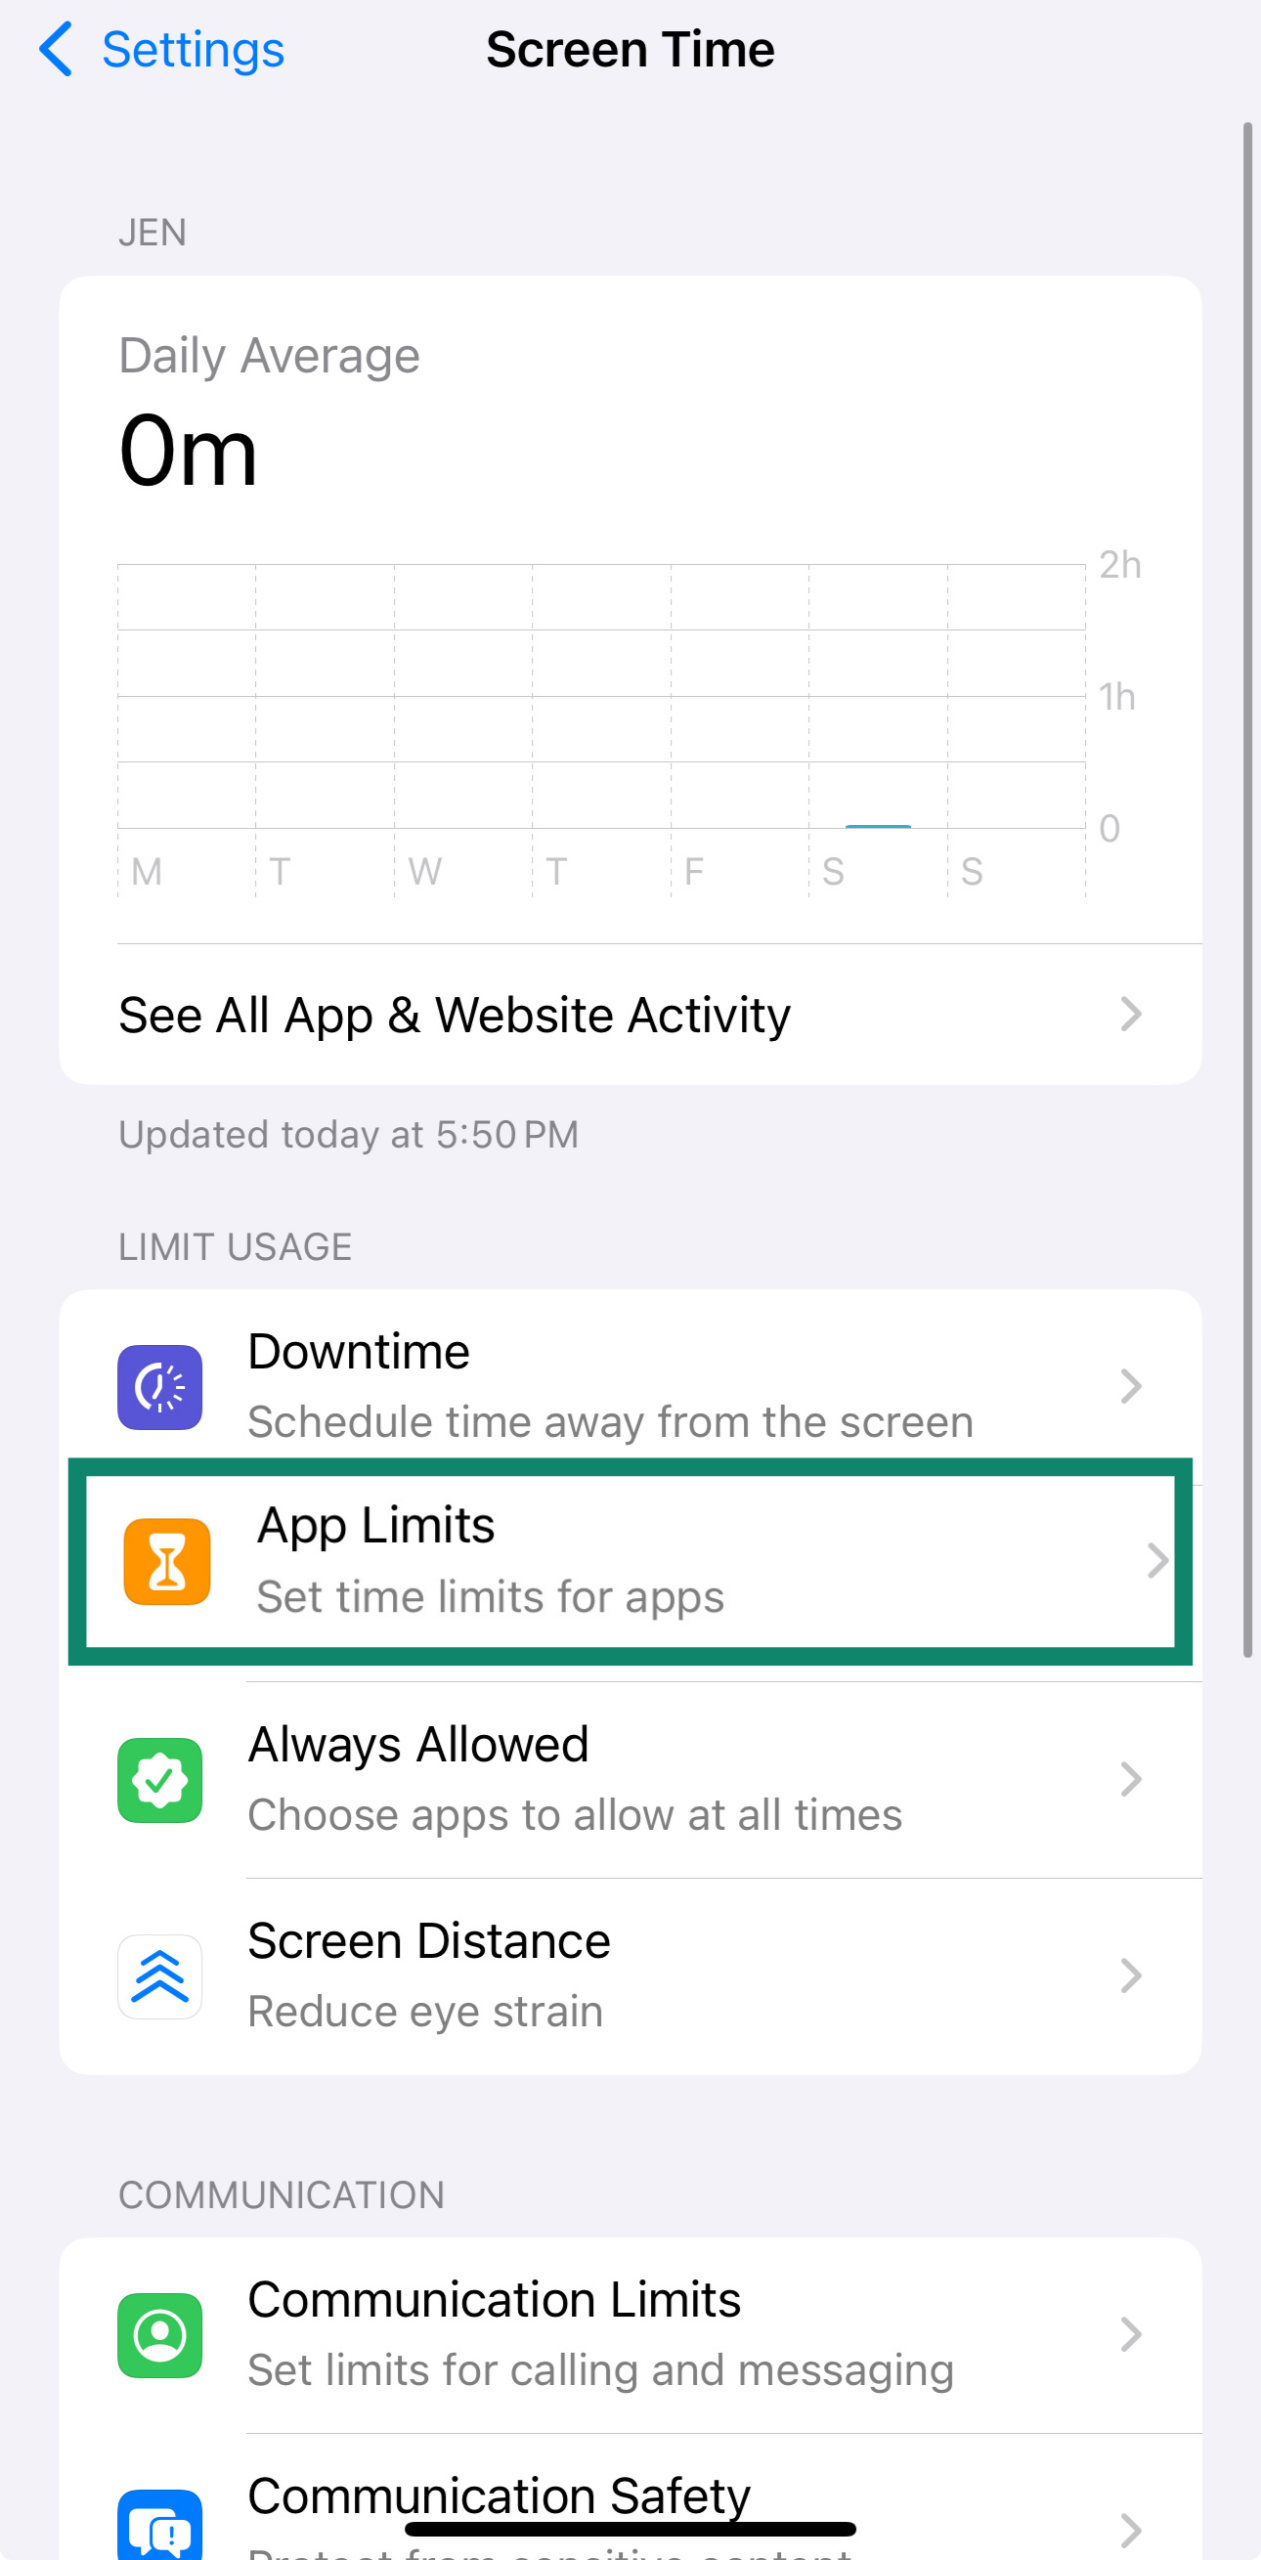
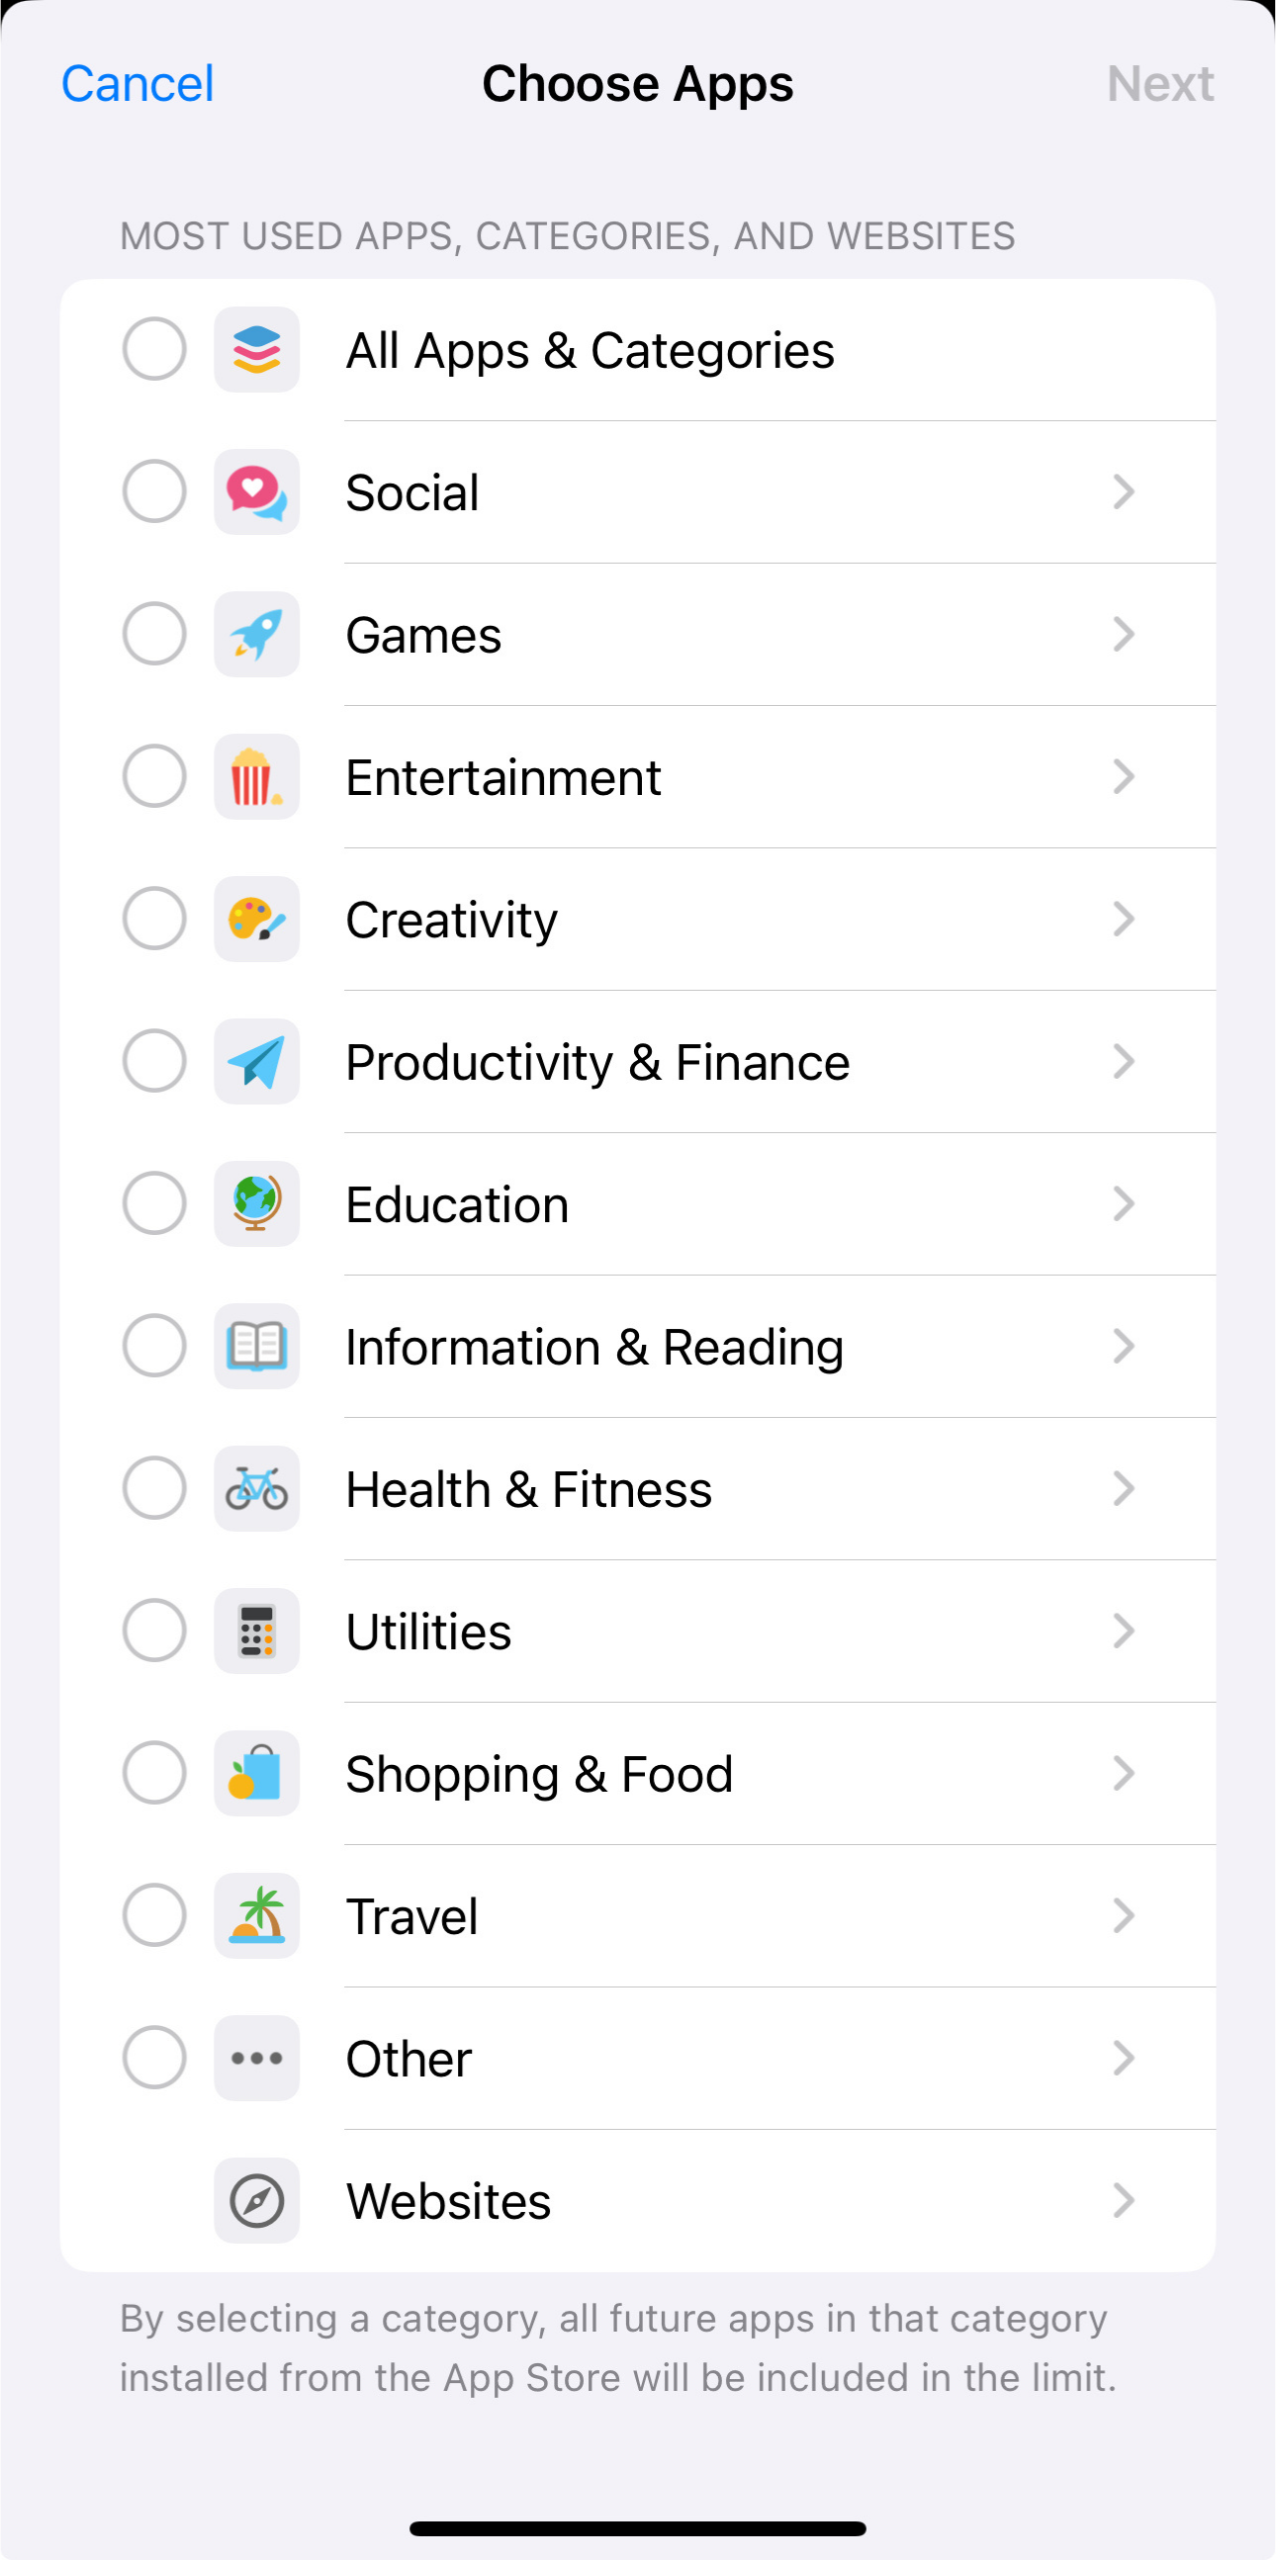
Configuring App Limits
App Limits let you set daily time limits for app categories like games or social media.
- From Screen Time in your child’s account, tap App Limits.
- Tap Add Limit.
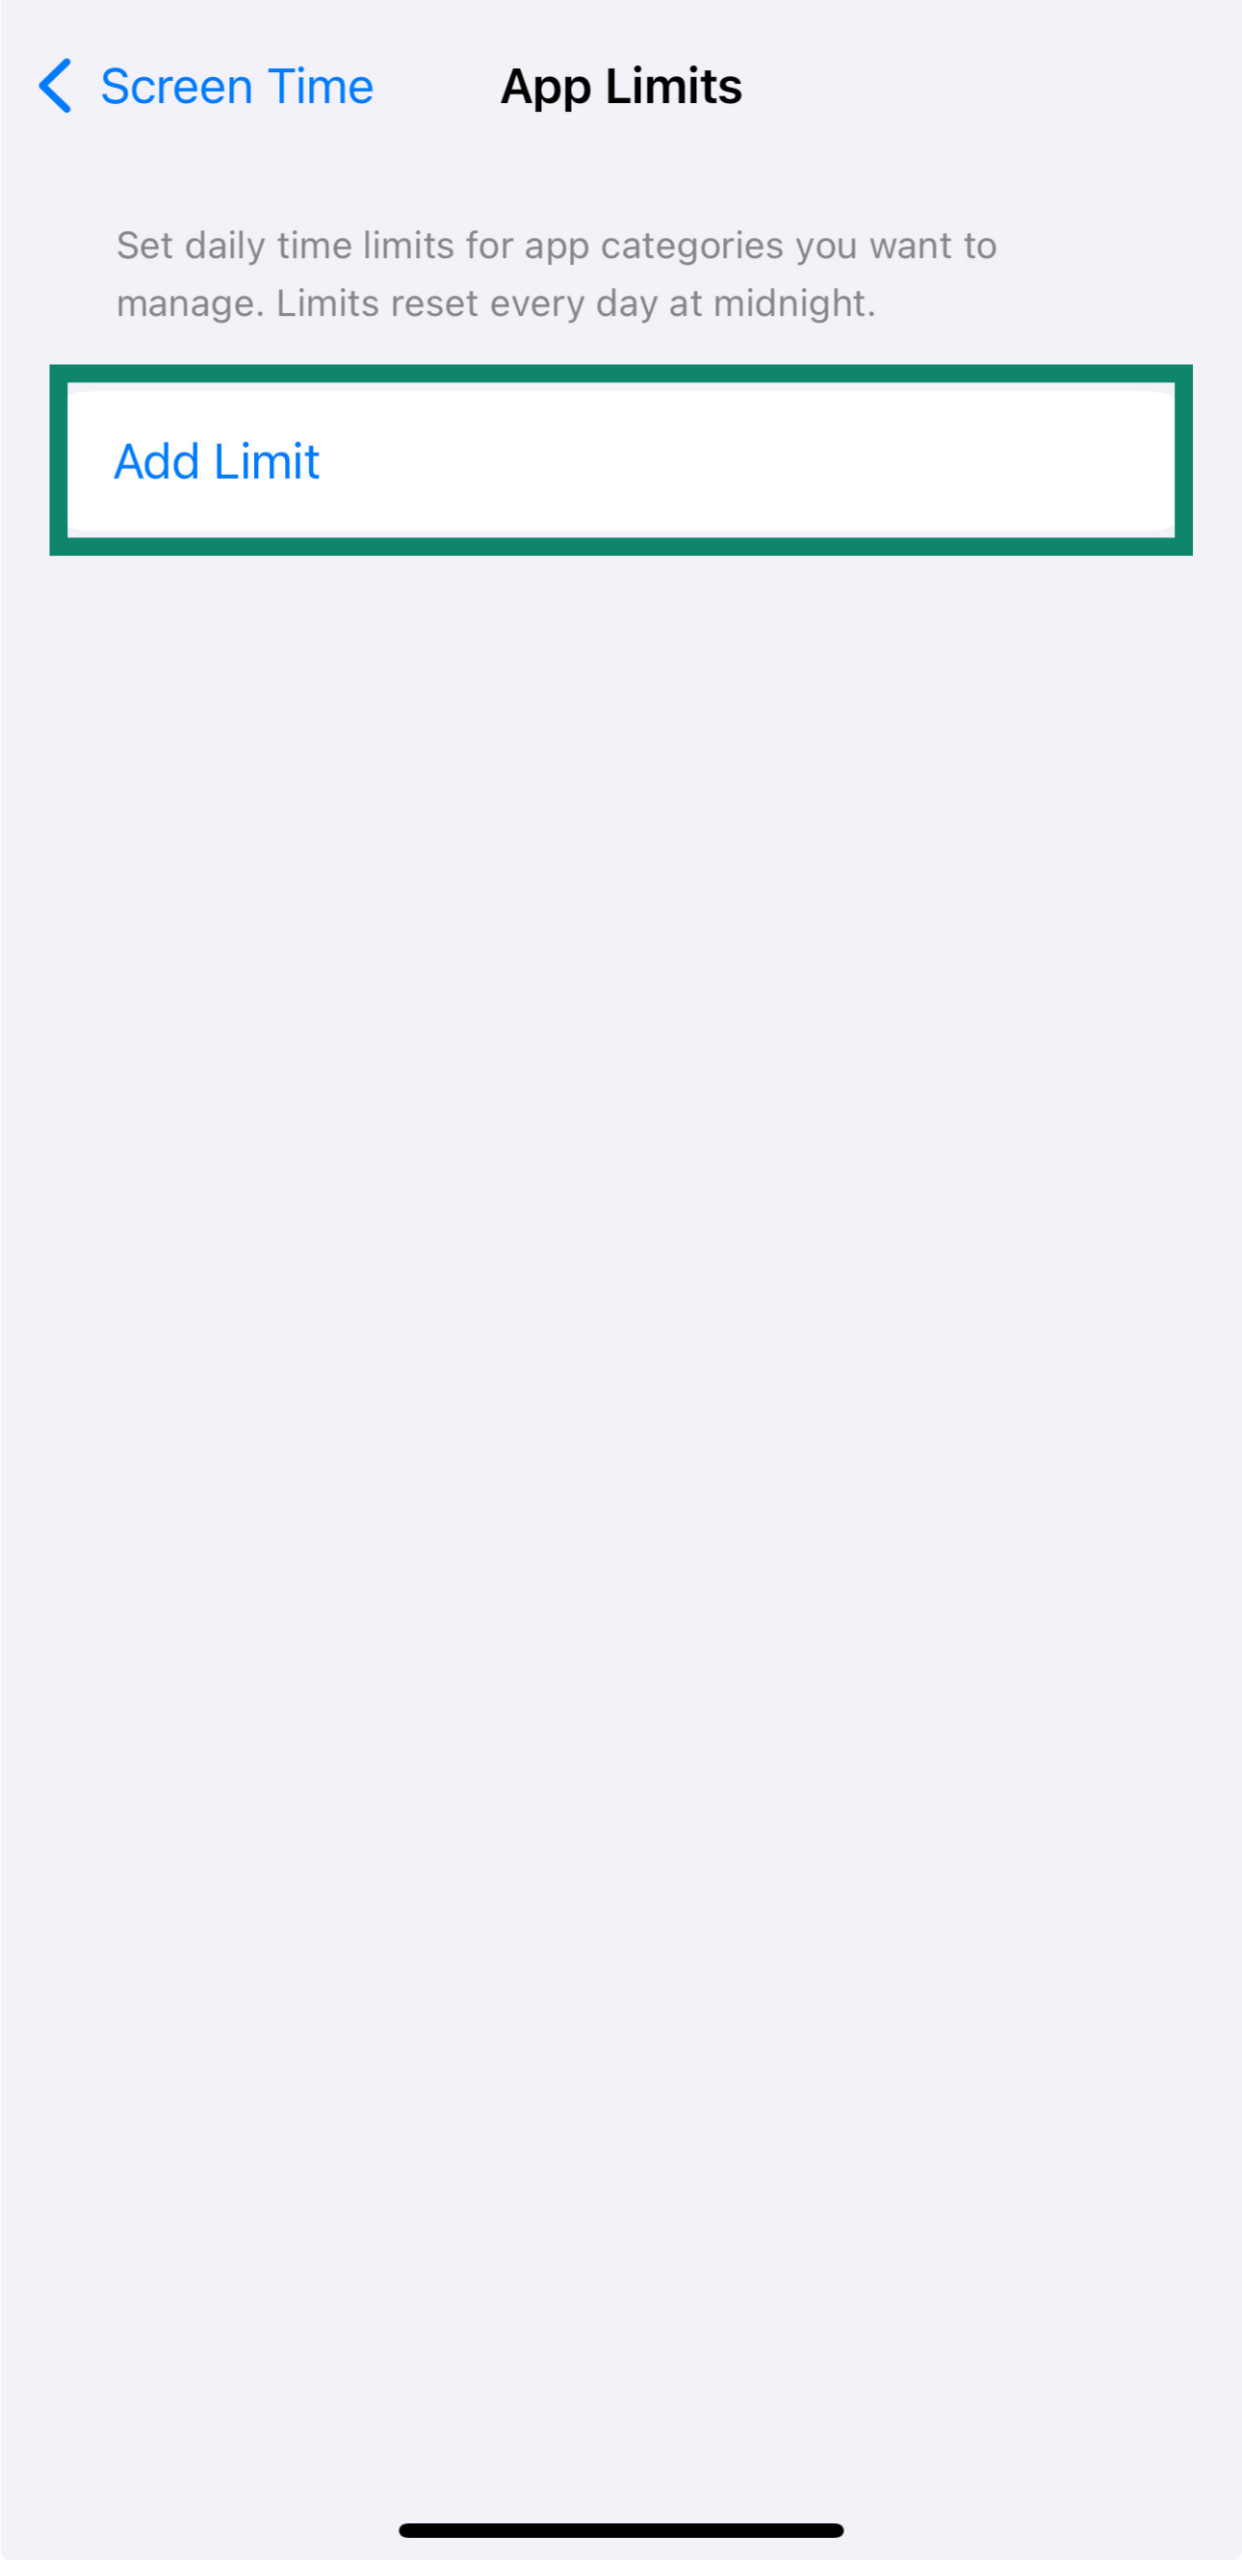
- Select the apps or categories you want to limit and tap Next to set the daily time limit.
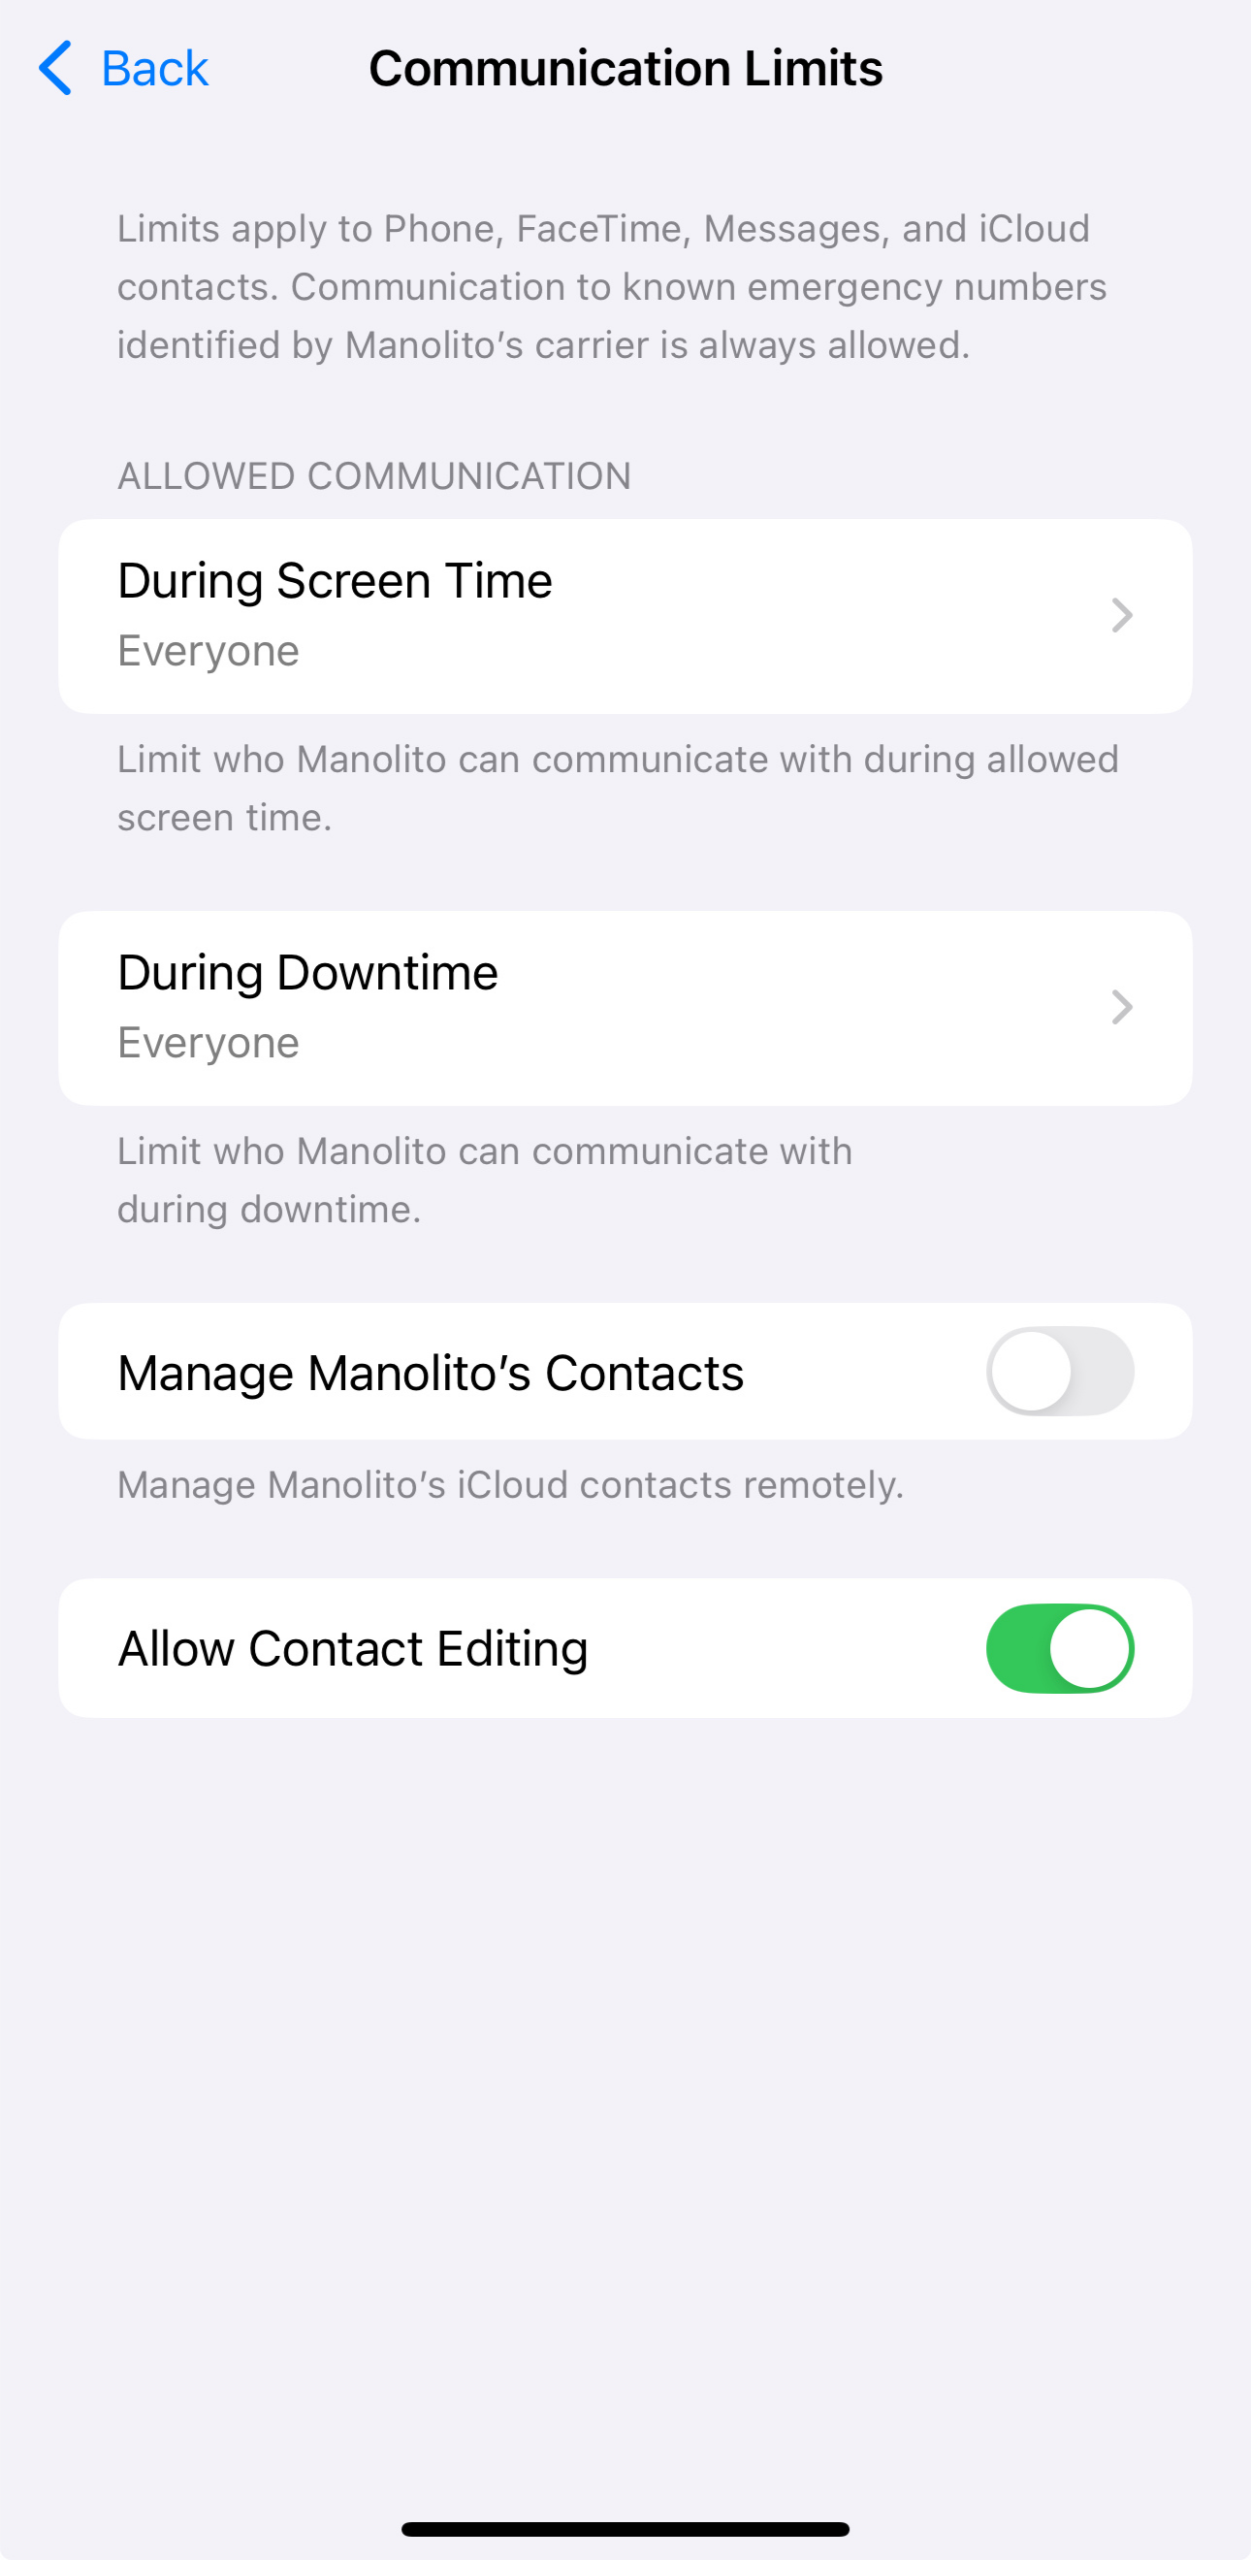
Managing Communication Limits
- Select your child’s account, tap Screen Time, and select Communication Limits.
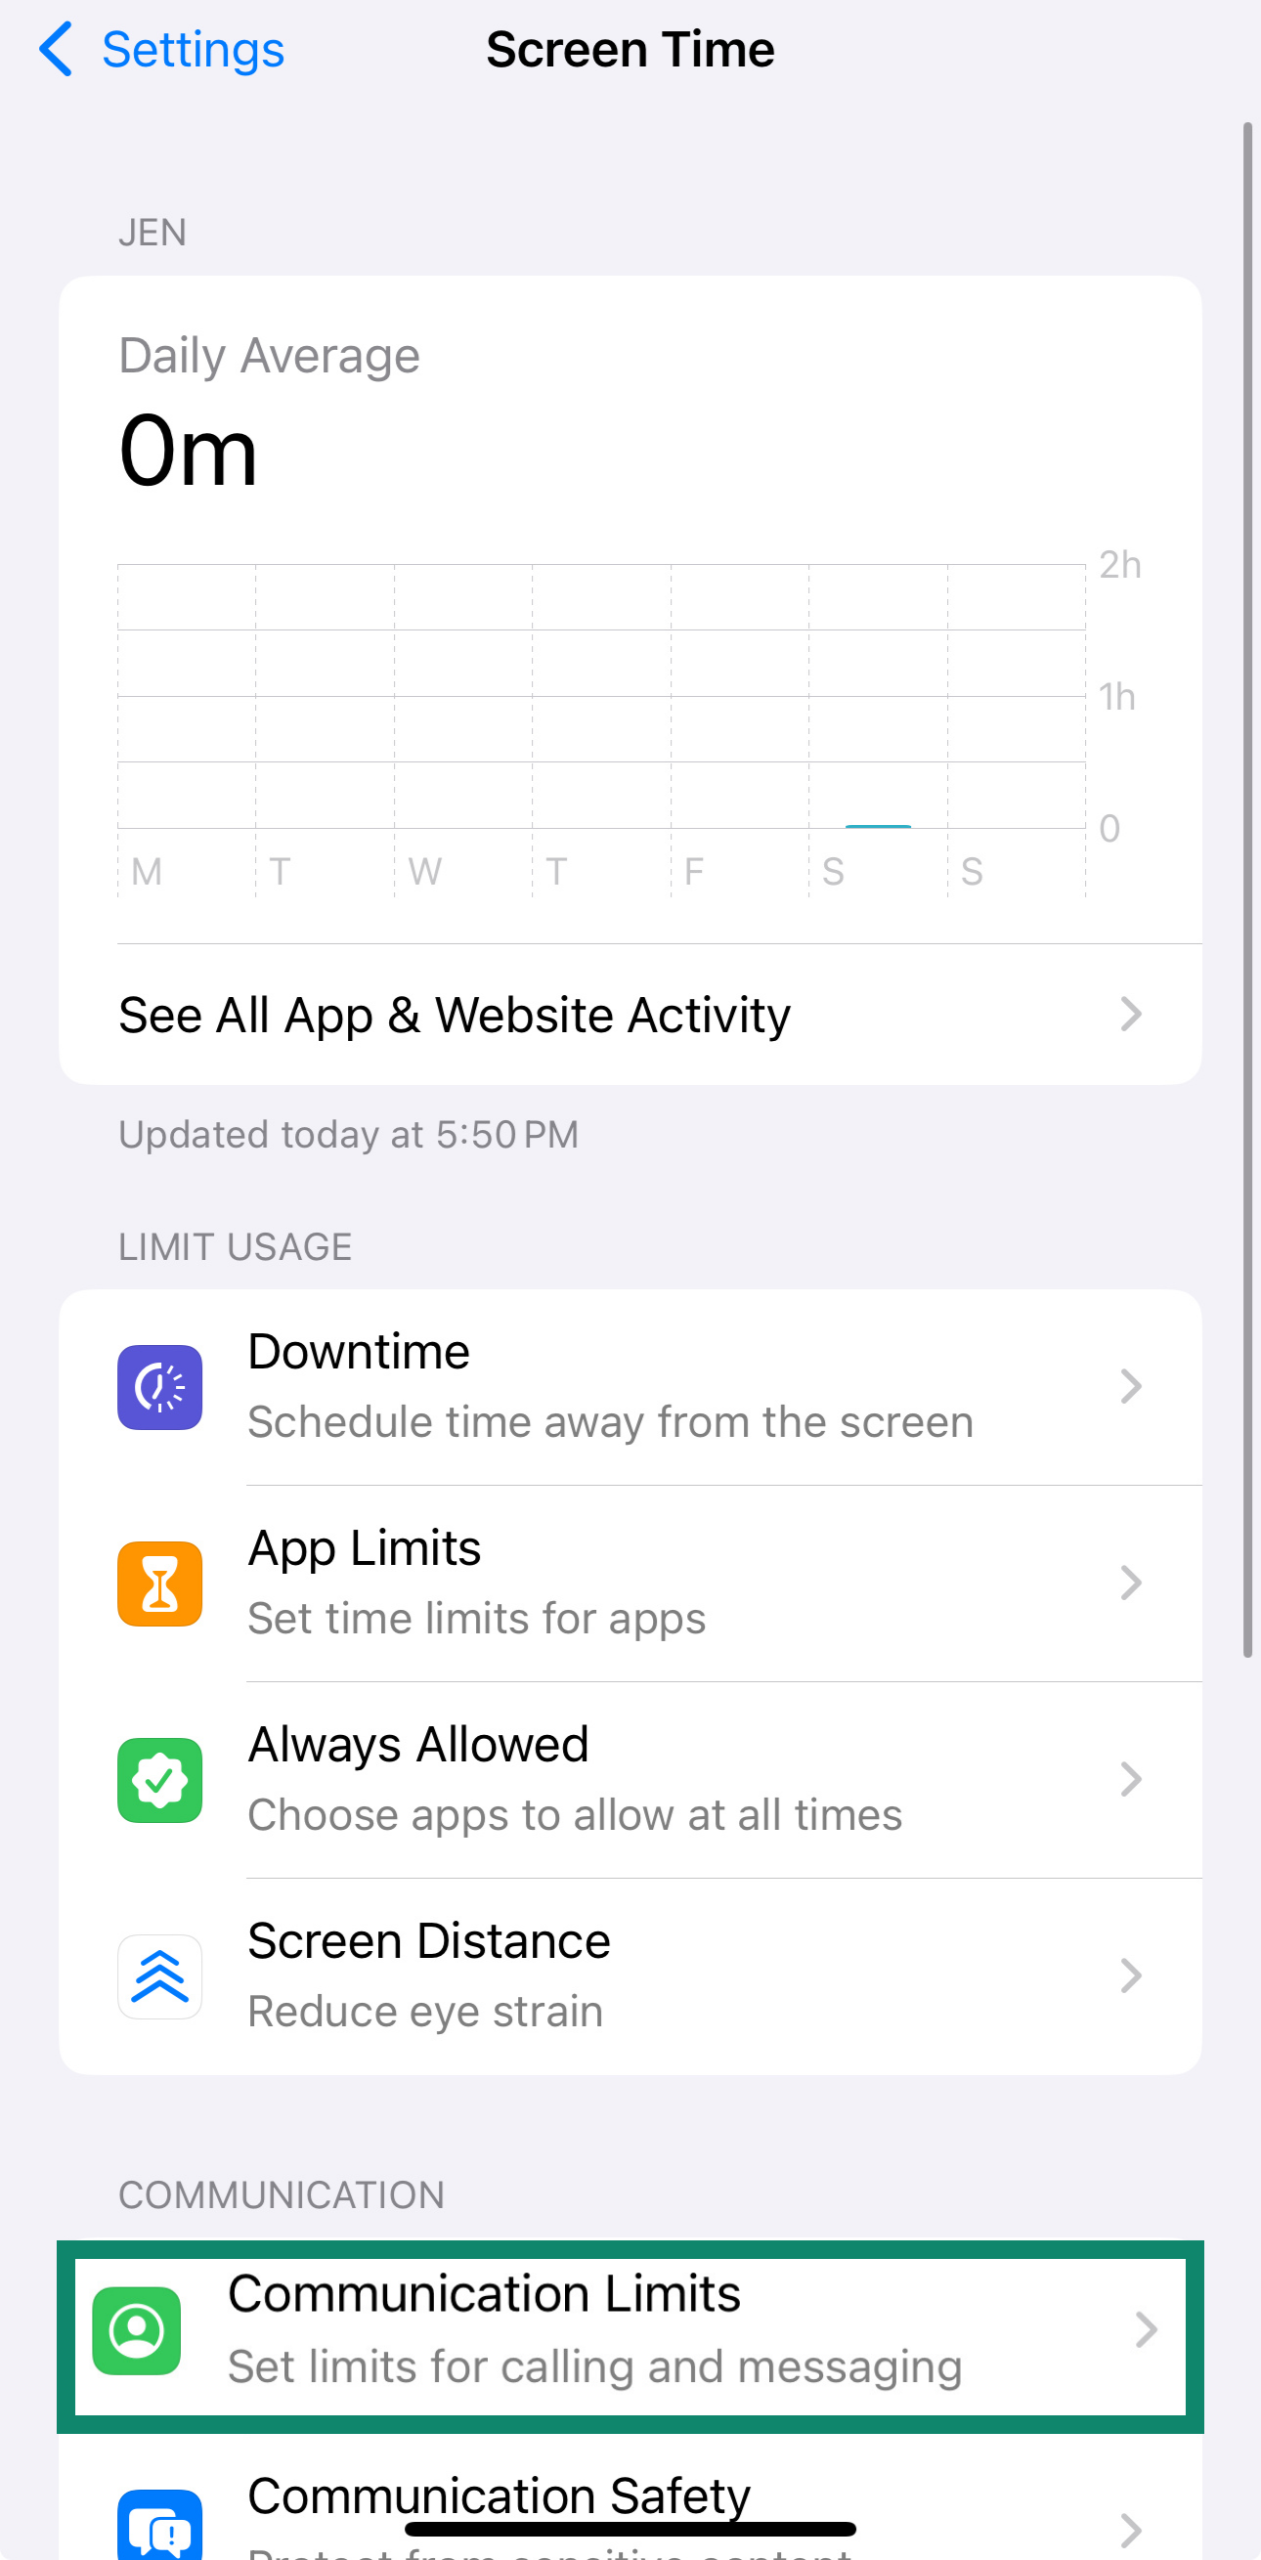
- From here, you can set who your child can communicate with During Screen Time and During Downtime.
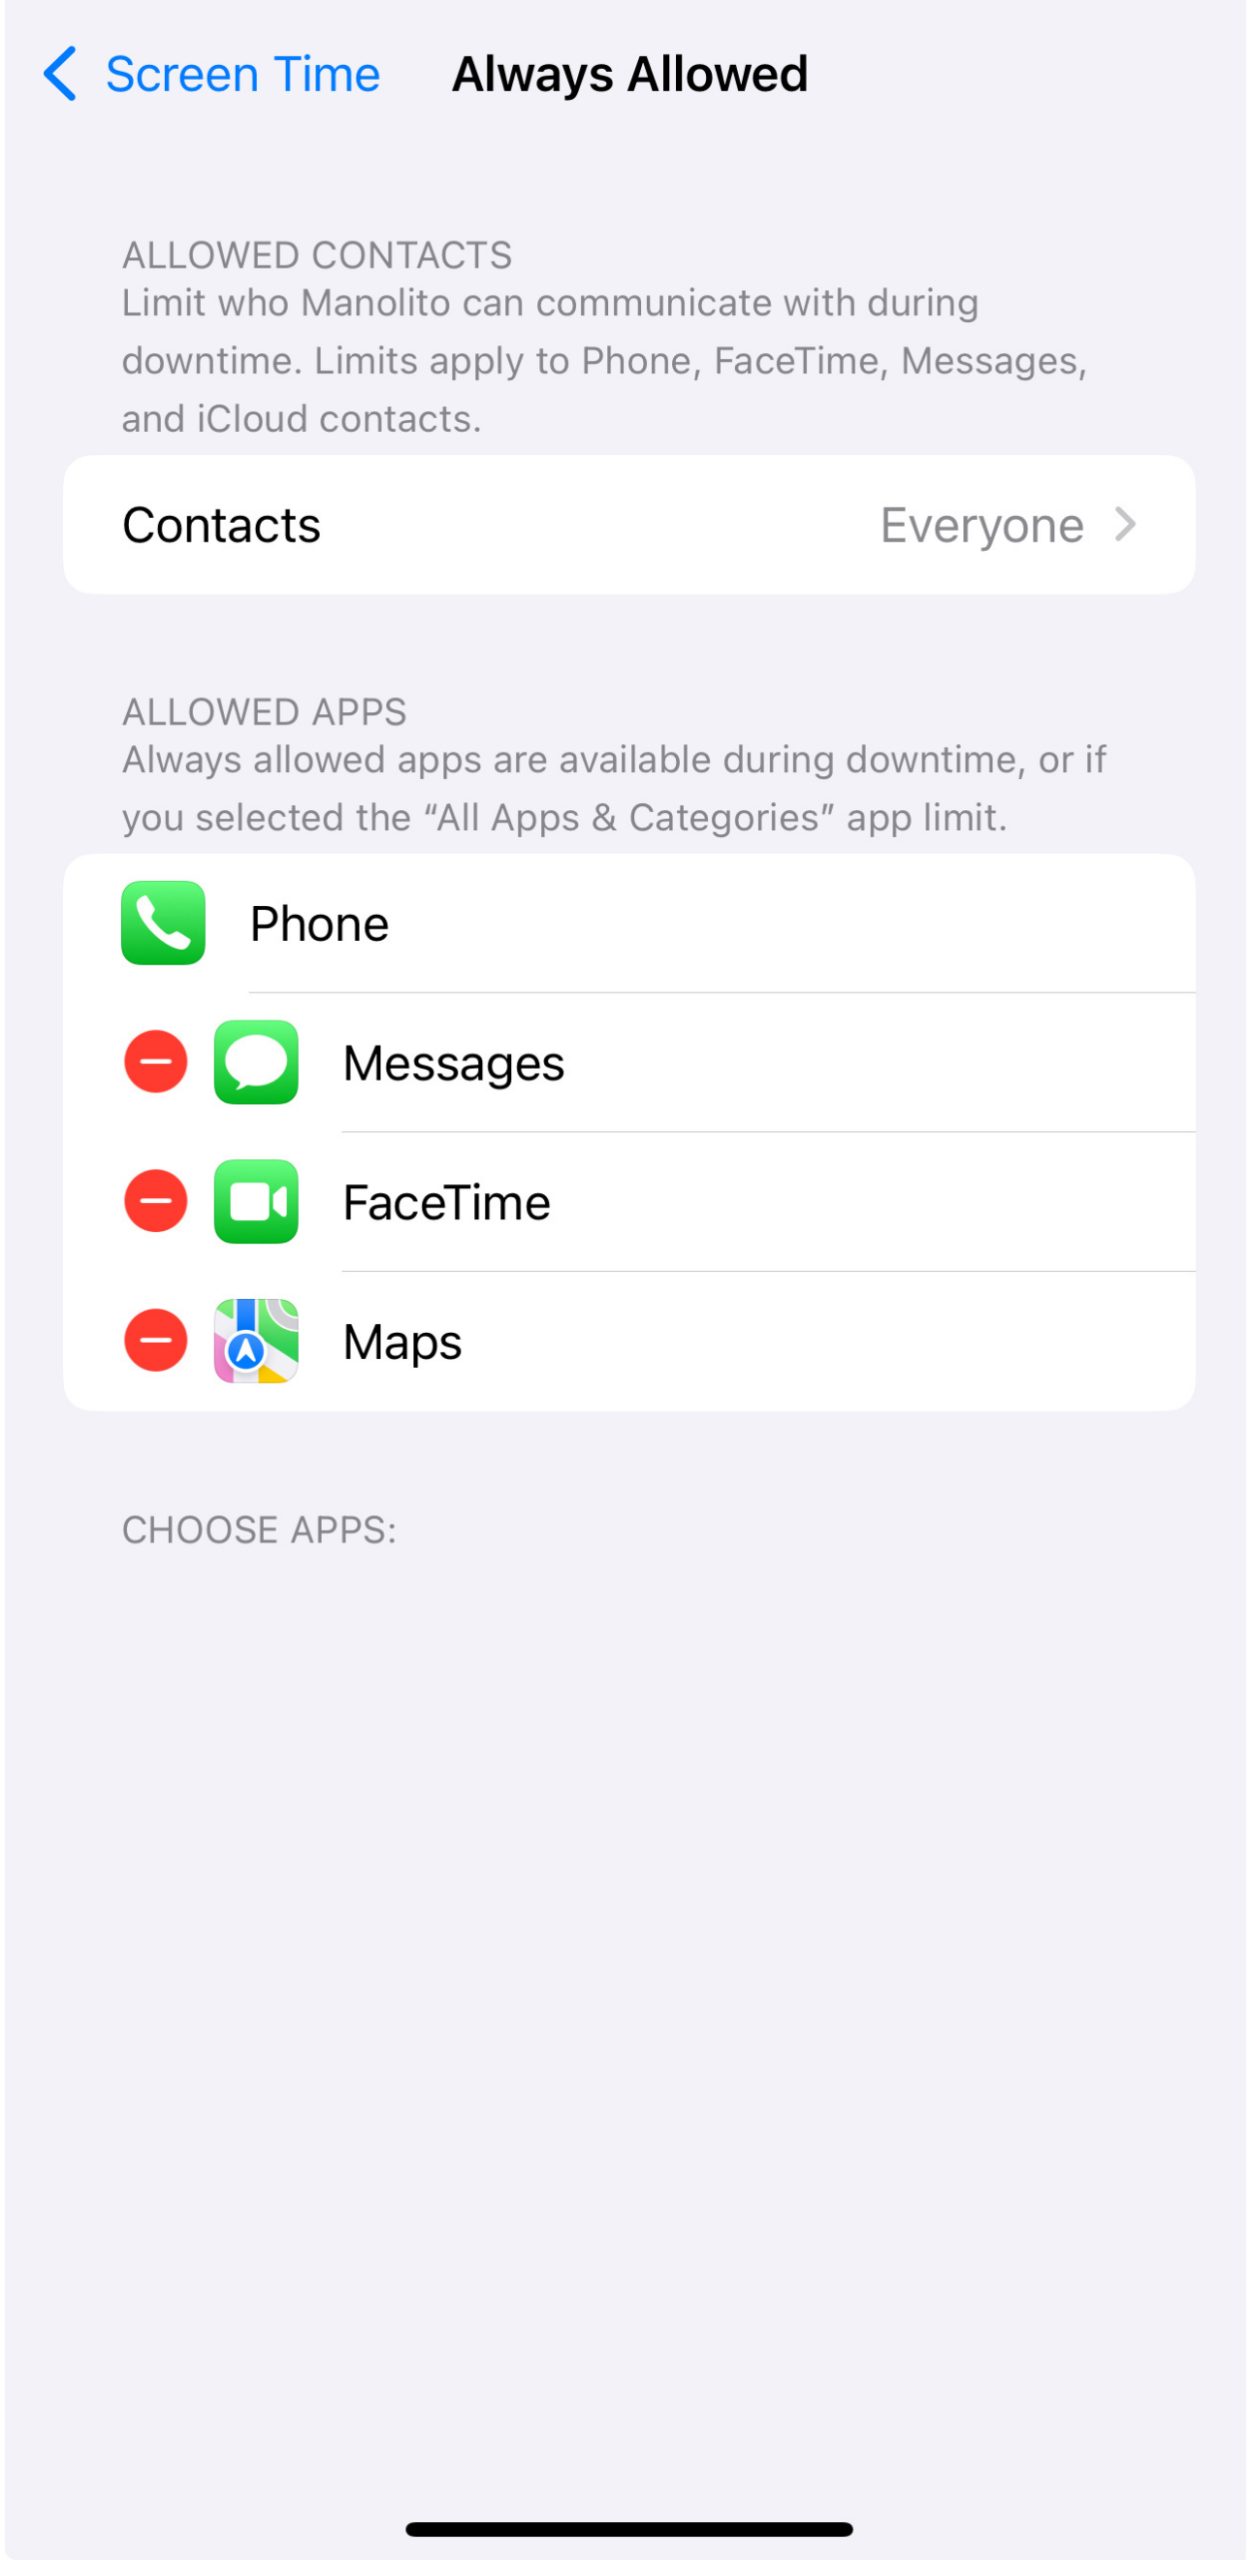
Always Allowed apps
- Select your child’s account, tap Screen Time, and choose Always Allowed.
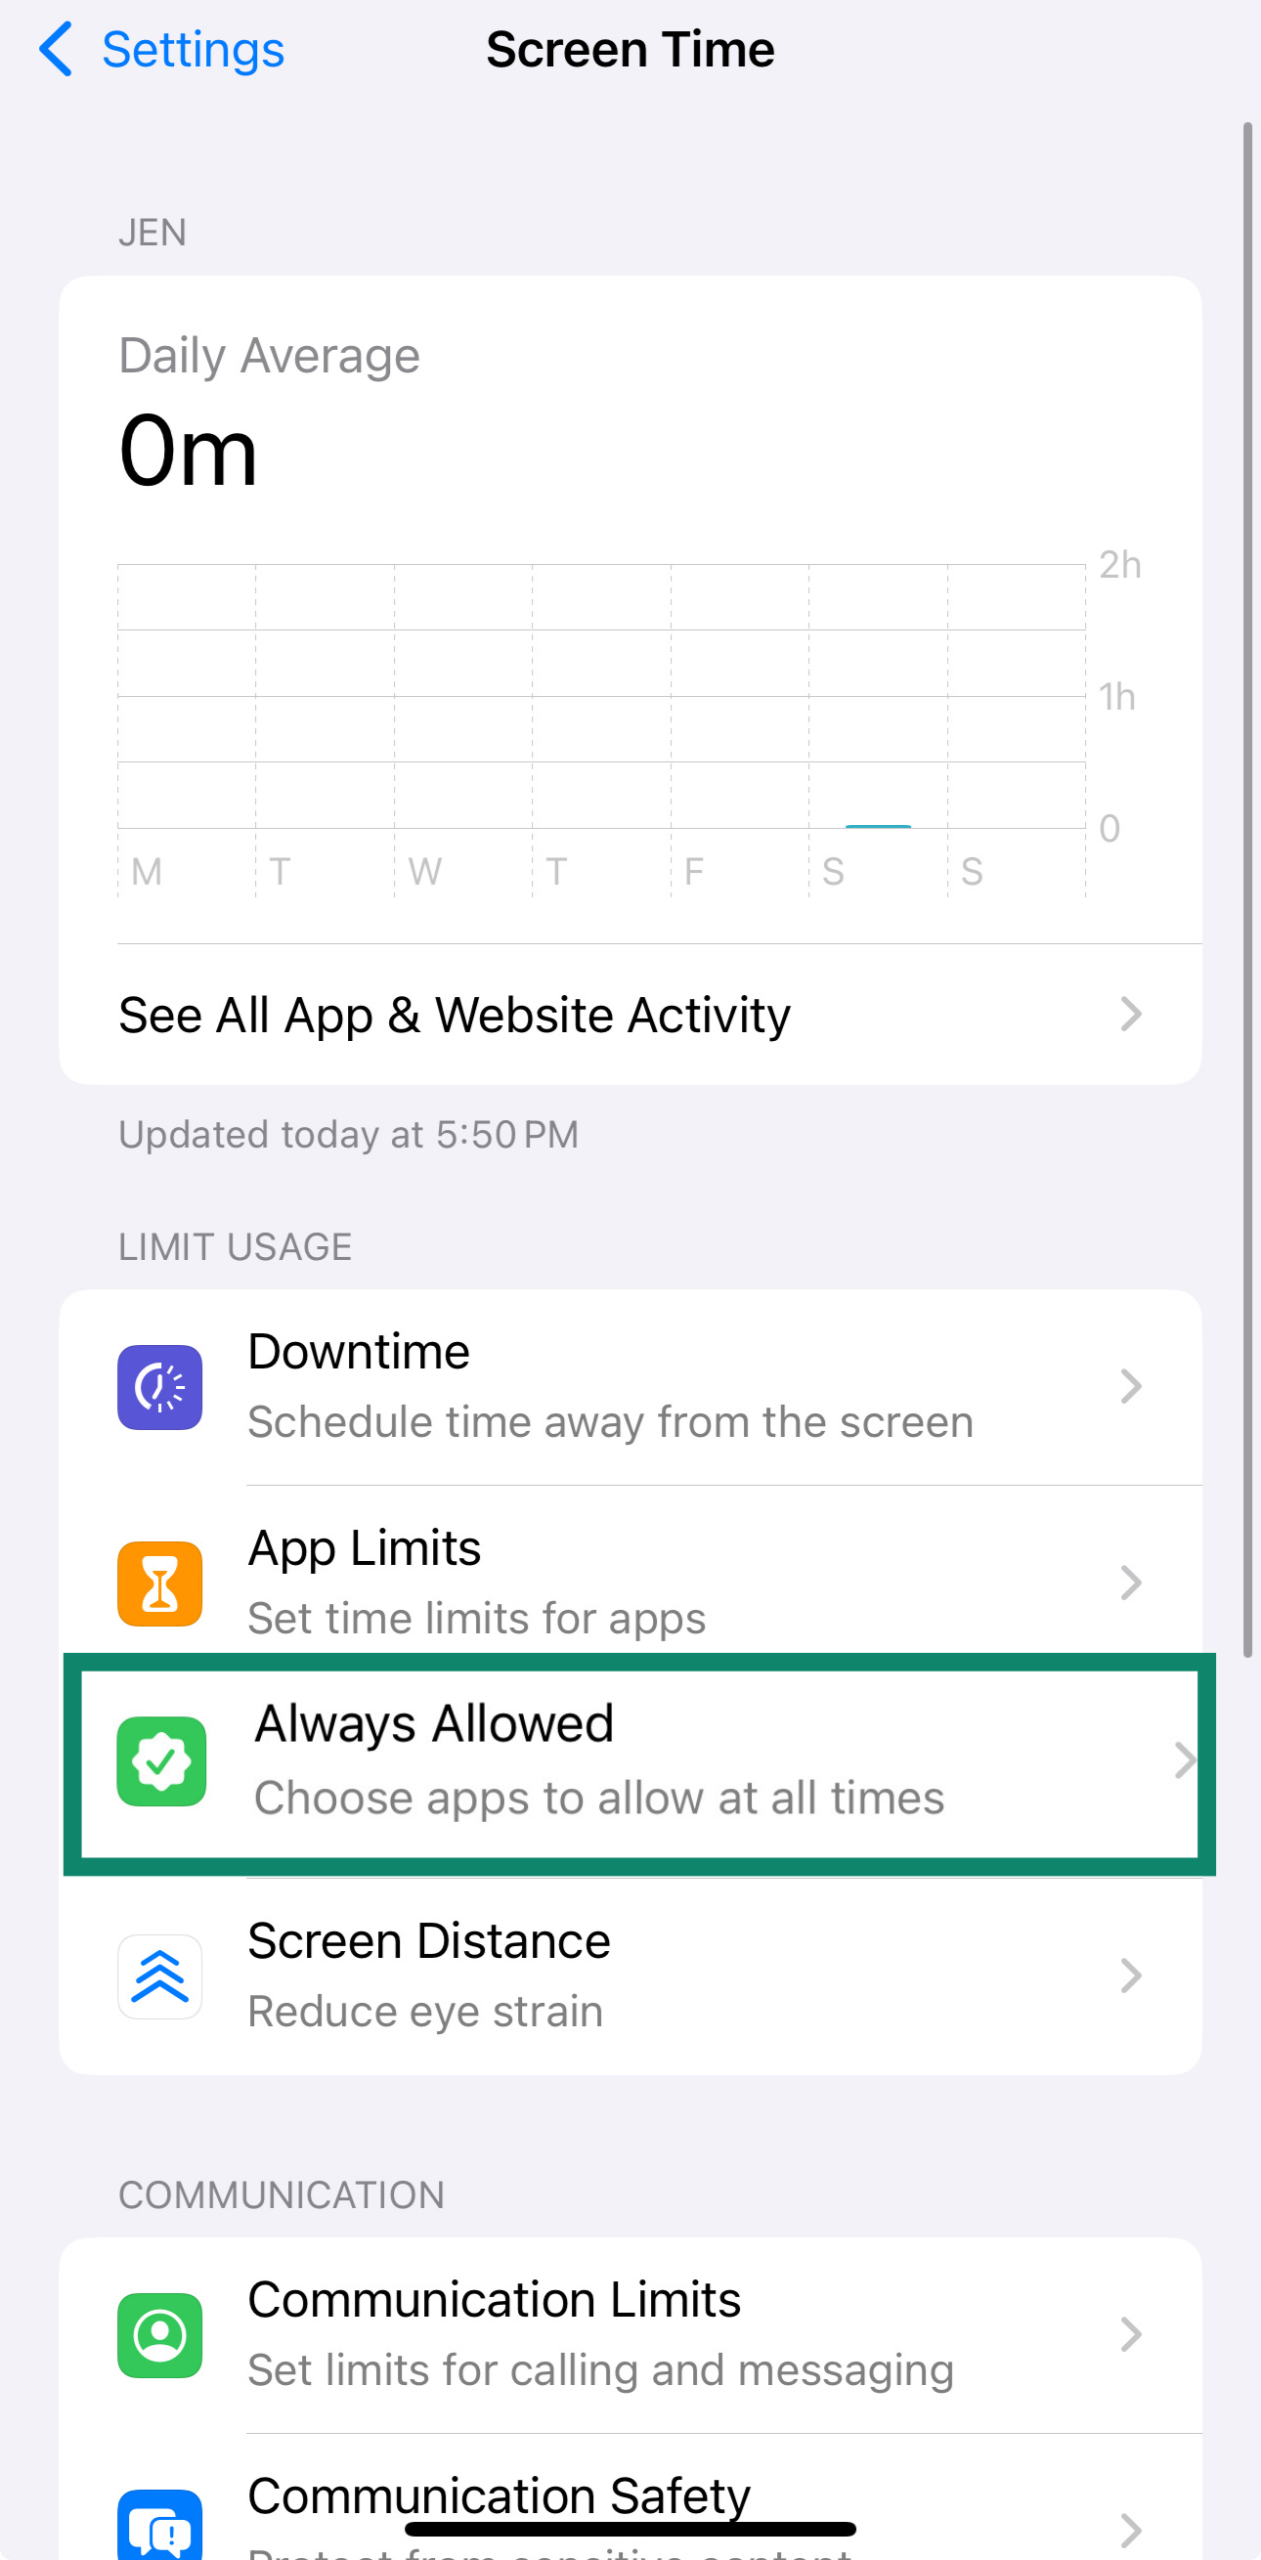
- Use the plus and minus buttons to add or remove apps from the list.
Restricting access to apps, content, and features
Once Screen Time is set up, you can fine-tune what your child is able to access. From limiting websites to blocking purchases, all the iPhone child safety settings are managed in the same place.
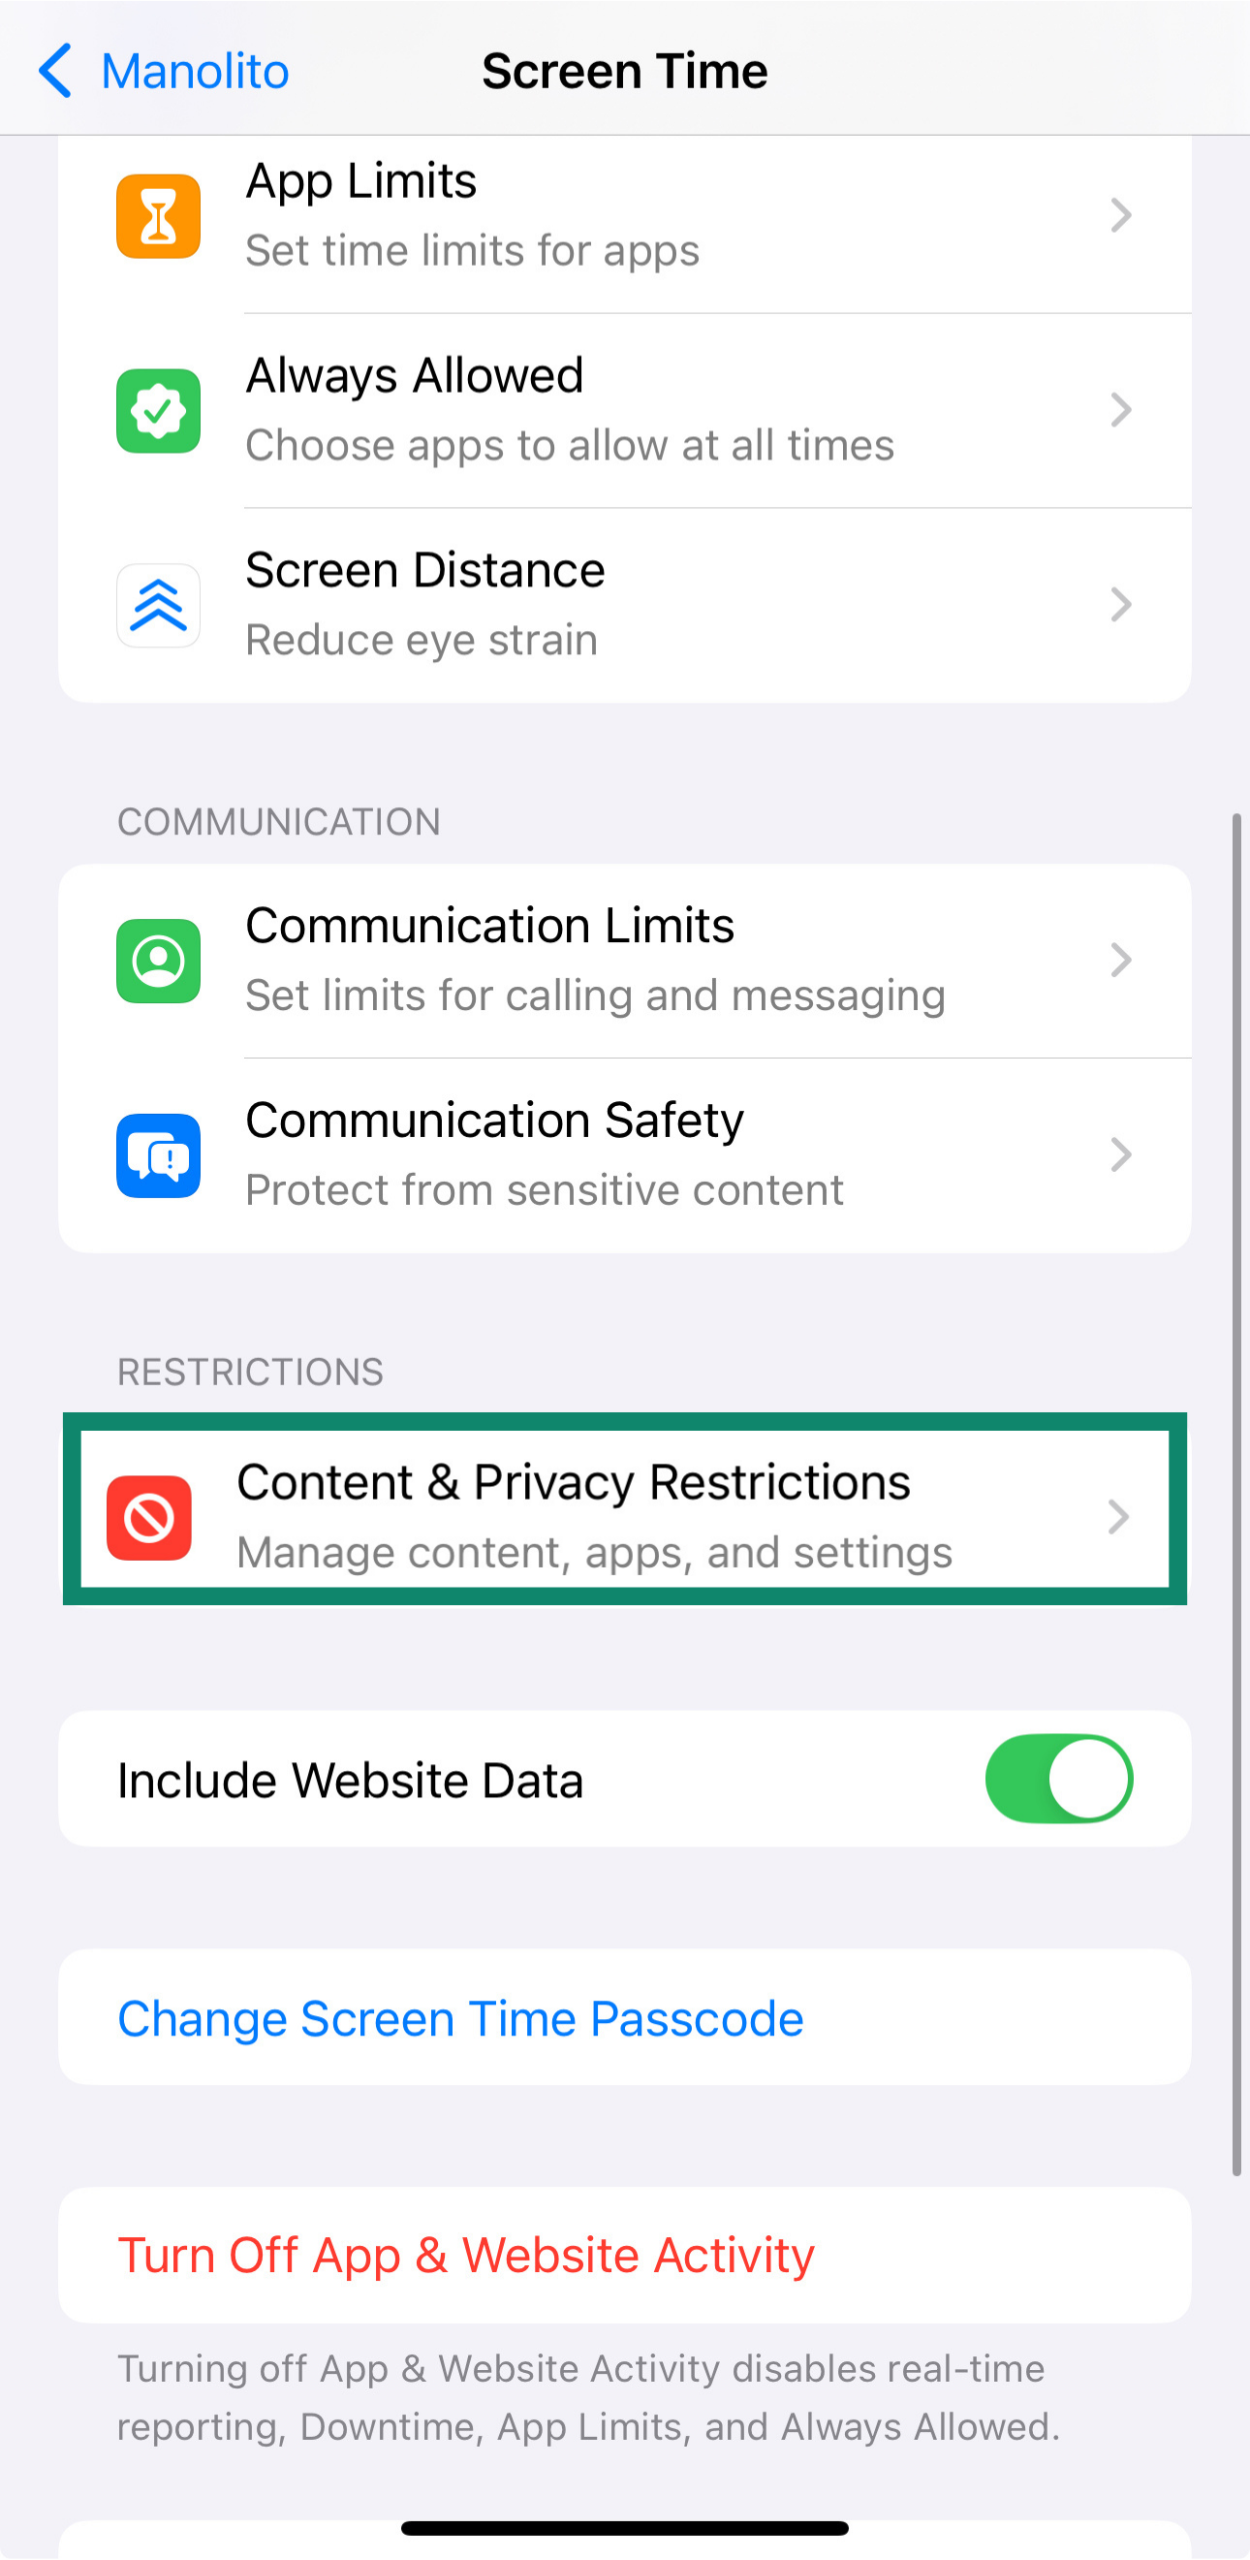
Using content and privacy restrictions
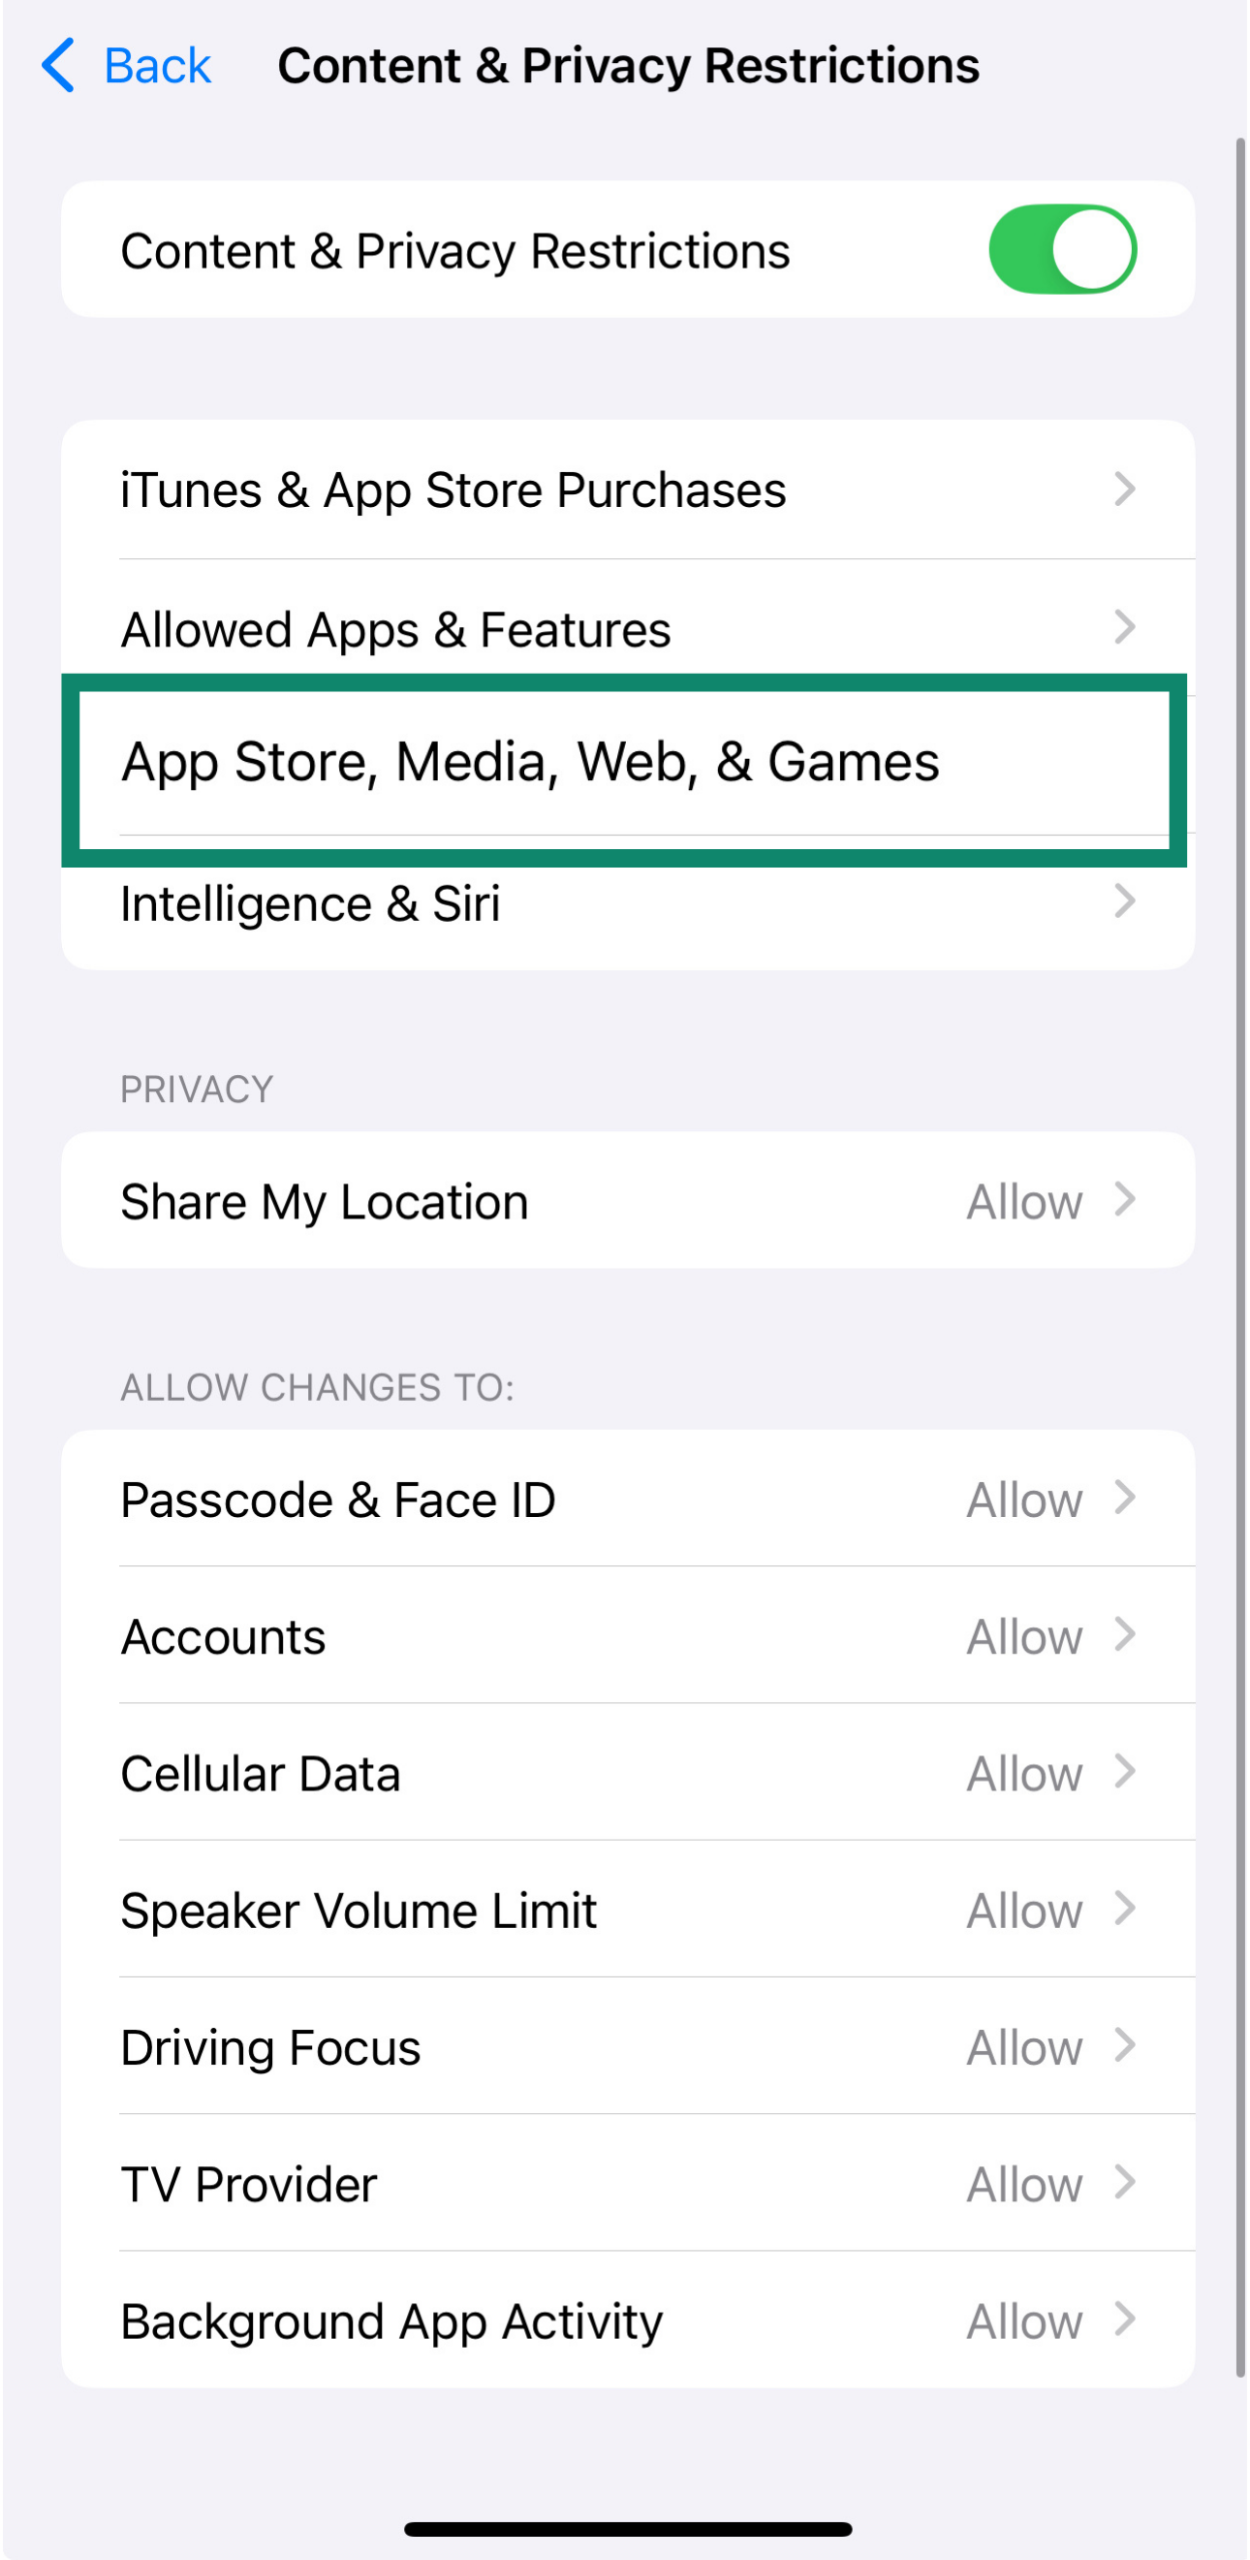
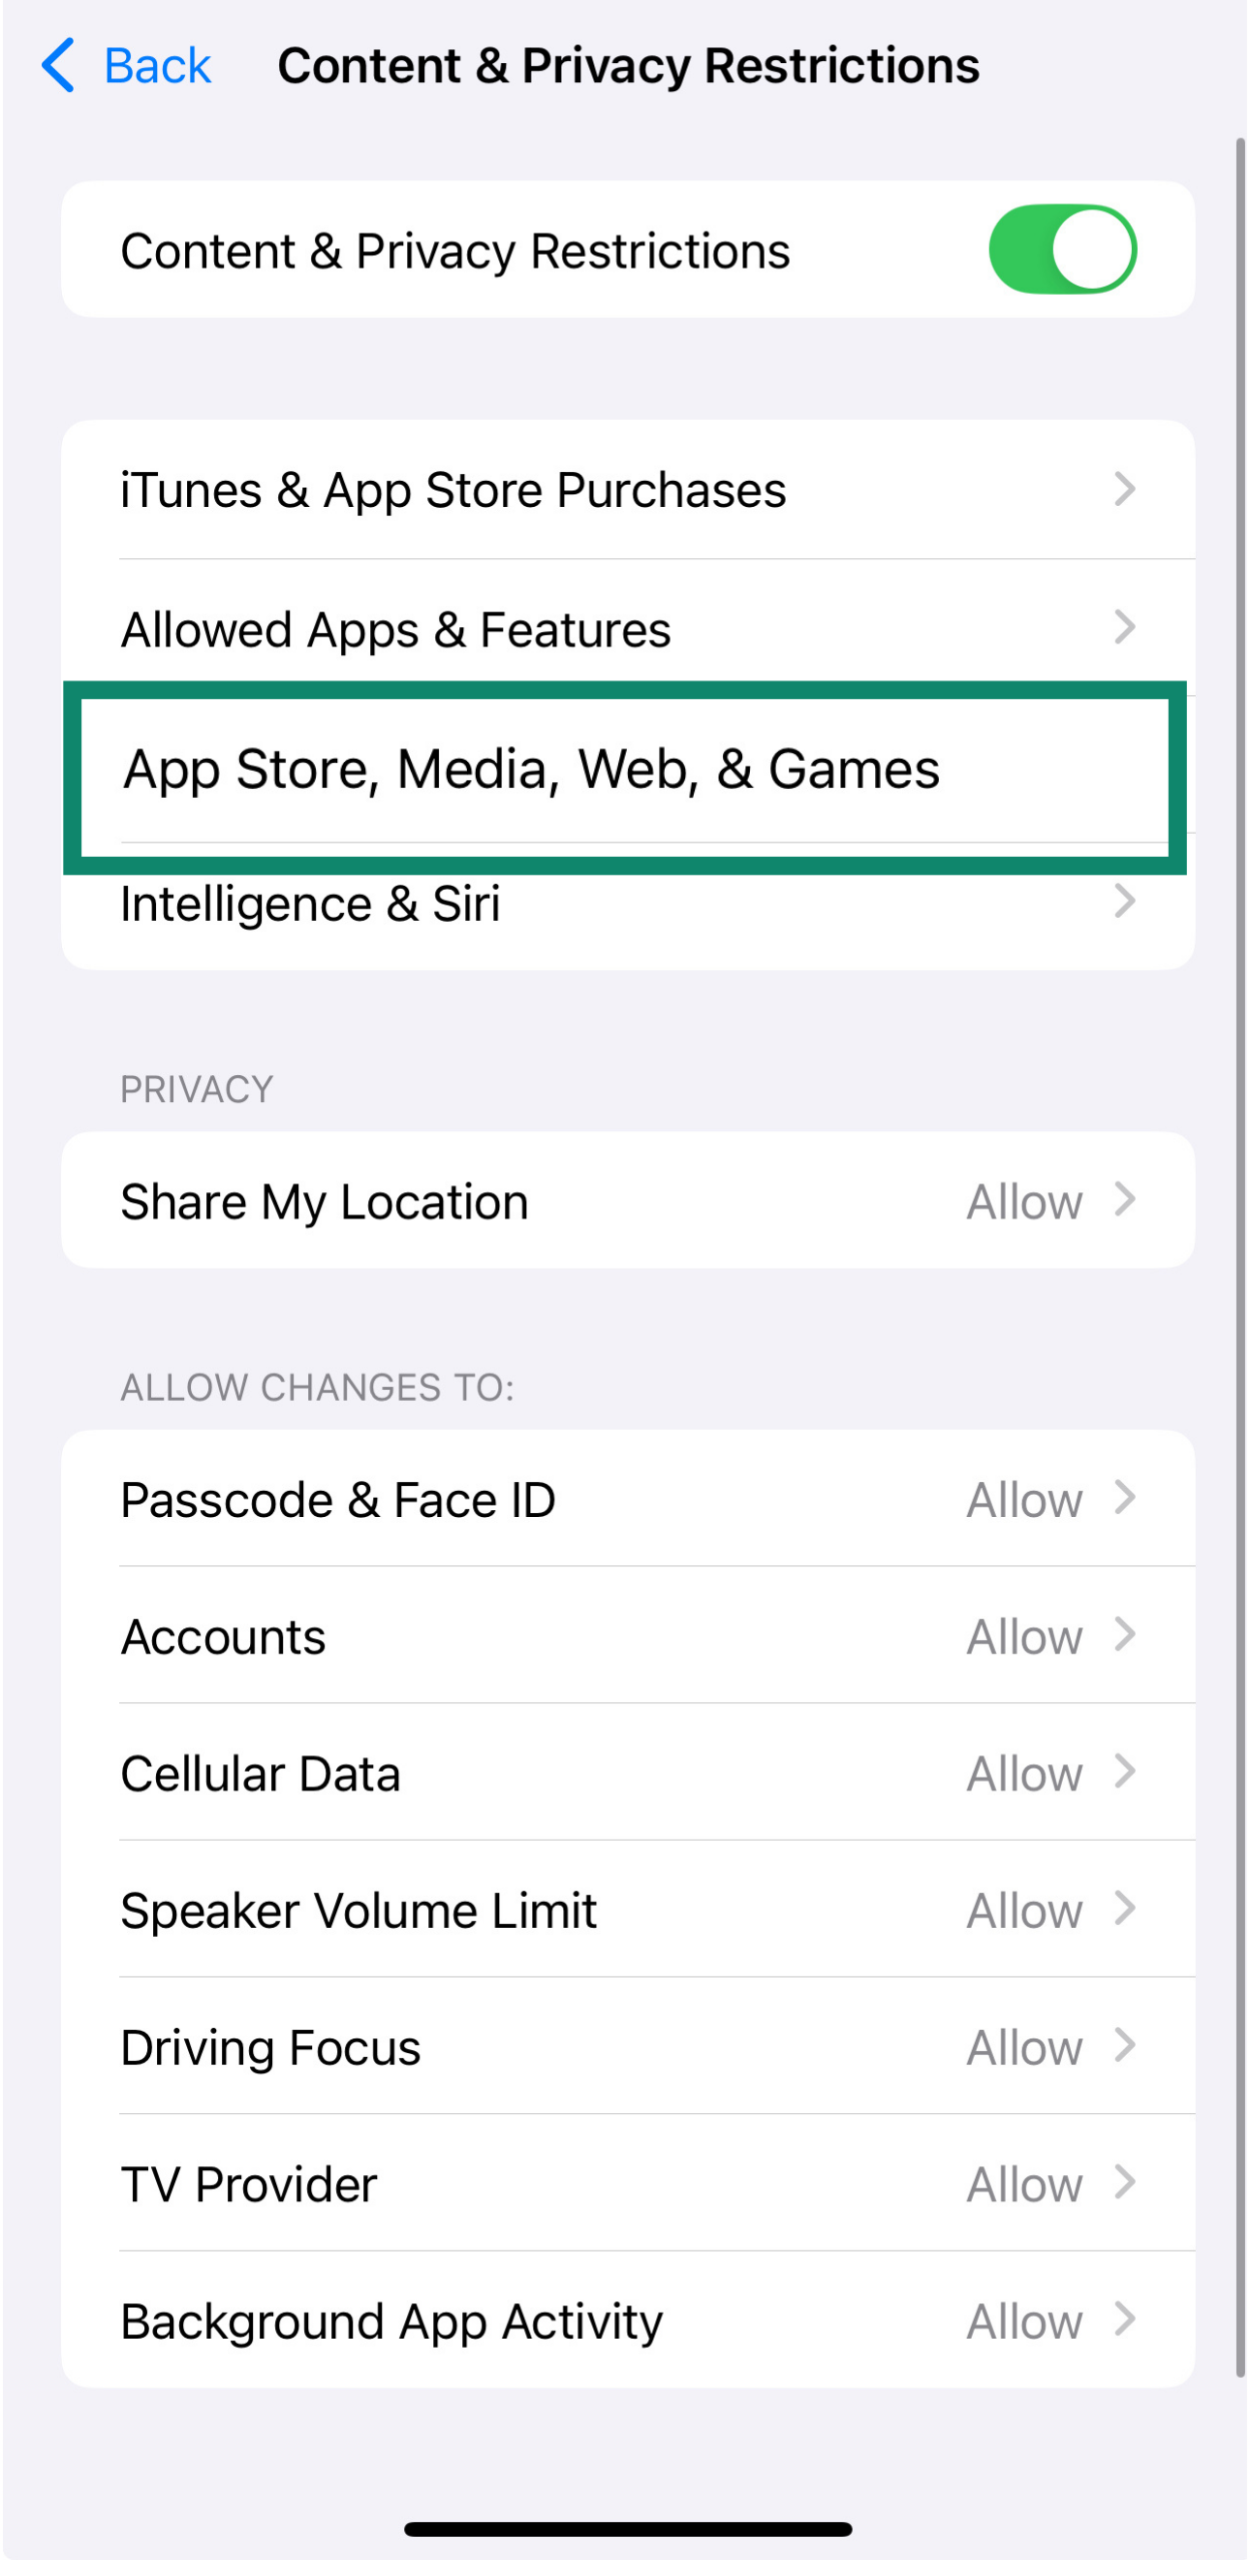
- Go to your child’s account in your Family group, tap Screen Time, and choose Content & Privacy Restrictions.
- Turn on Content & Privacy Restrictions.
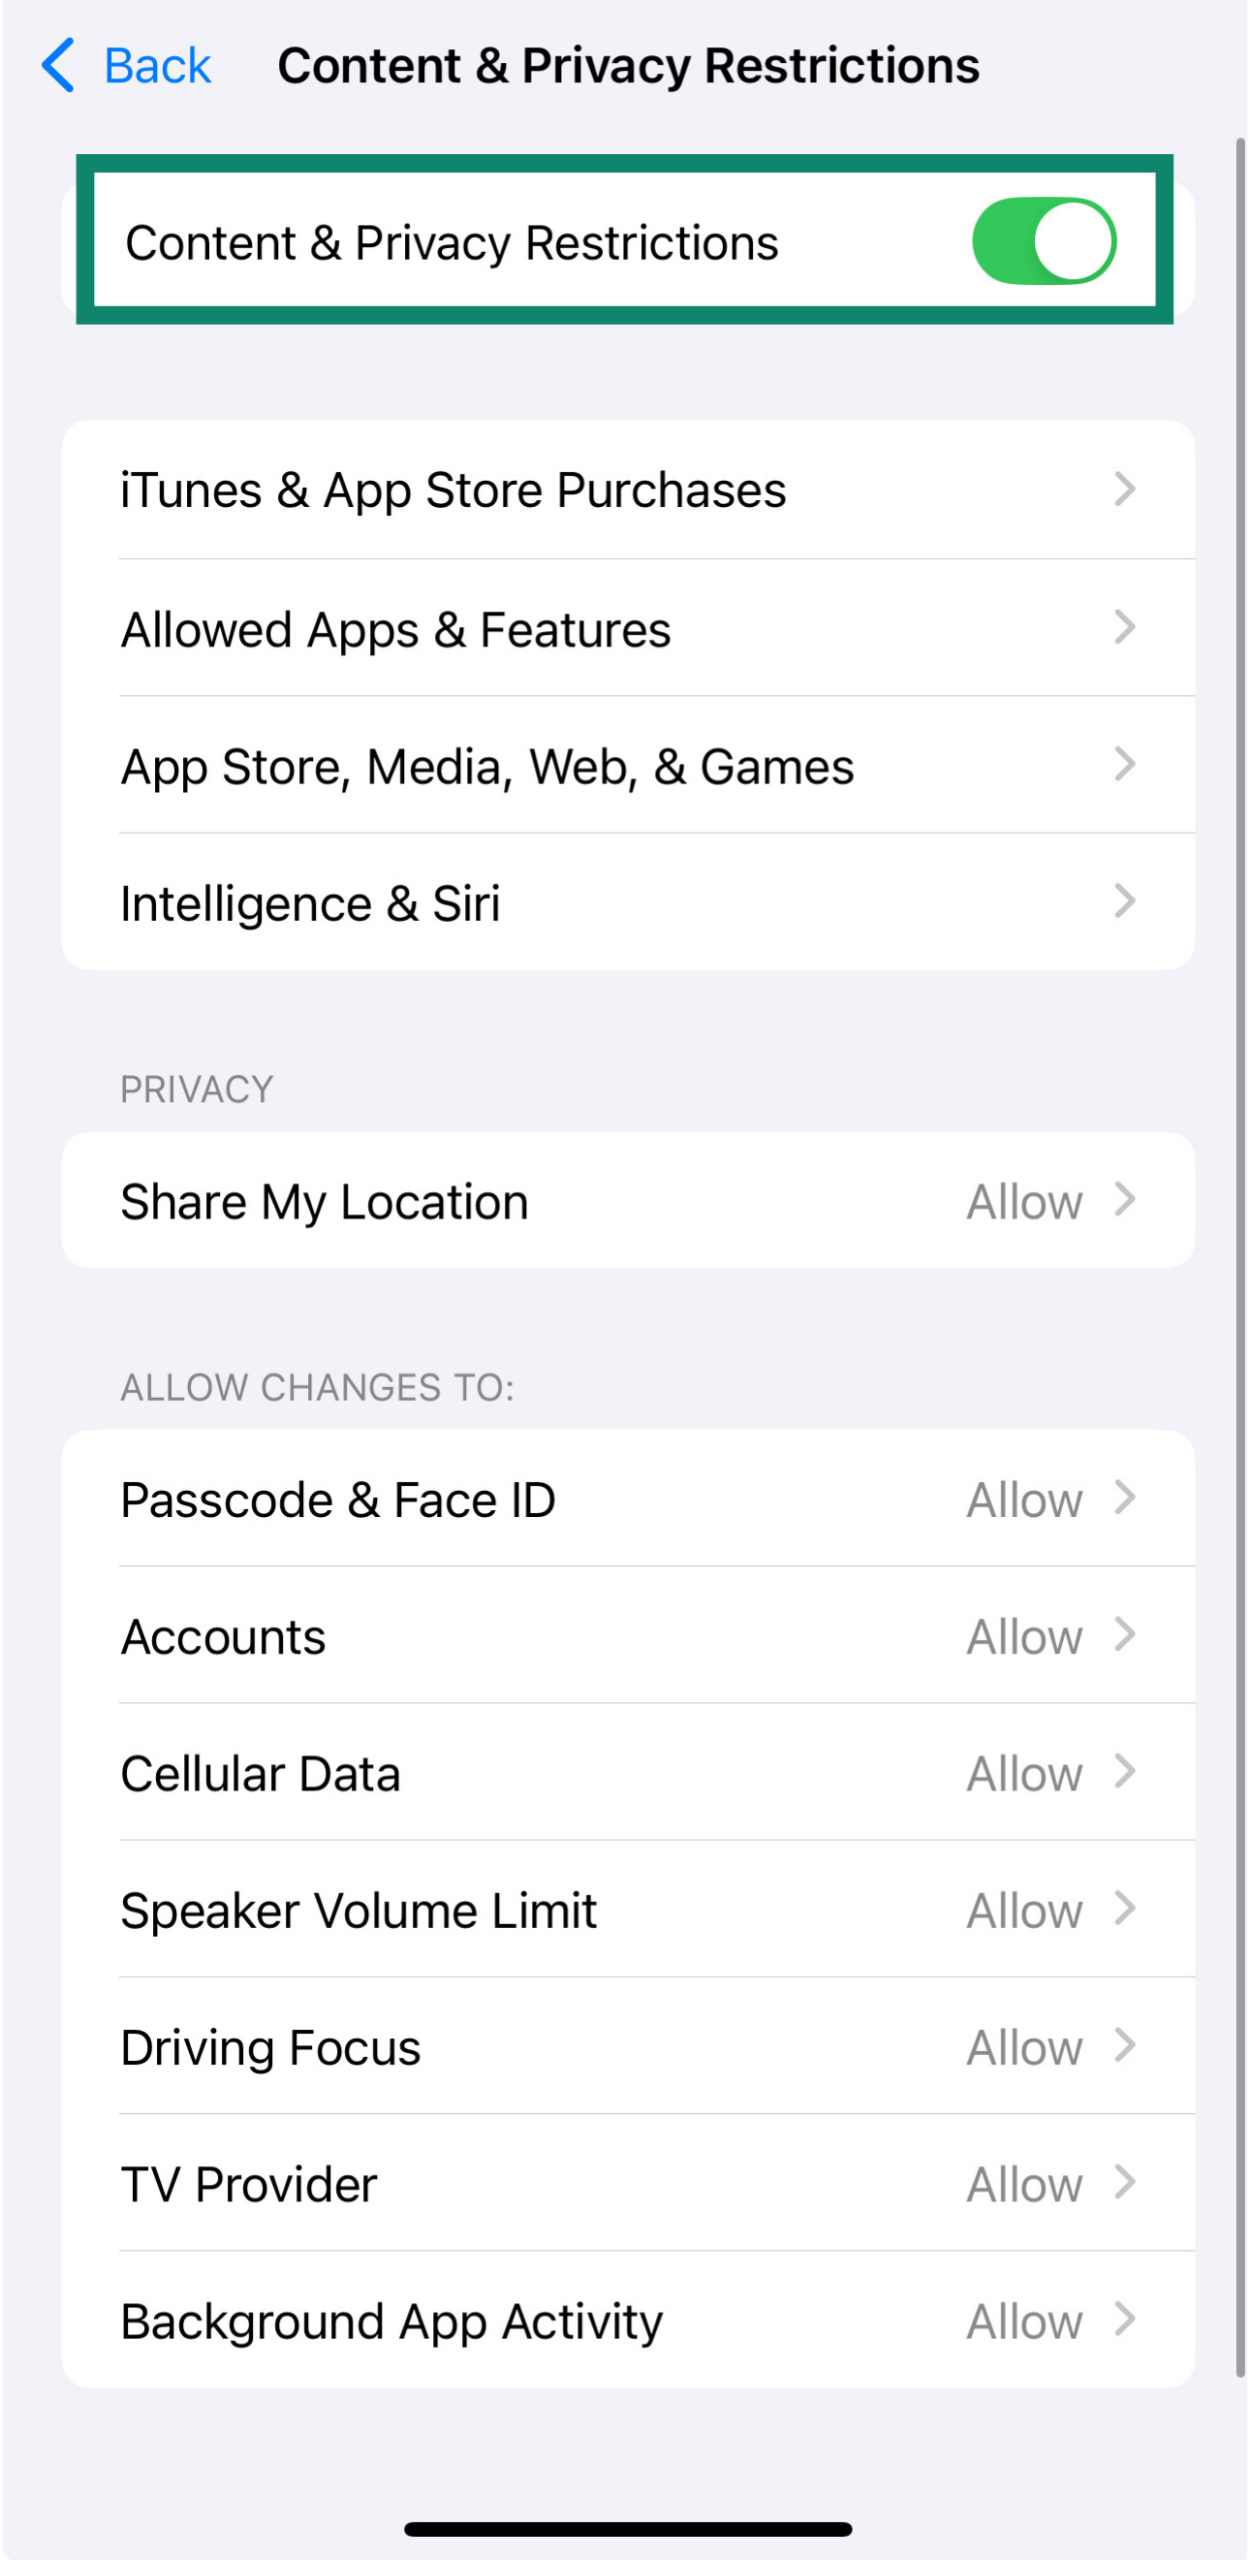
From here, you can make the changes below to modify your child’s access.
Block websites
You can block adult content automatically or create a custom list of allowed or restricted sites in Safari.
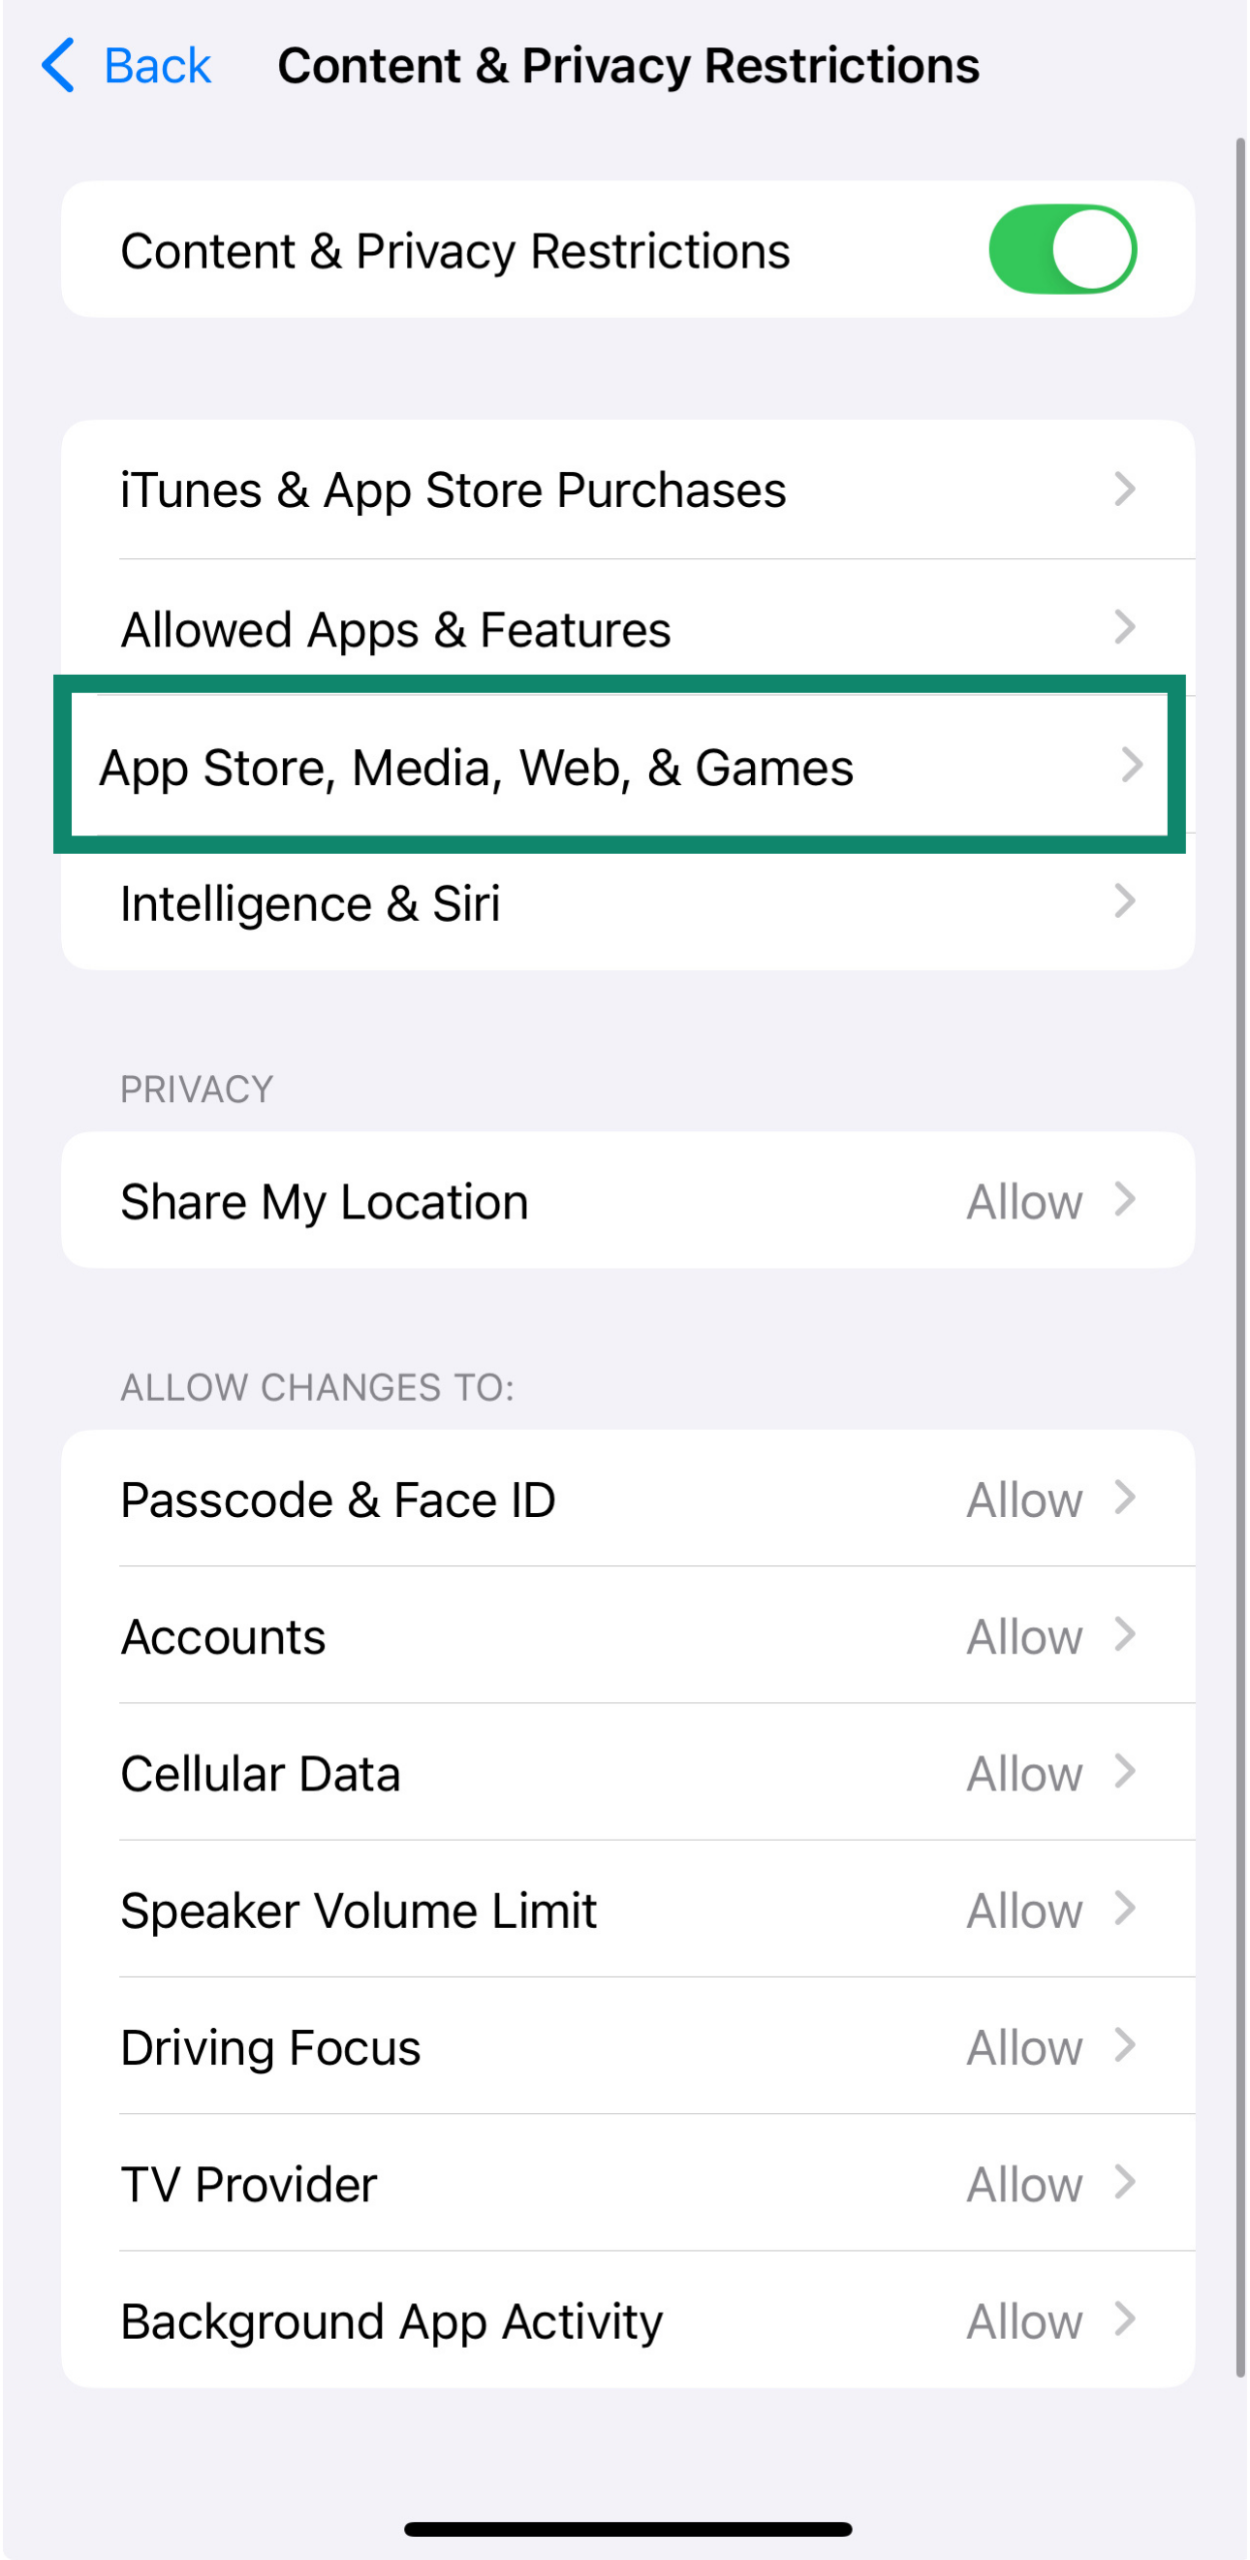
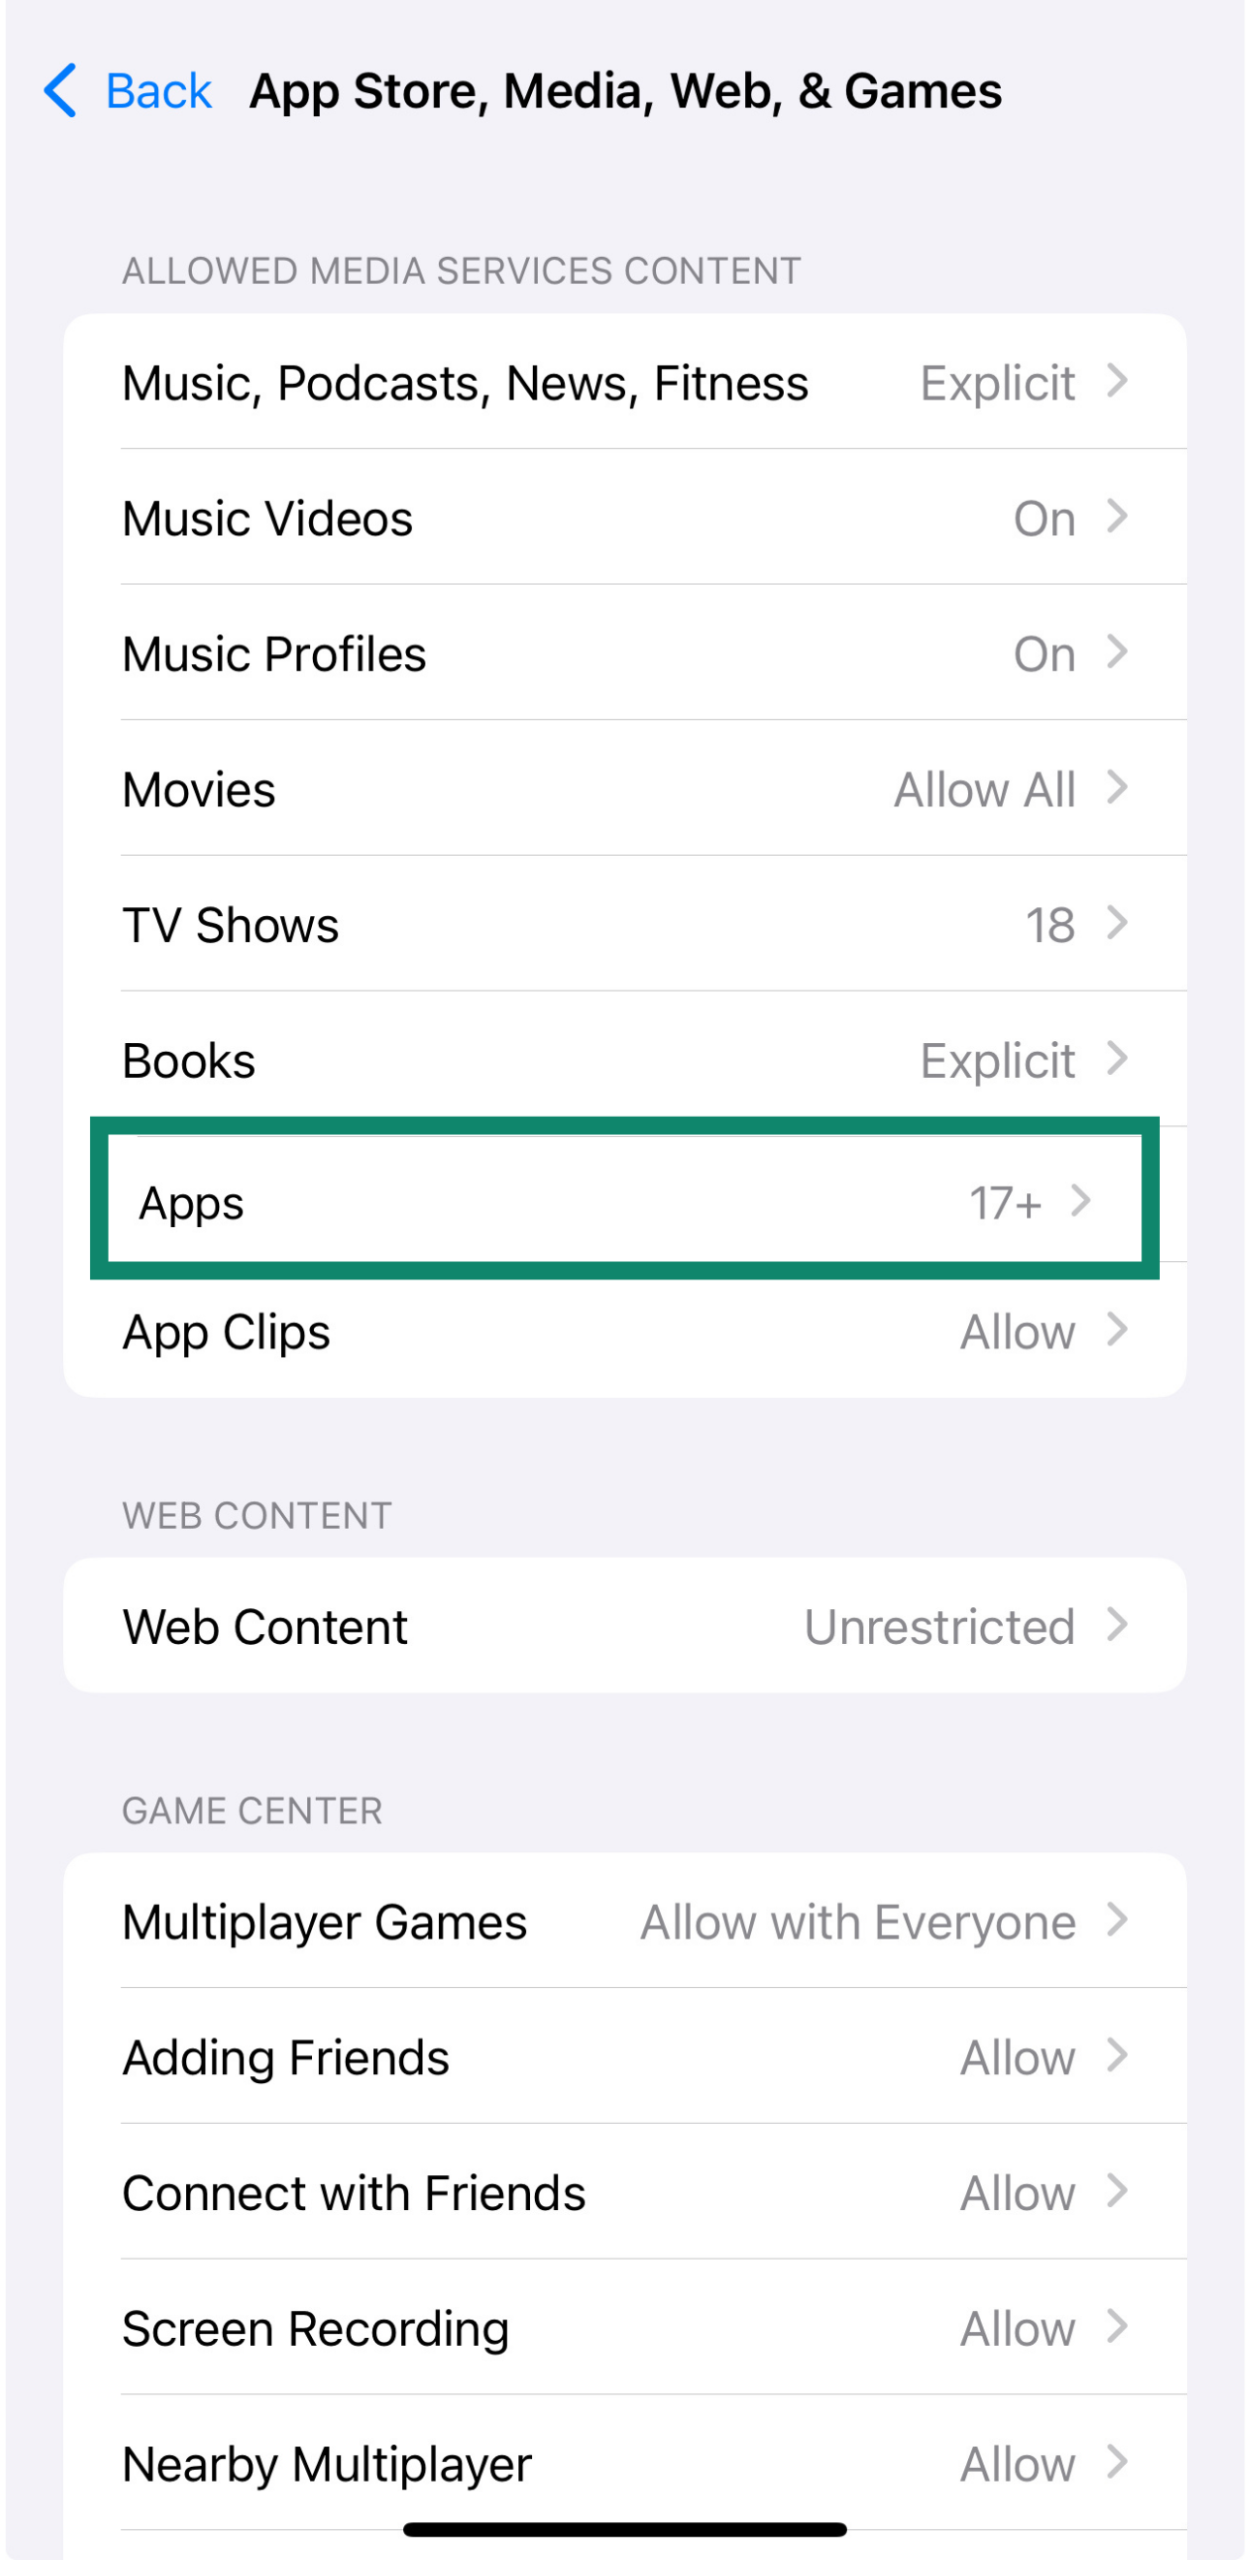
- From Content & Privacy Restrictions, tap App Store, Media, Web, & Games.
- Tap Web Content.
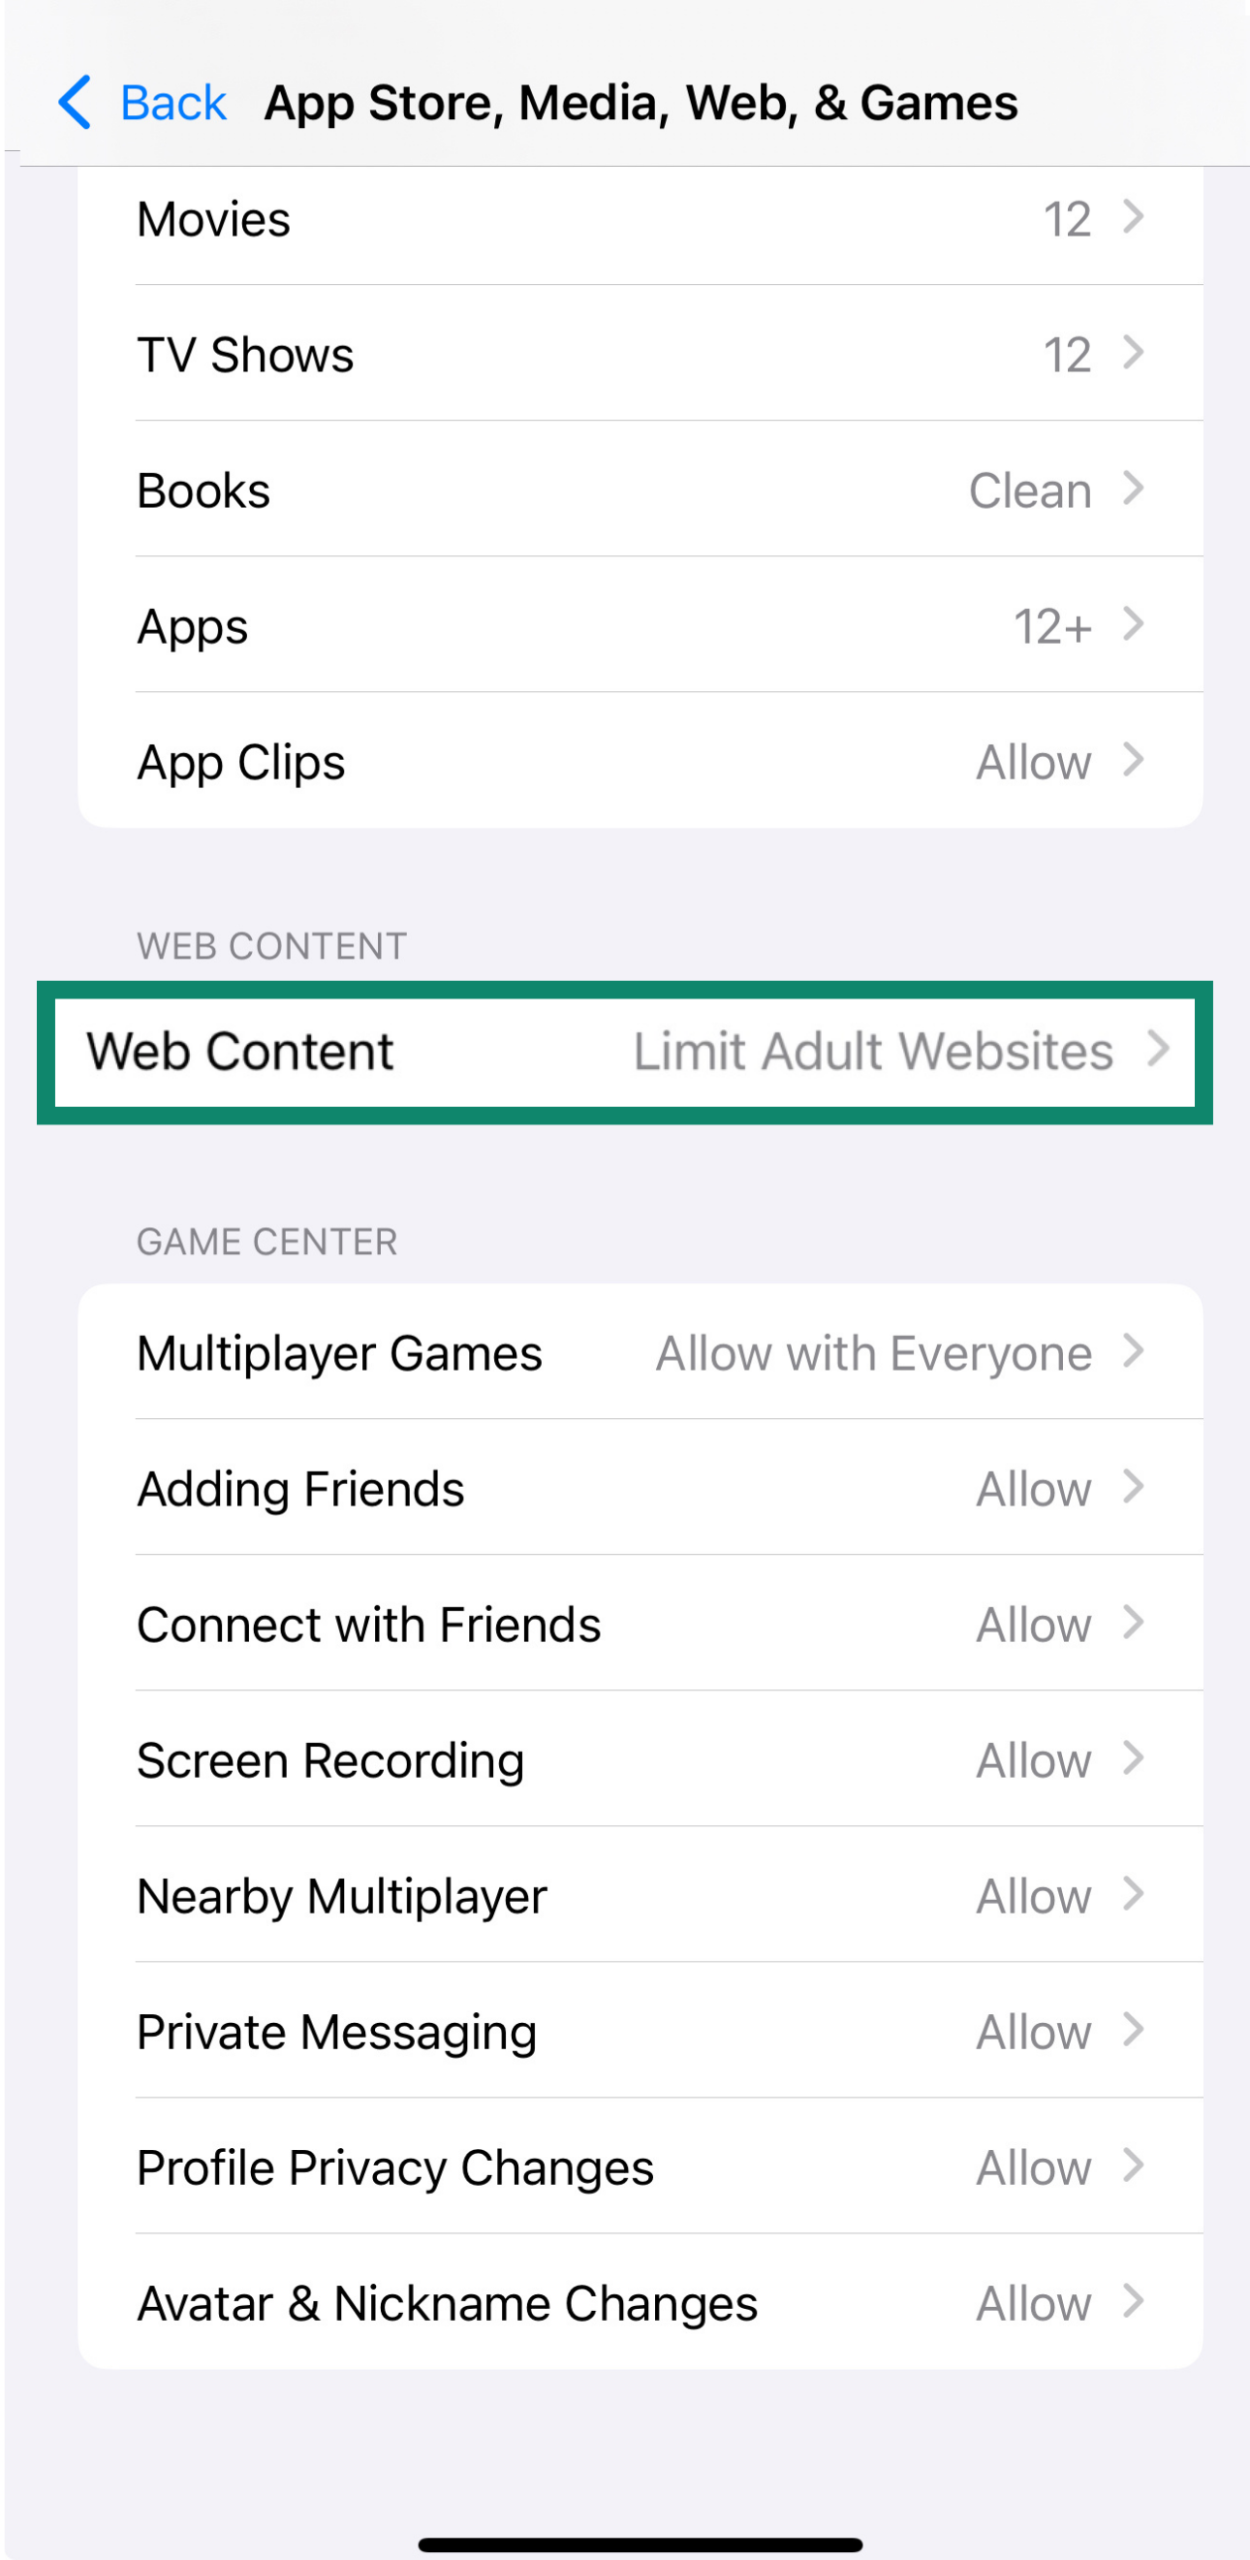
- Choose Unrestricted, Limit Adult Websites, or Only Approved Websites.
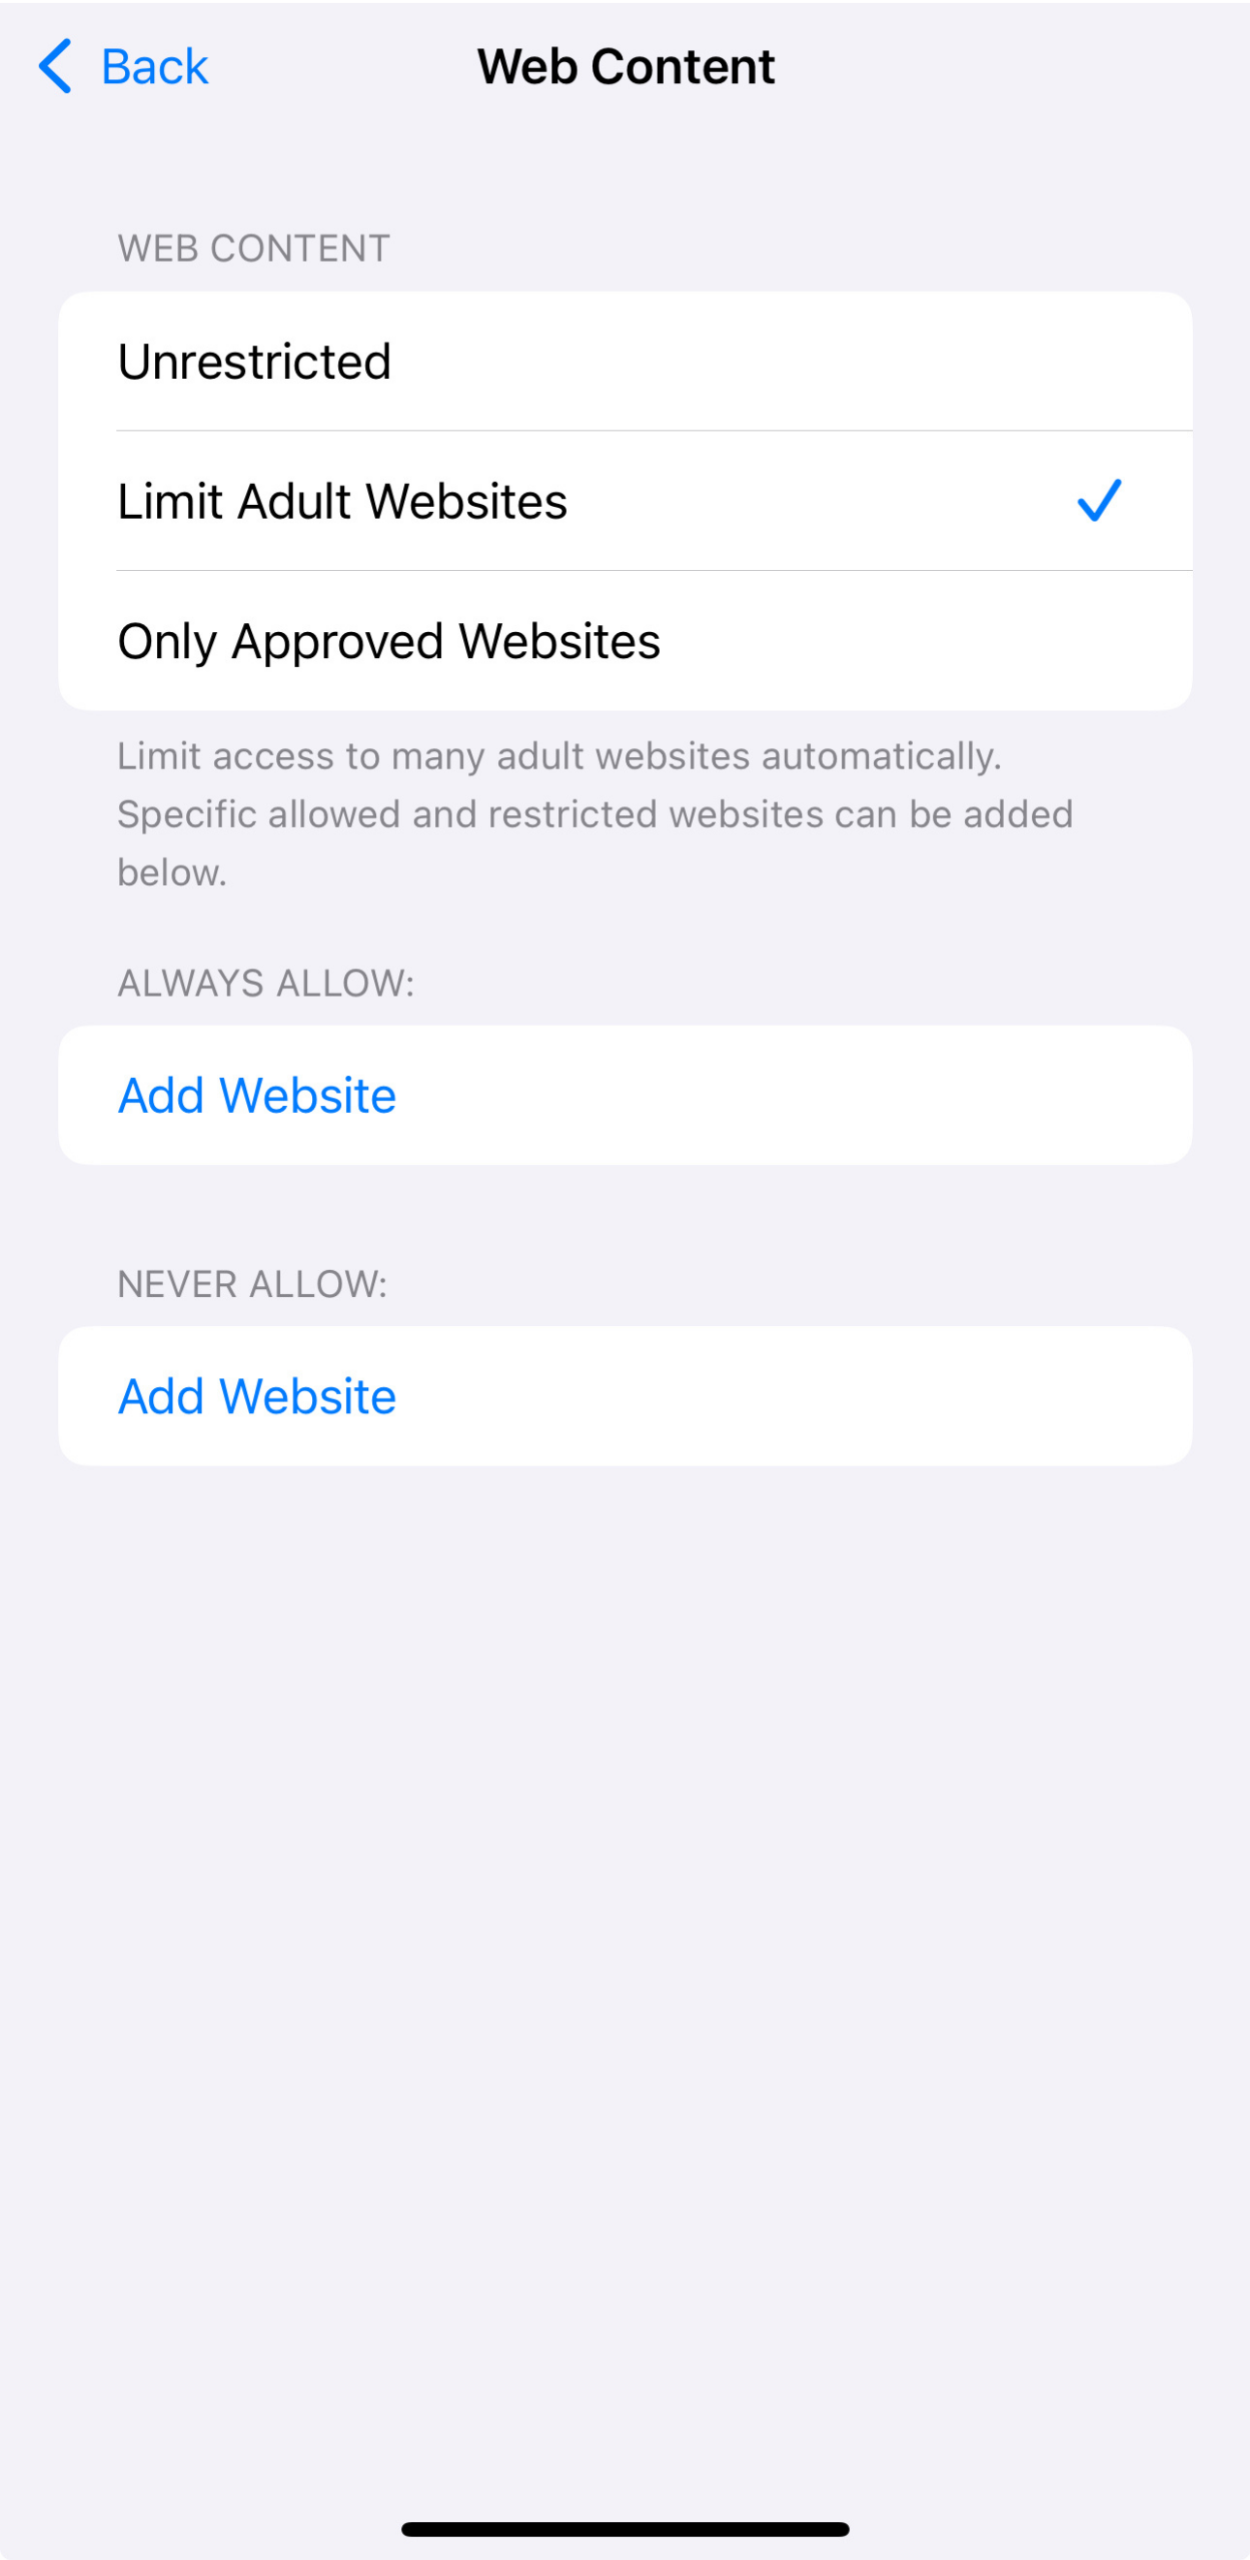
- If needed, you can manually add specific sites to the Never Allow or Always Allow lists for more control.
Using web protection like ExpressVPN’s Advanced Protection tools can also add an extra layer of protection by blocking malicious websites and trackers.
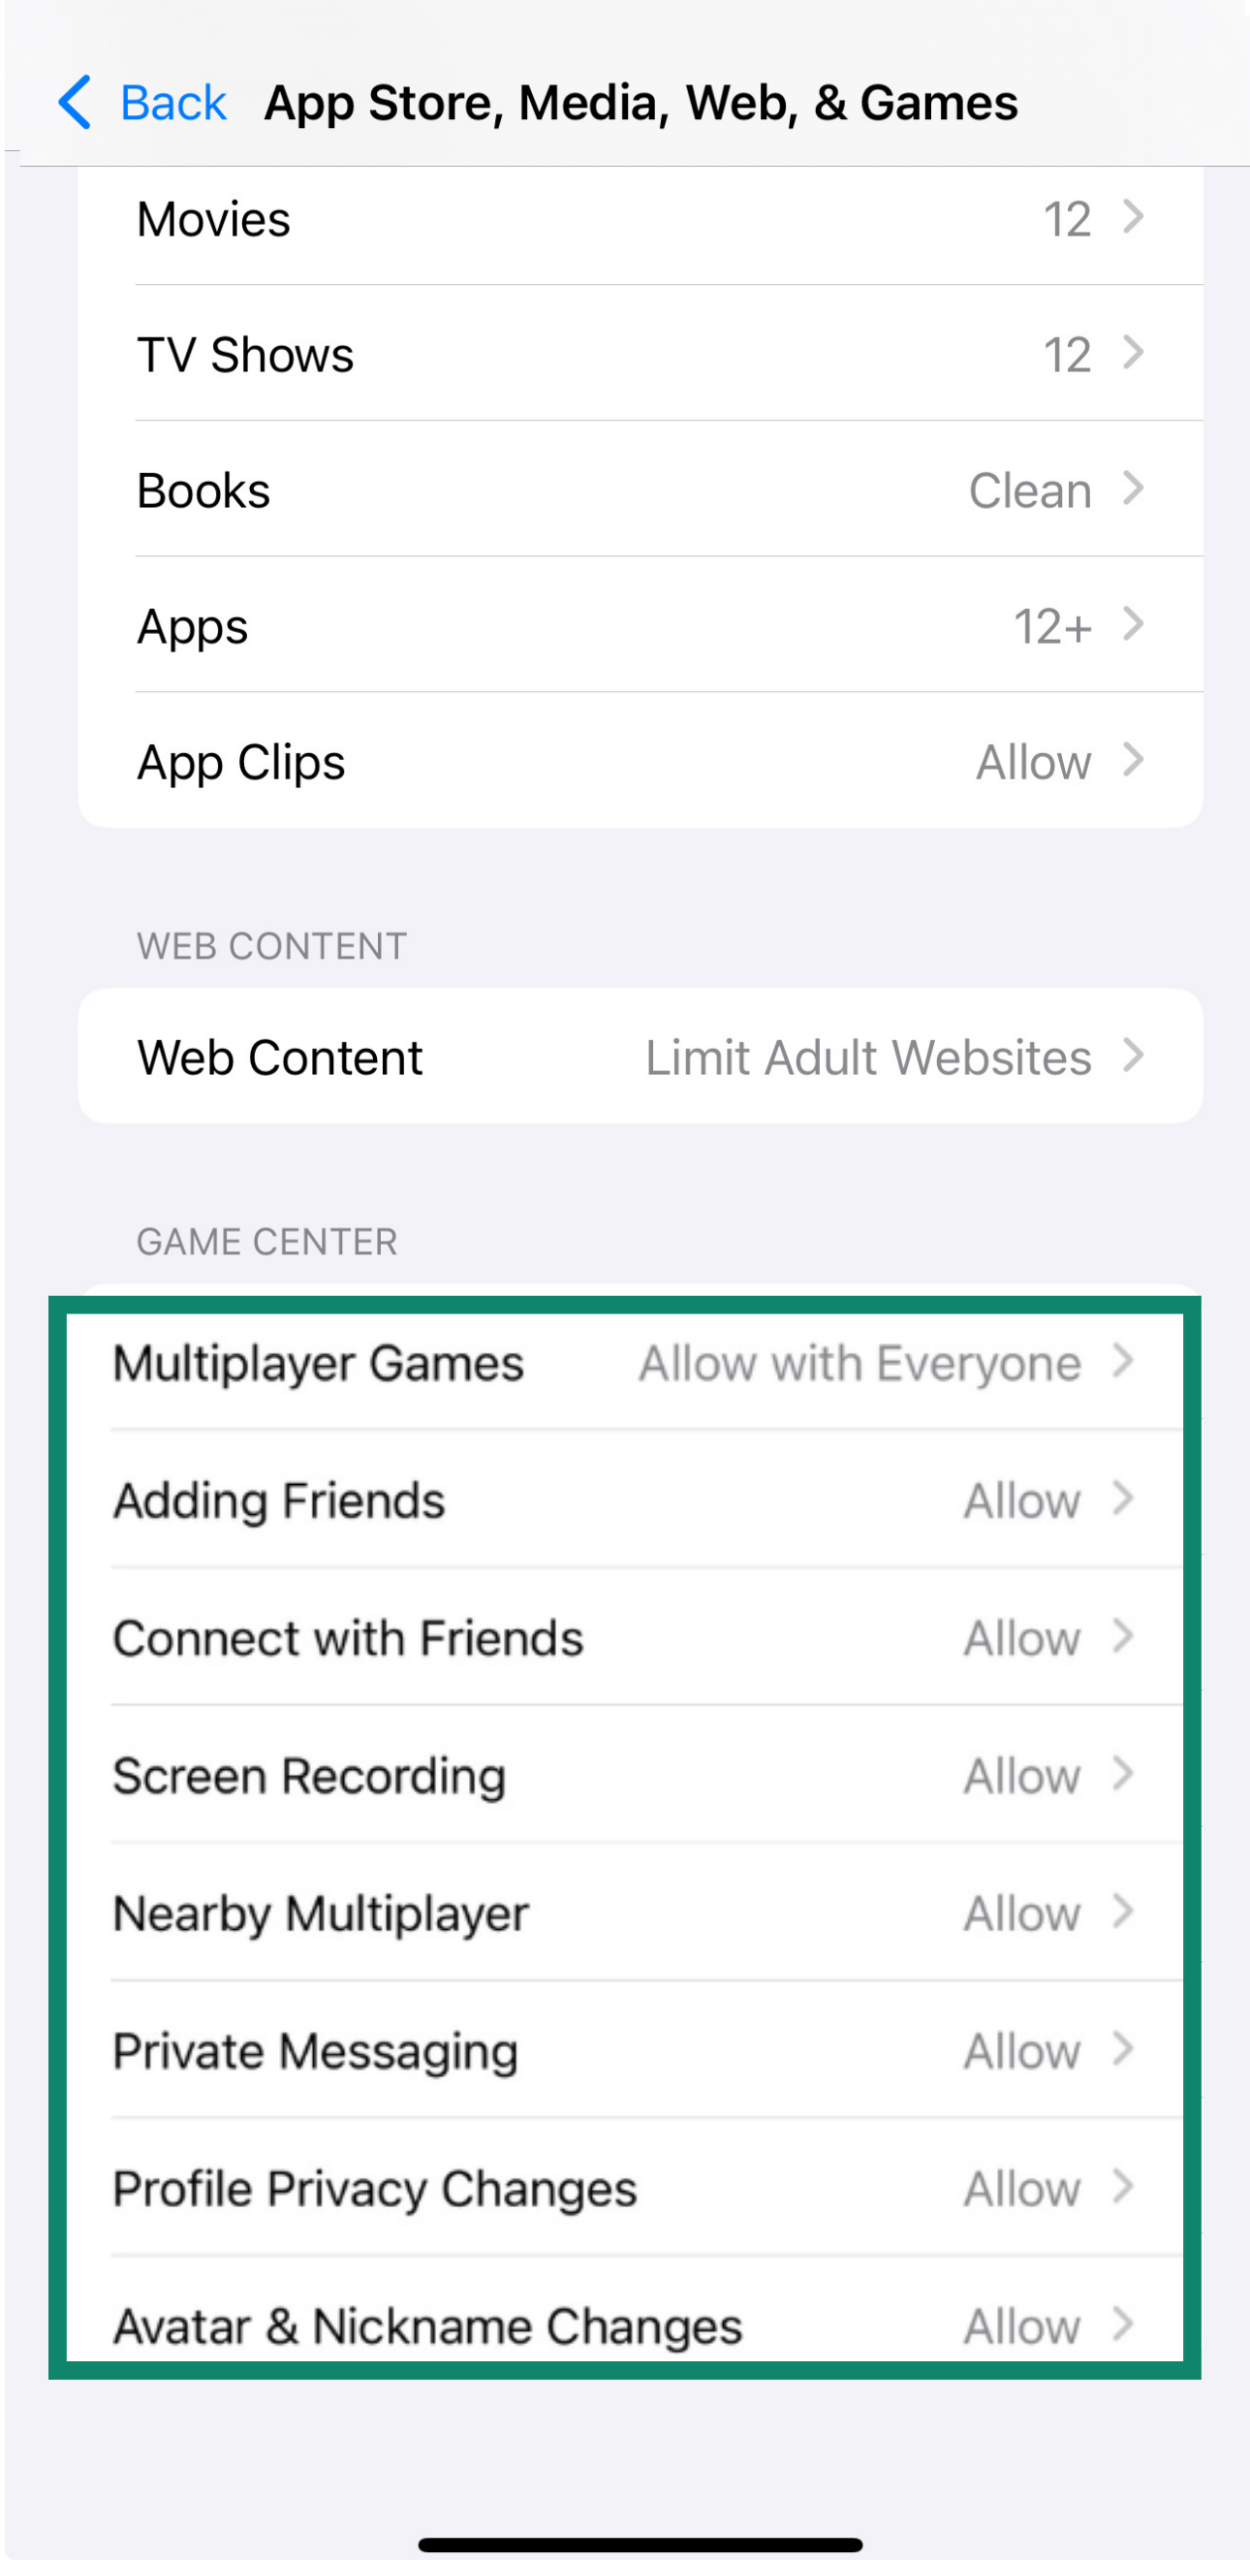
Restrict access to games and Game Center features
You can limit access to certain gaming features, like multiplayer, adding friends, or messaging, through Game Center restrictions.
- In Content & Privacy Restrictions, tap App Store, Media, Web & Games.
- You can restrict Game Center features by clicking one by one and choosing Don’t Allow.
Hide built-in apps
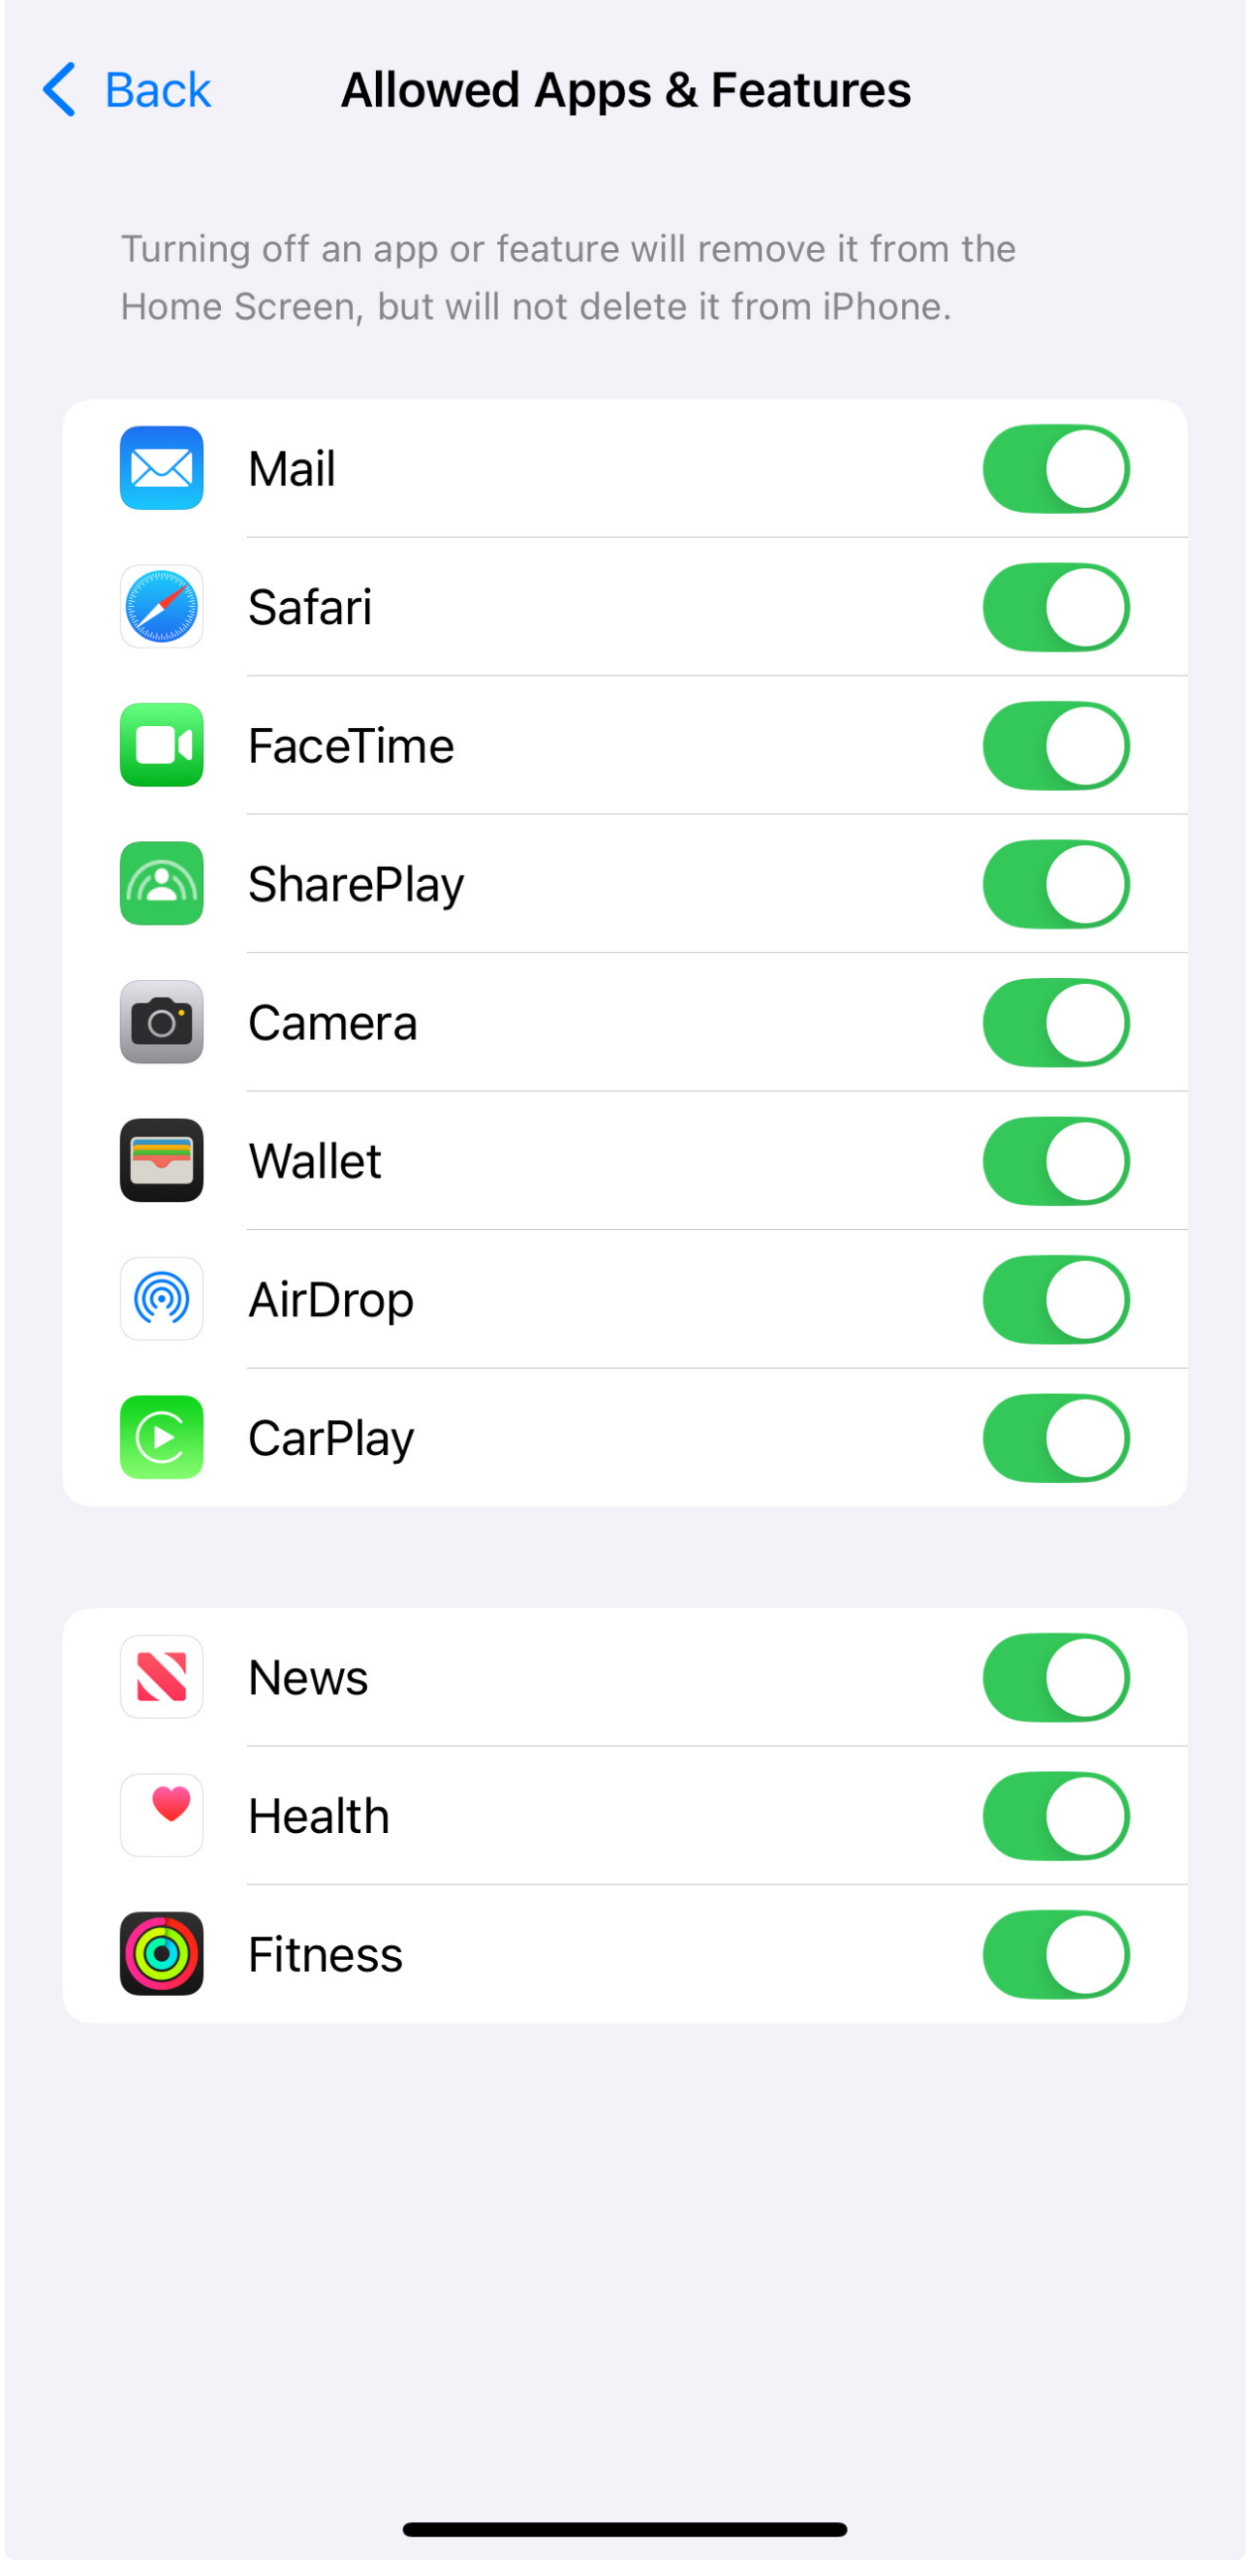
If there are built-in apps you don’t want your child to use, like Safari, Camera, or FaceTime, you can turn them off entirely.
- From Content & Privacy Restrictions, tap Allowed Apps & Features.
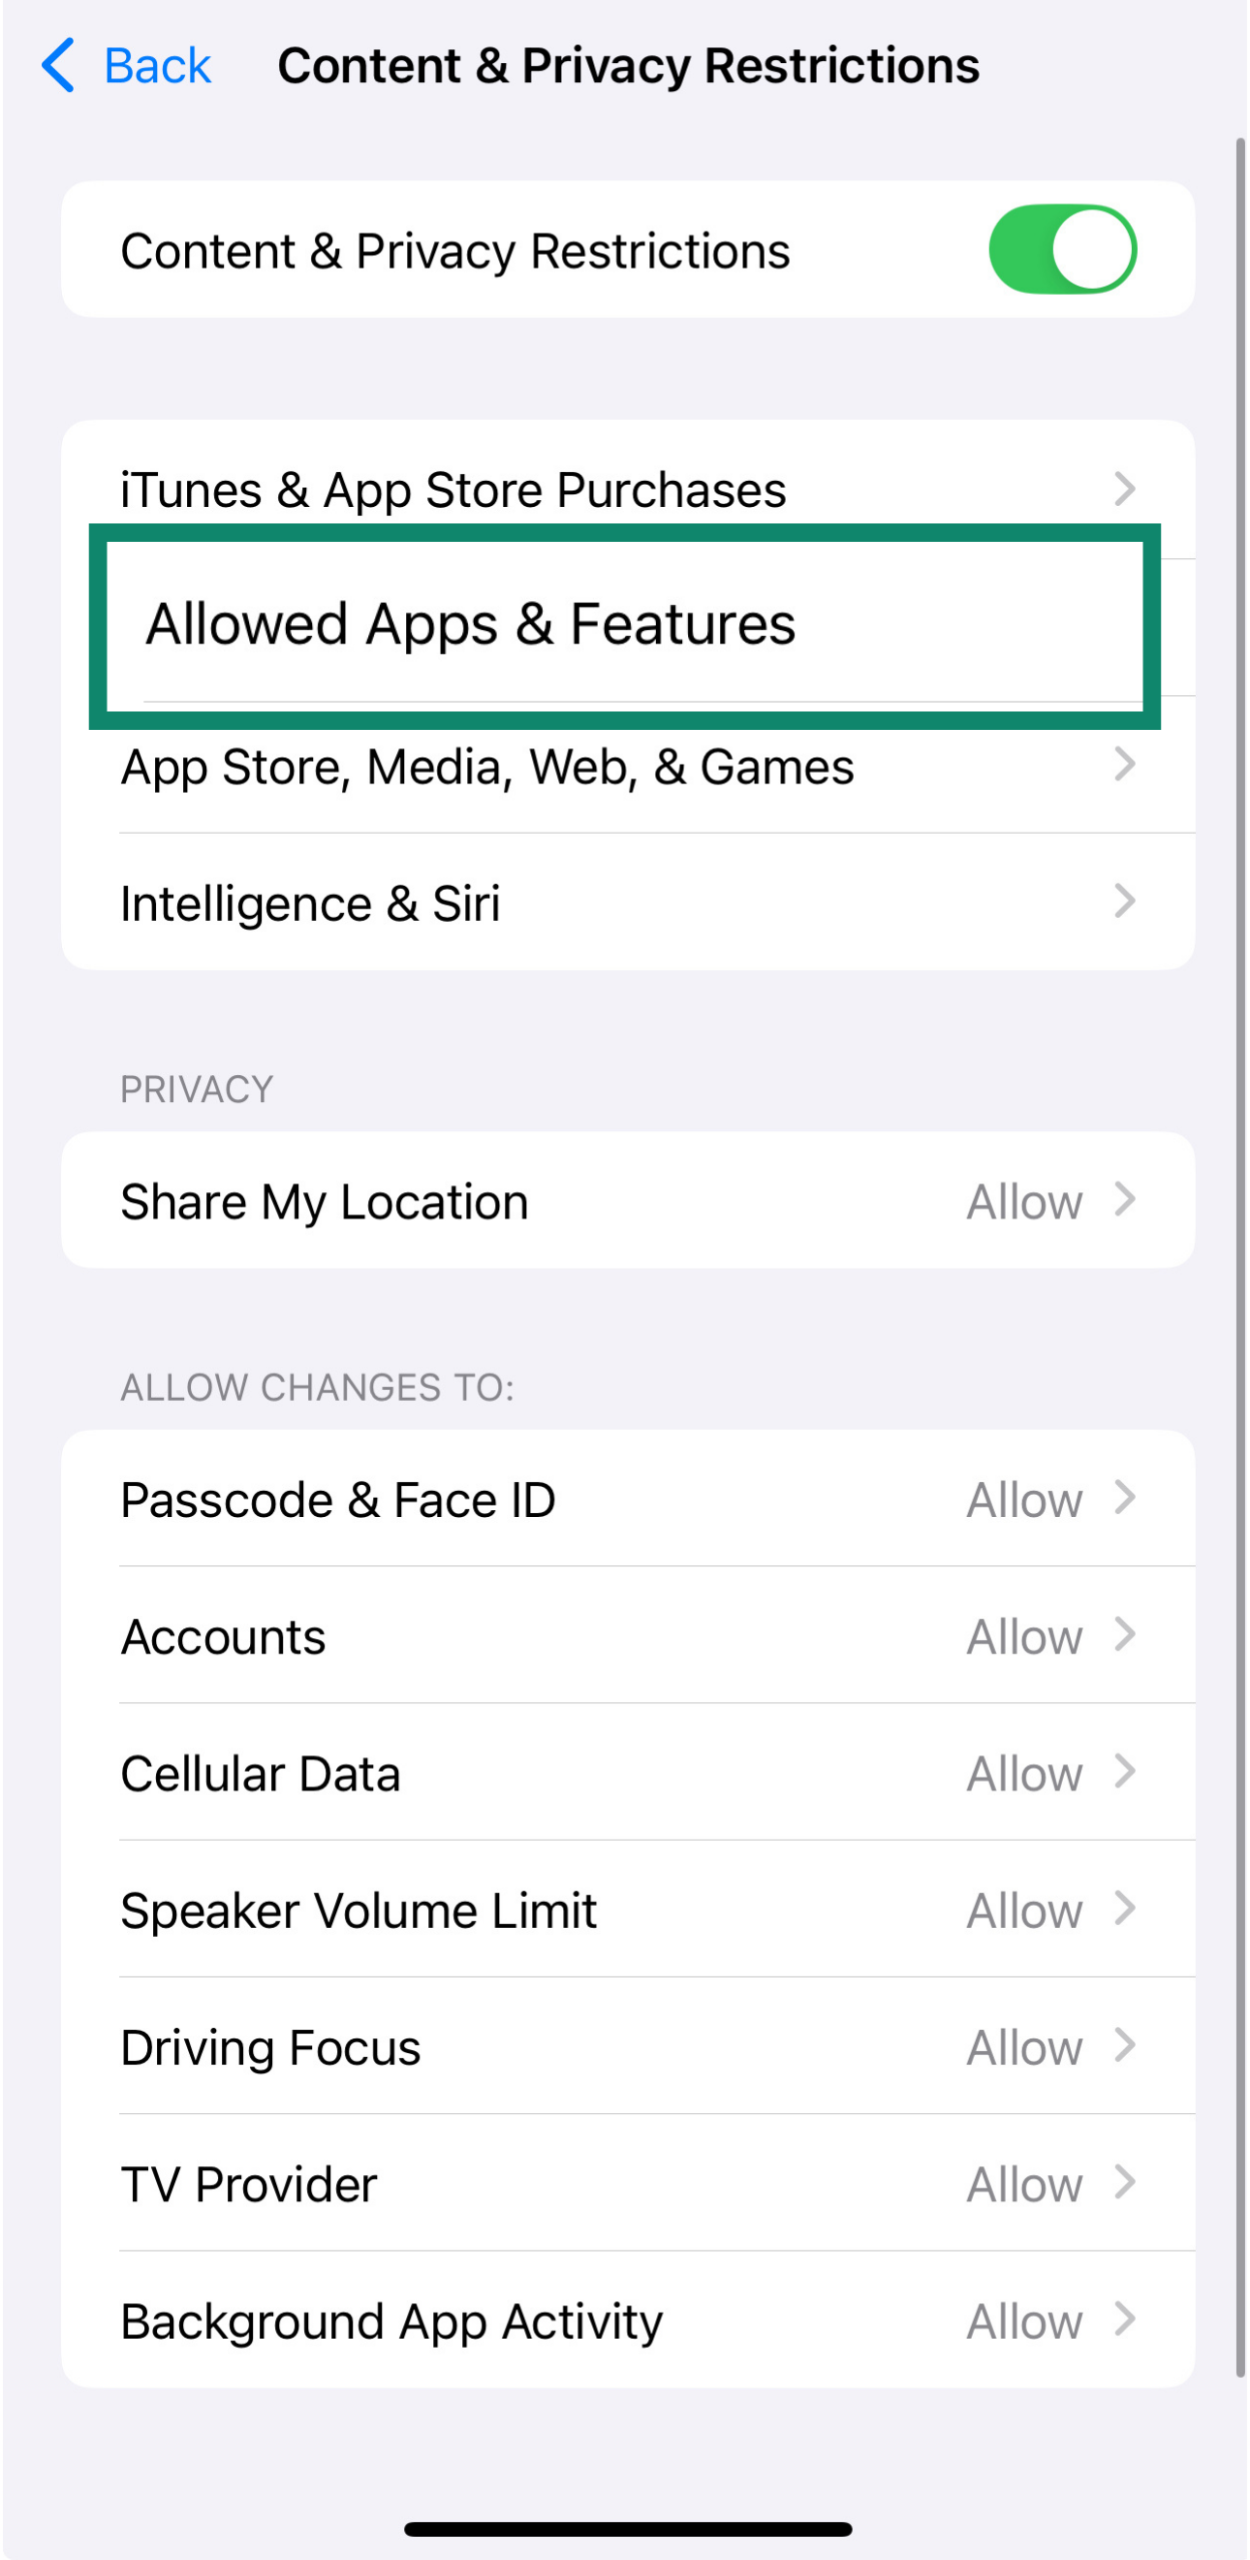
- Toggle off any built-in apps you want to hide, such as Safari, FaceTime, or Camera.
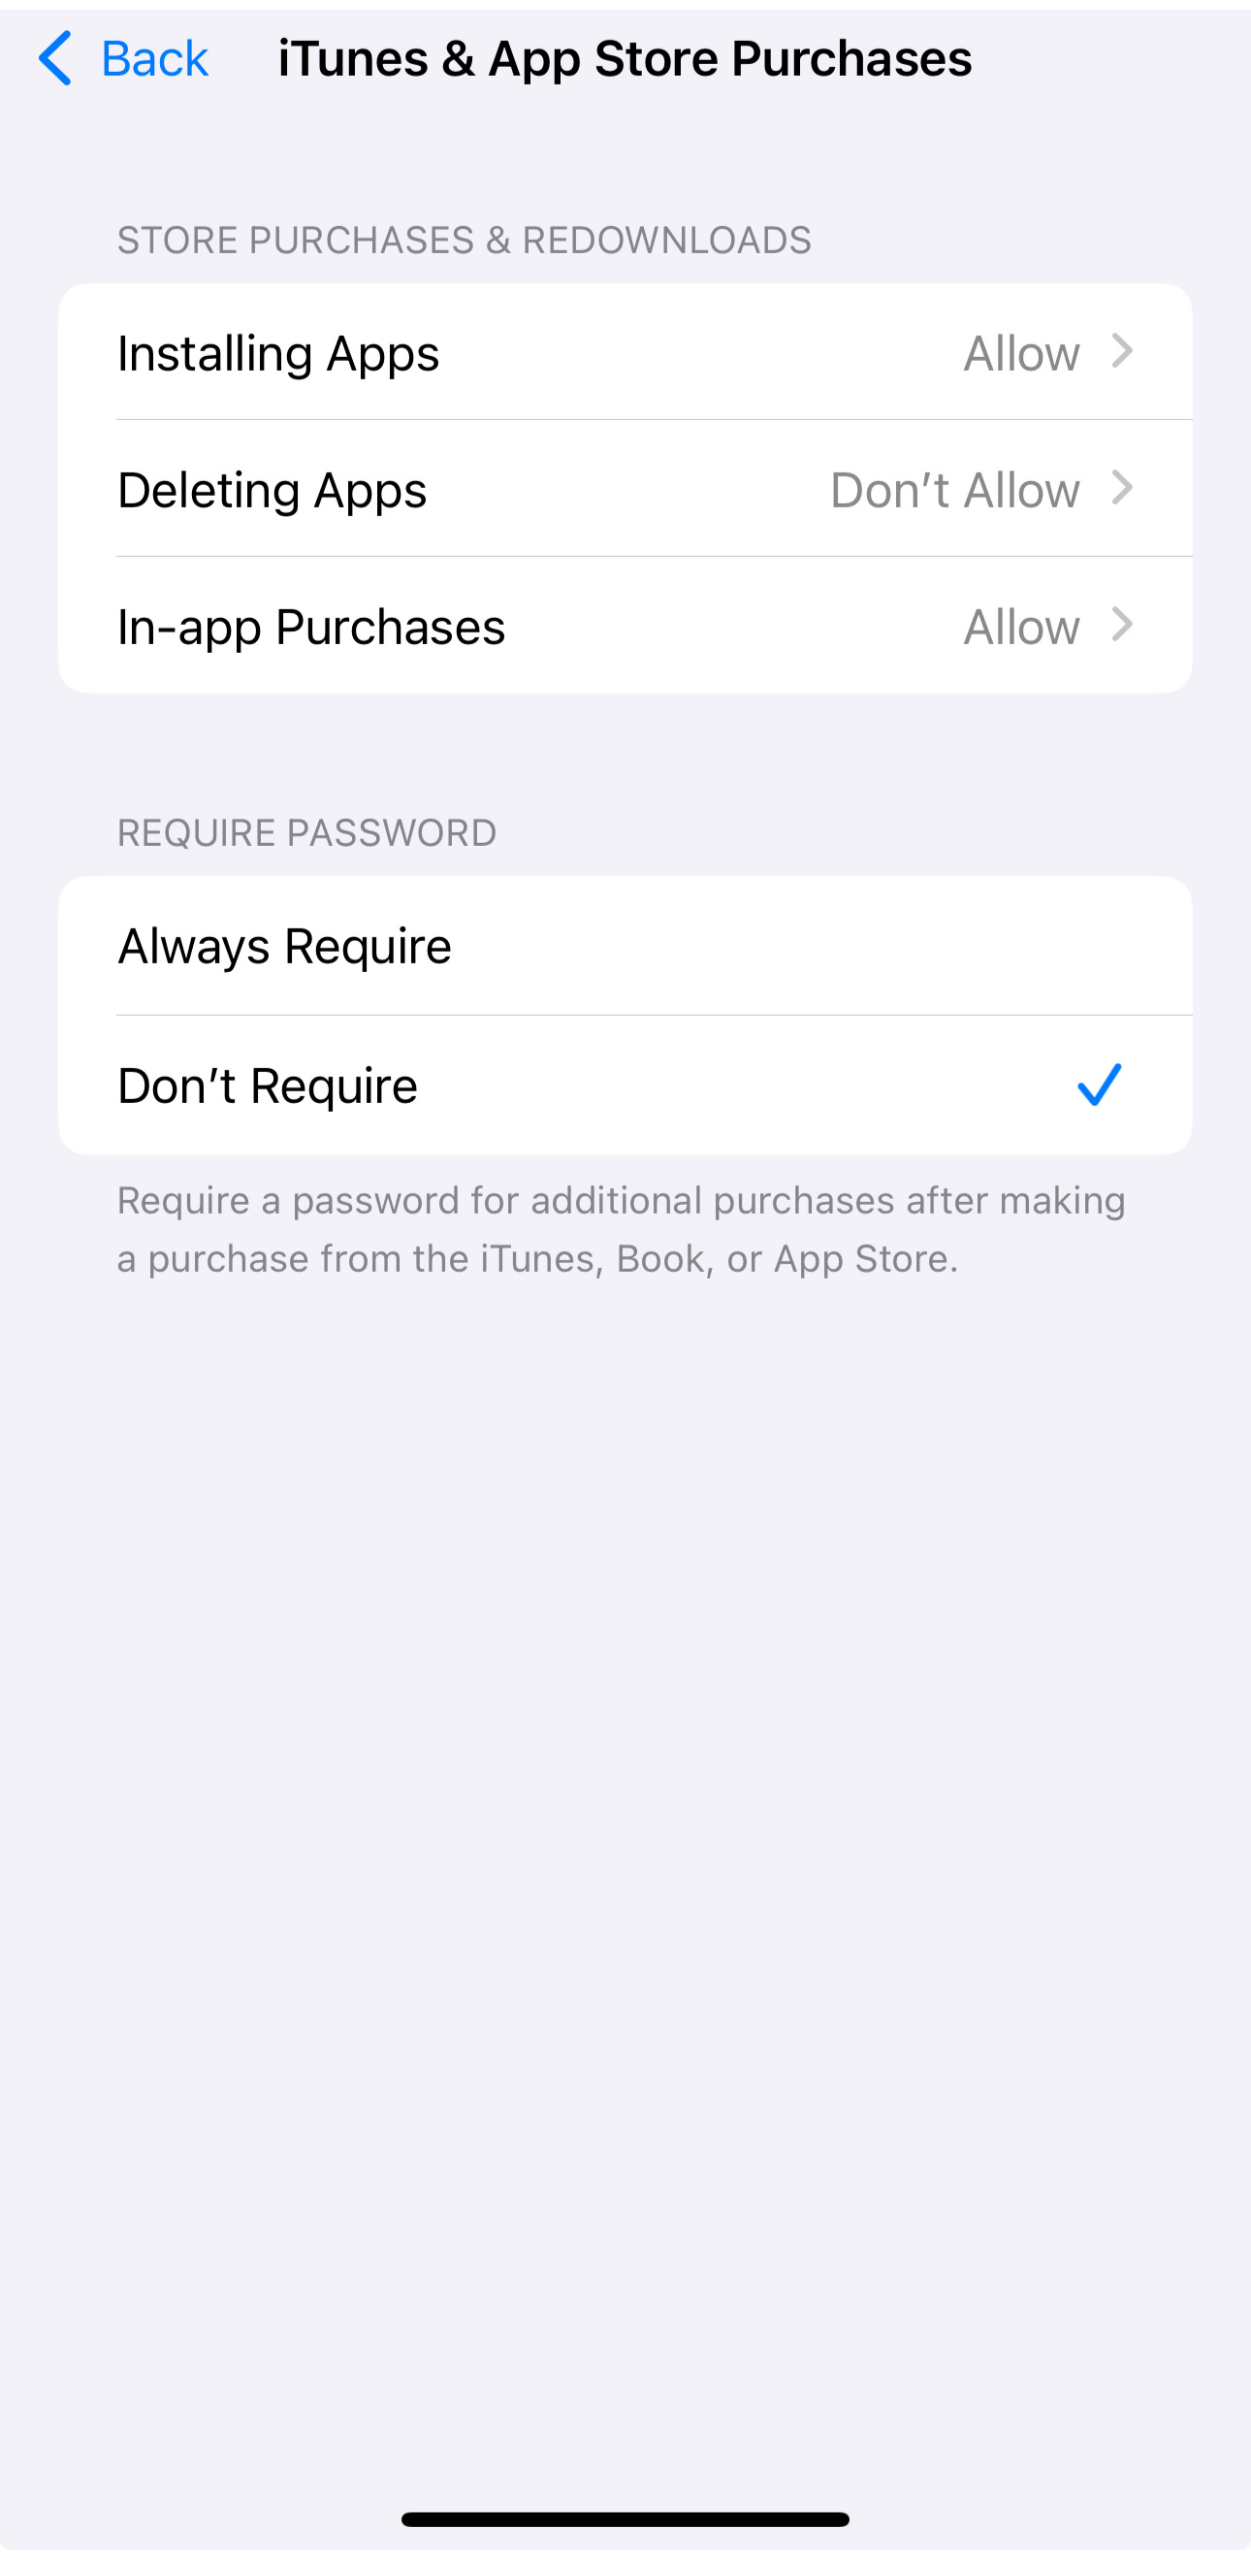
Prevent App Store purchases
- From Content & Privacy Restrictions, tap iTunes & App Store Purchases.
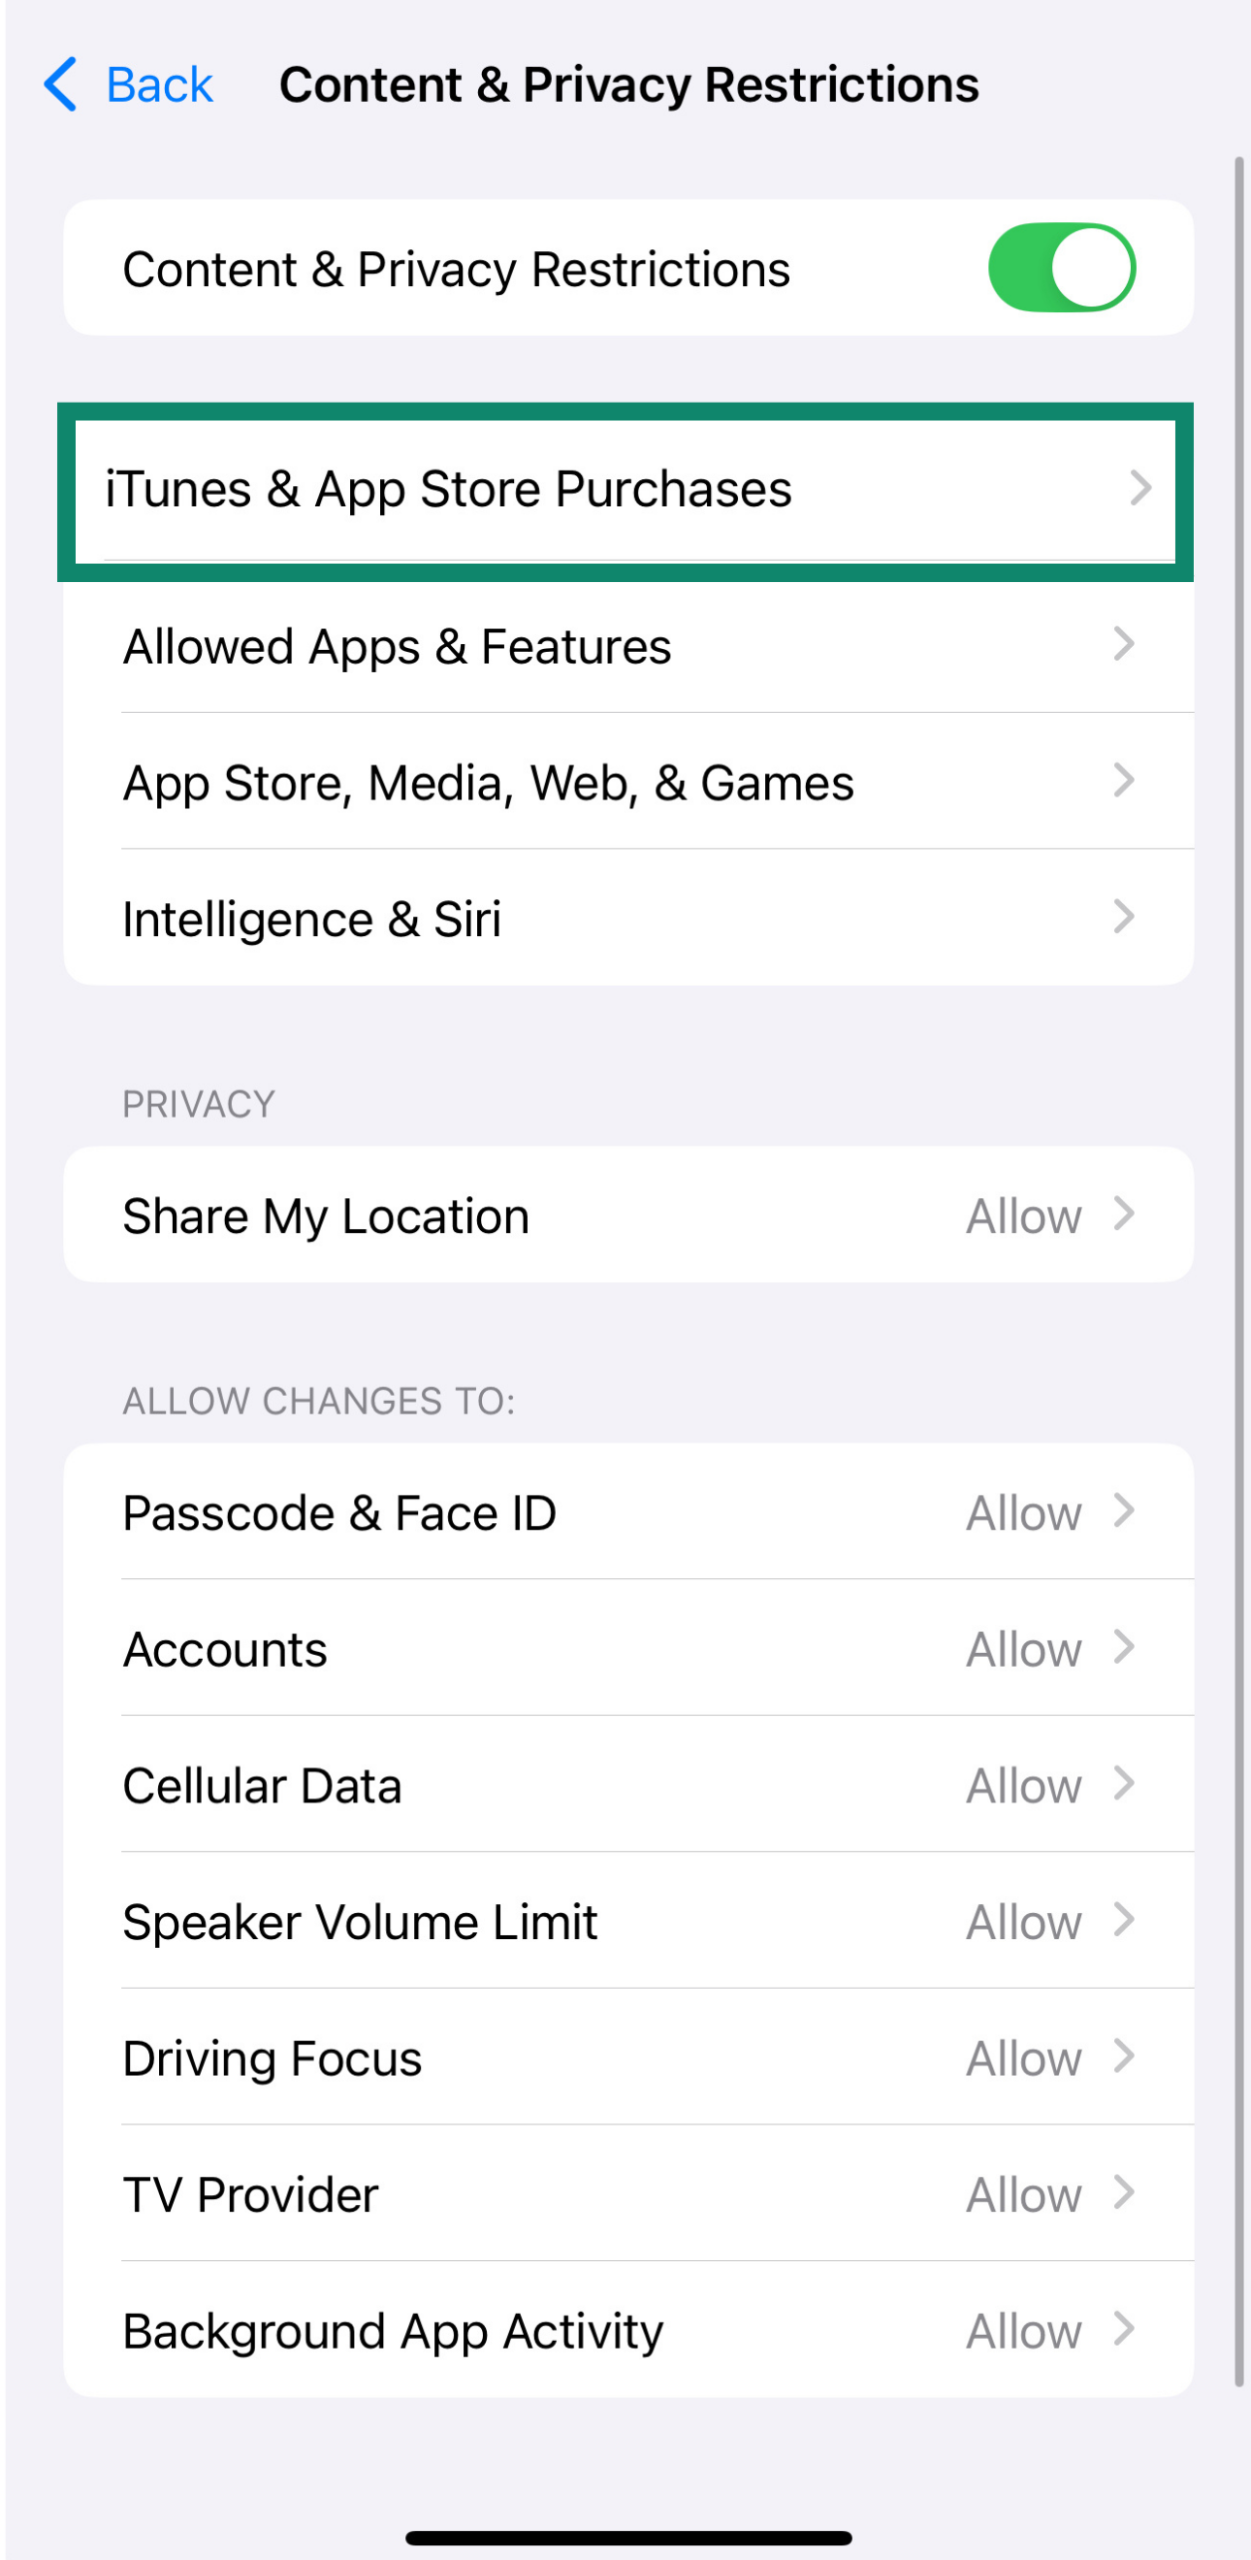
- Click on any option you don’t want your child to have access to (like Installing Apps, Deleting Apps, or In-App Purchases) and set them to Don’t Allow.
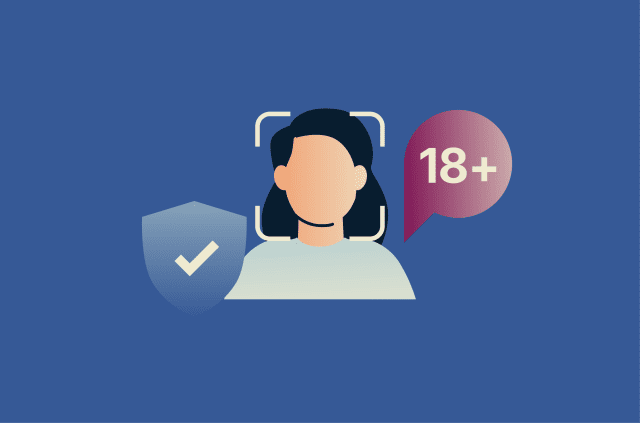
Set age restrictions for apps and media
To filter apps and media by age rating:
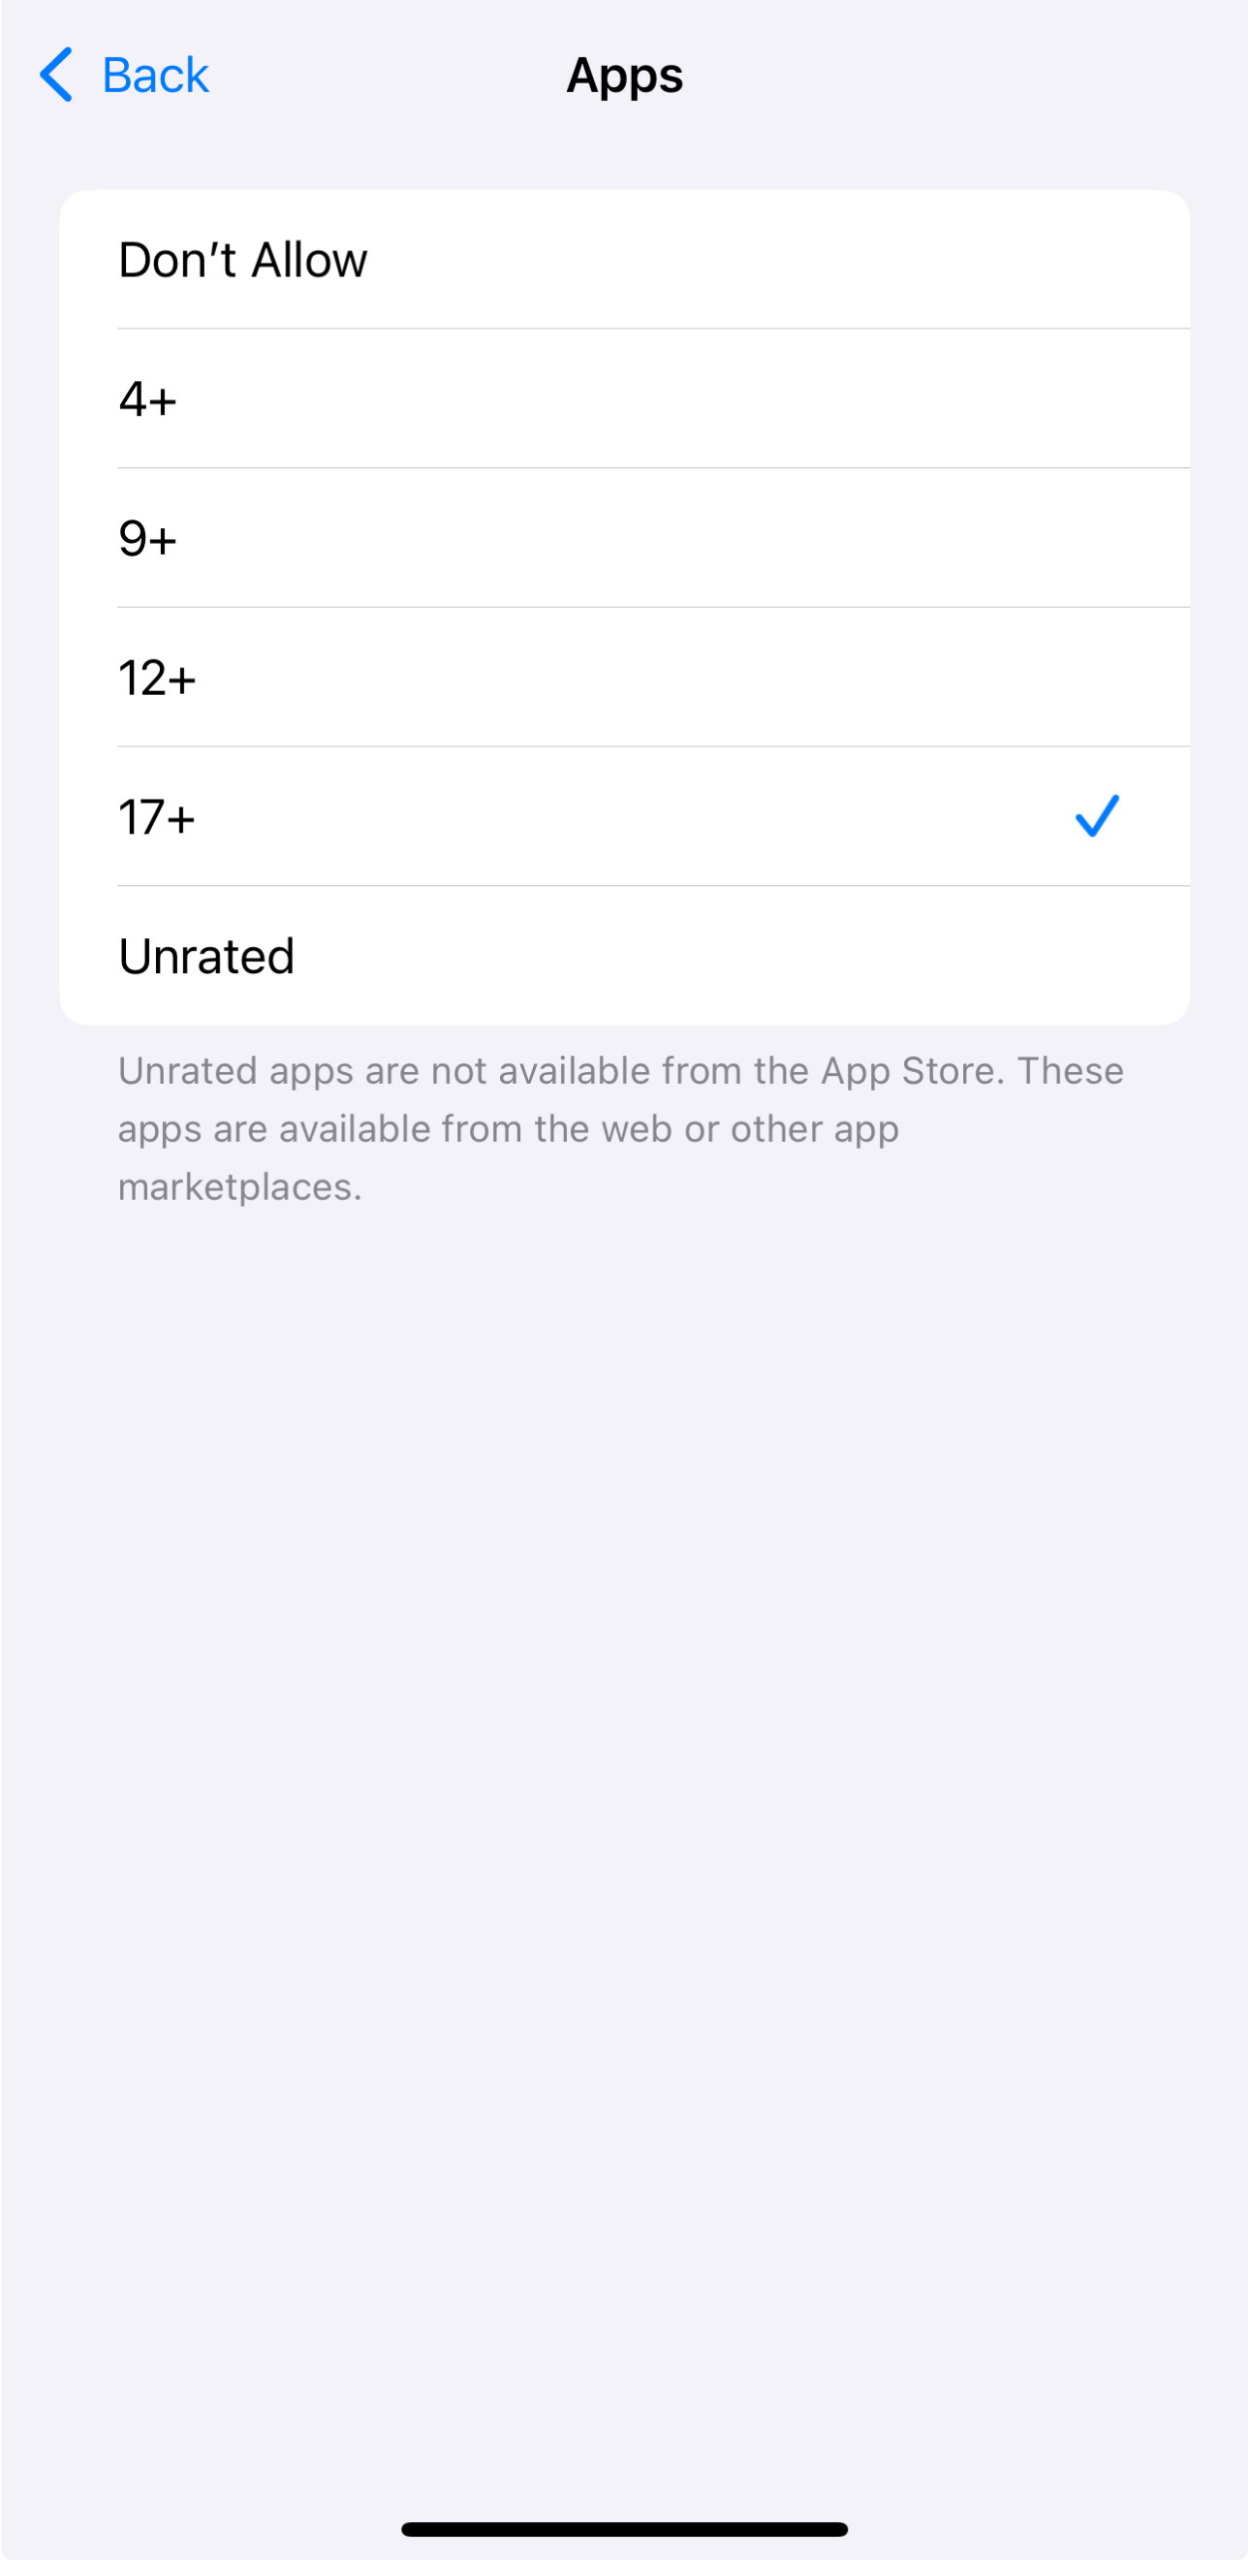
- From Content & Privacy Restrictions, tap on App Store, Media, Web, & Games.
- Select a category, like Apps, TV Shows, Movies, or Books.
- Select the appropriate age rating for your child.
How to monitor and adjust parental controls over time
Setting up controls is just the start. To keep them effective, you’ll want to check in regularly and adjust them as your child’s needs change.
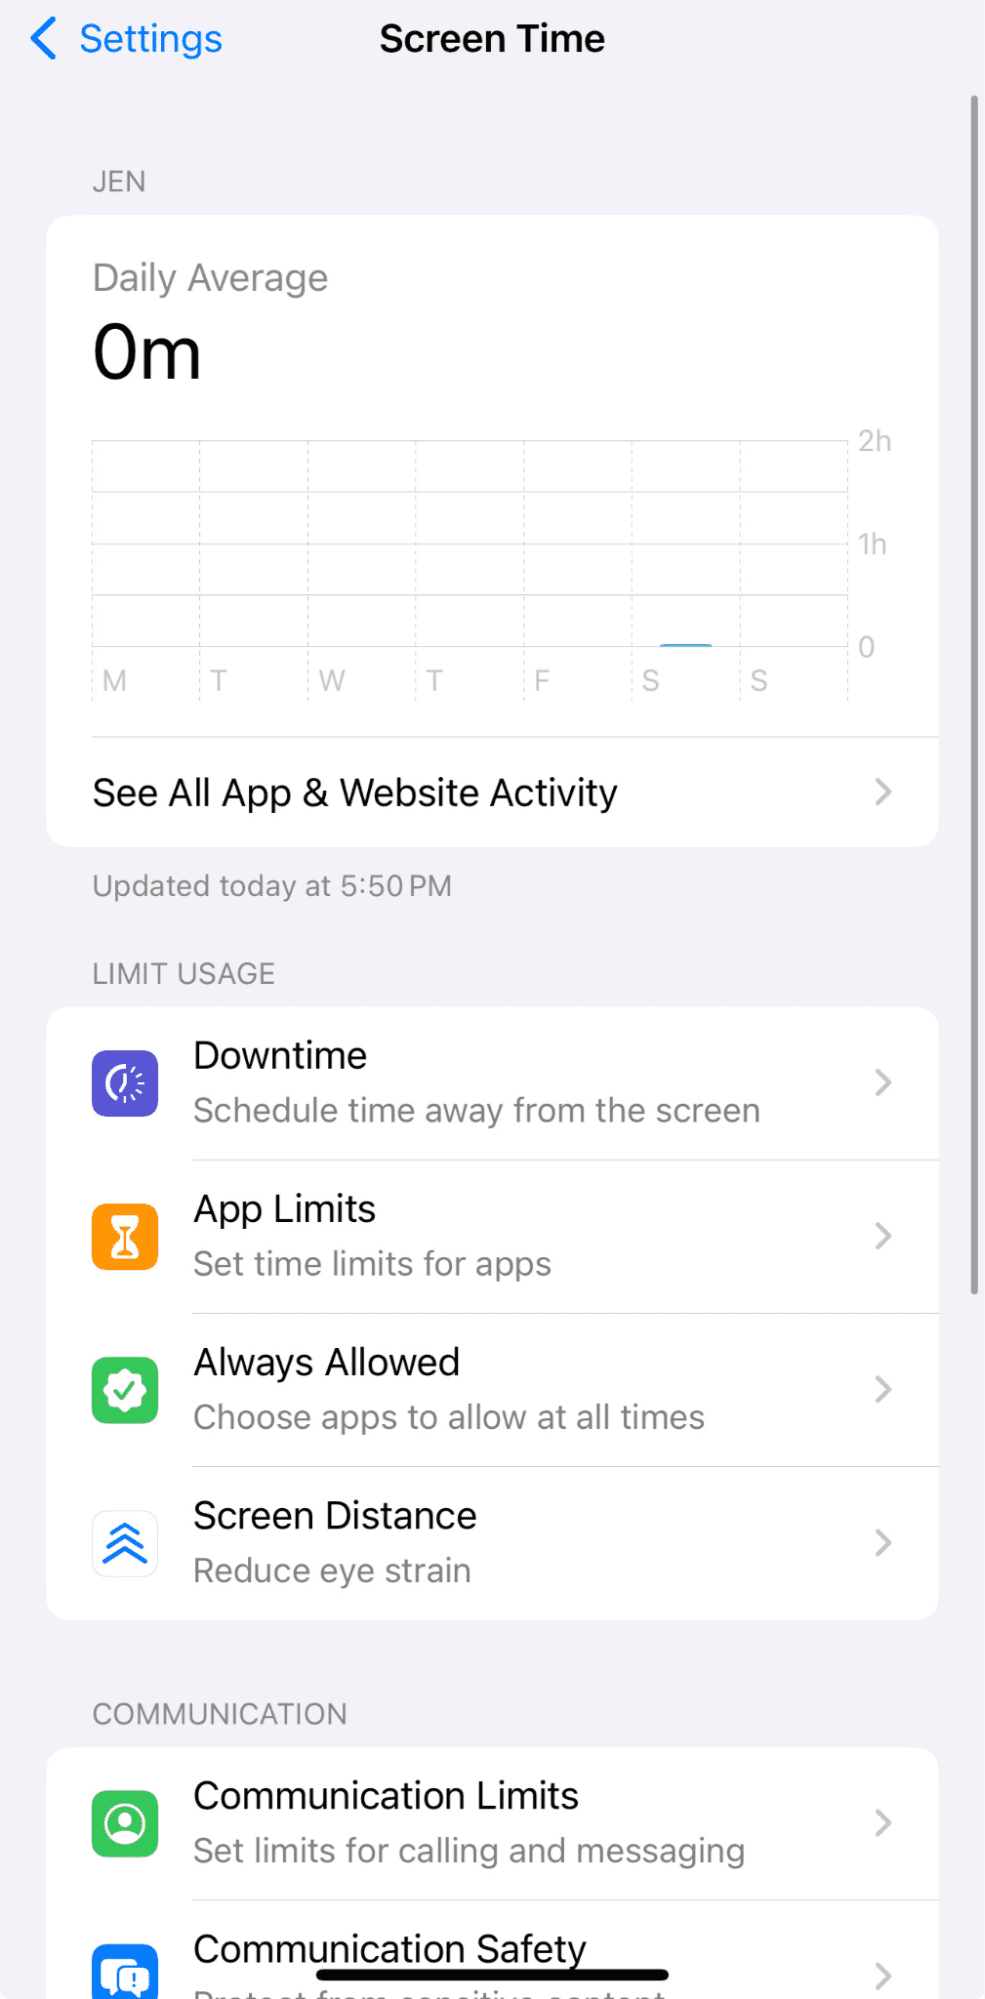
Reviewing Screen Time reports
Screen Time automatically tracks how the device is used, giving you a clear picture of where time is being spent.
- In Settings, go to Family and tap your child’s name, then tap Screen Time.
- Tap See All App & Website Activity.
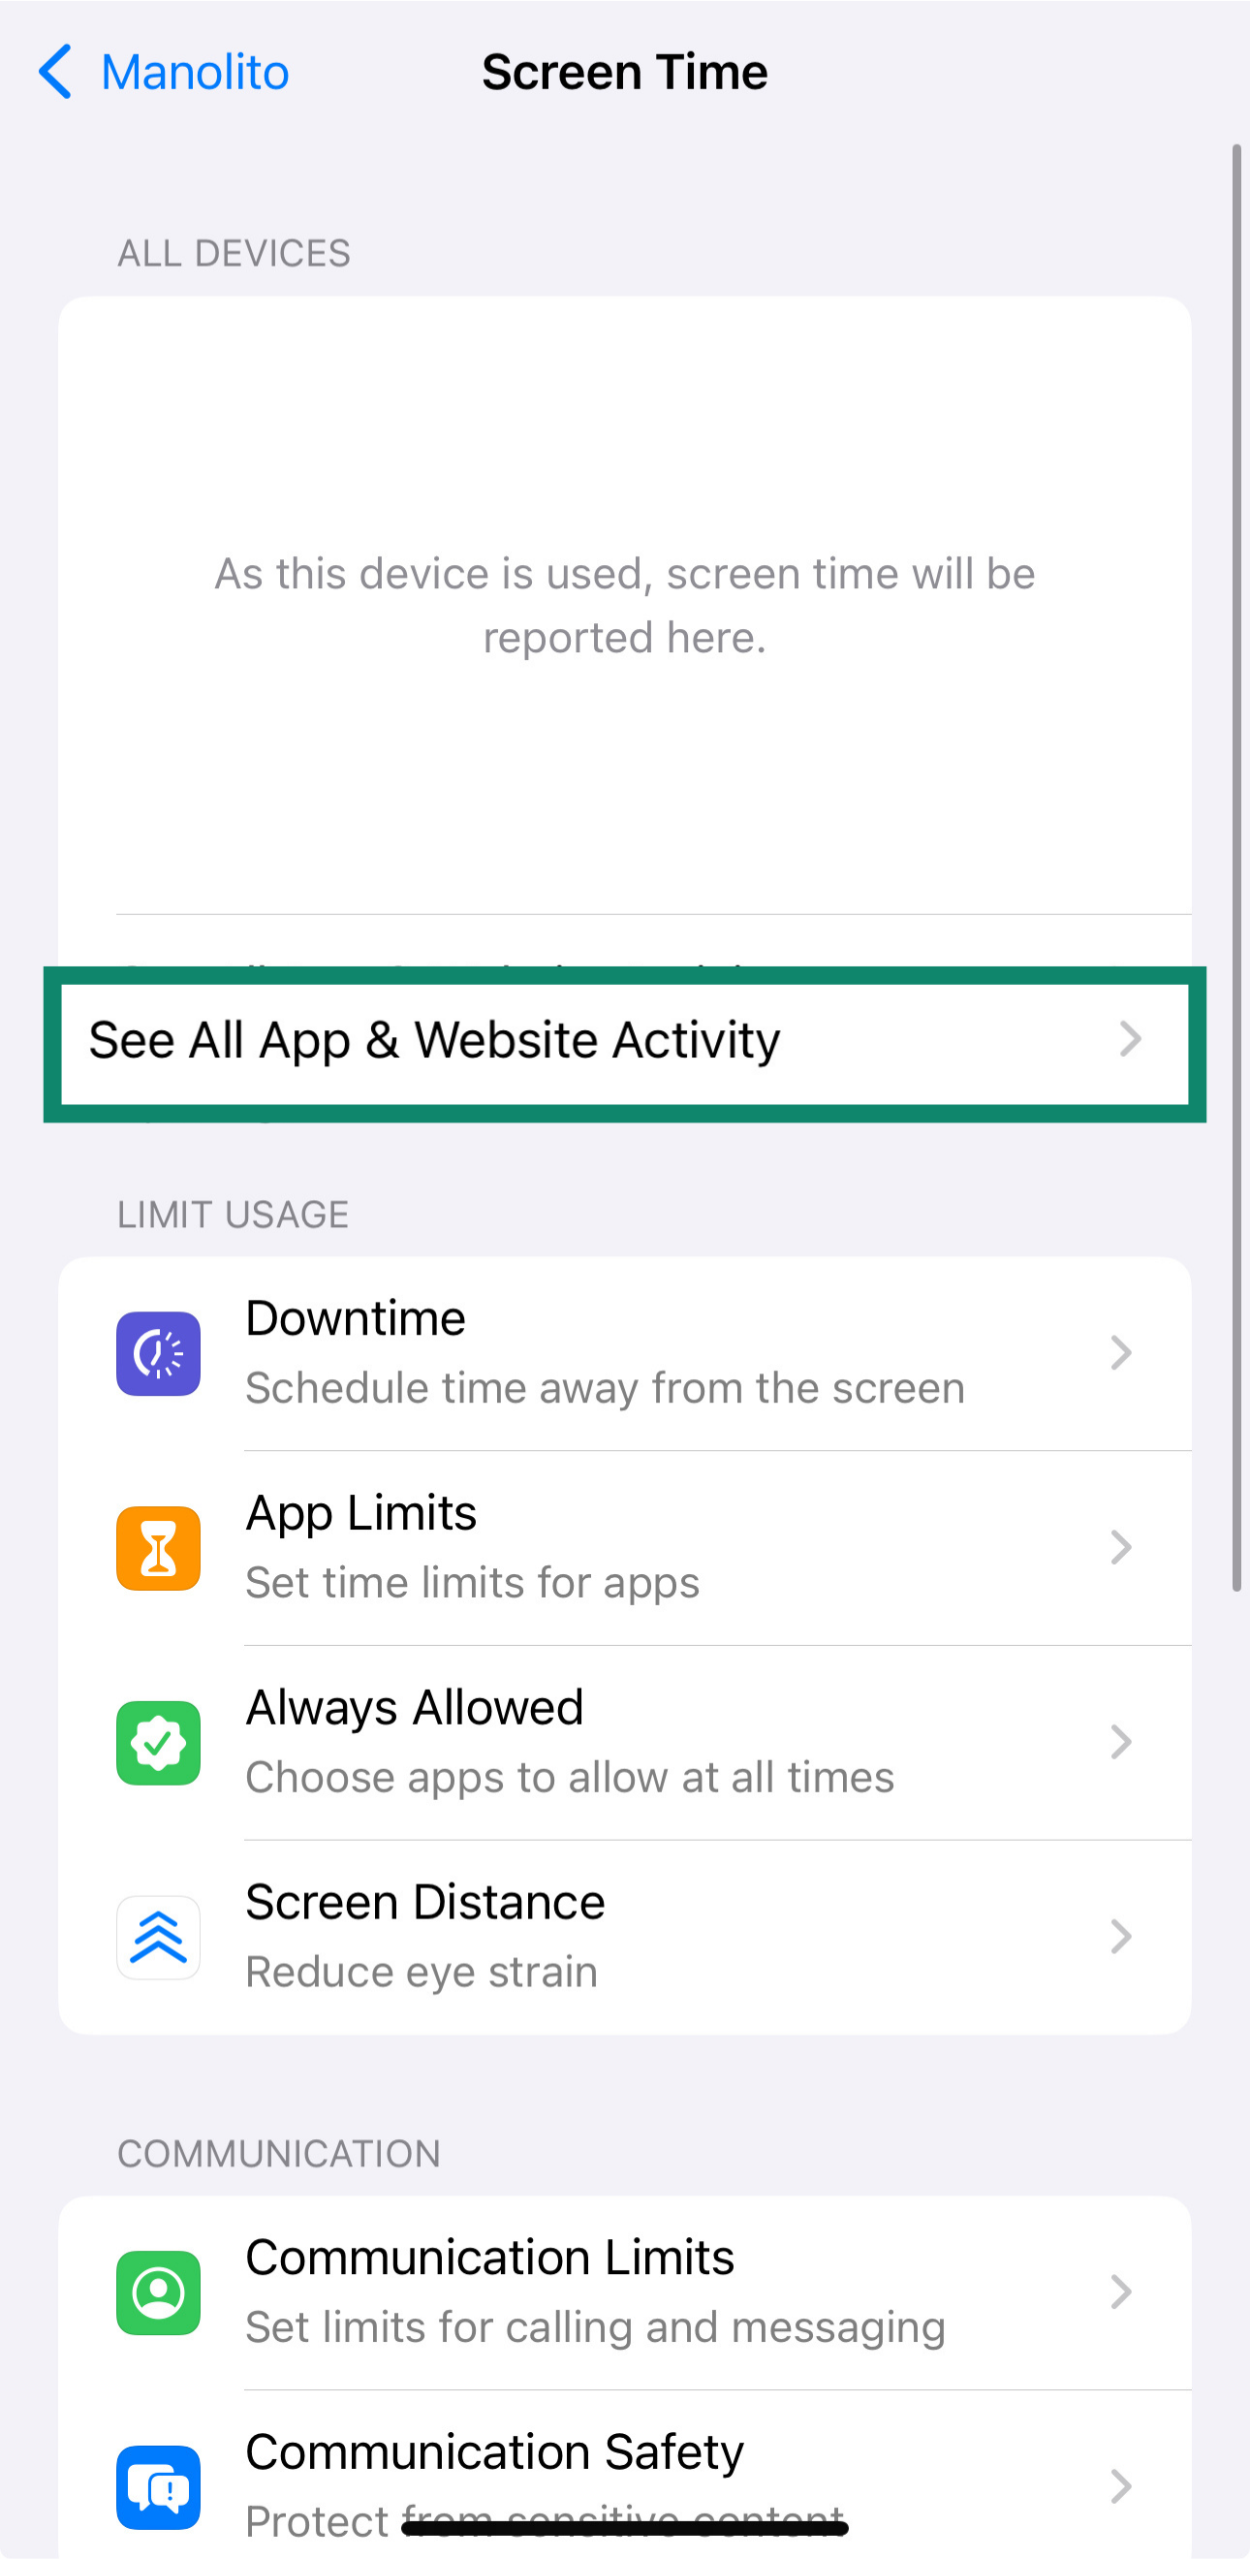
You’ll see daily and weekly breakdowns of your child’s activity by app and category. It’s a simple way to spot habits and decide if any limits need adjusting.
Location sharing and privacy
Even with parental controls enabled, your child might still be sharing their location, sometimes without realizing it. Apps and contacts can broadcast where they are. It’s important to review these settings to help protect their privacy.
To check which apps have access to location:
- Go to Settings > Privacy & Security.

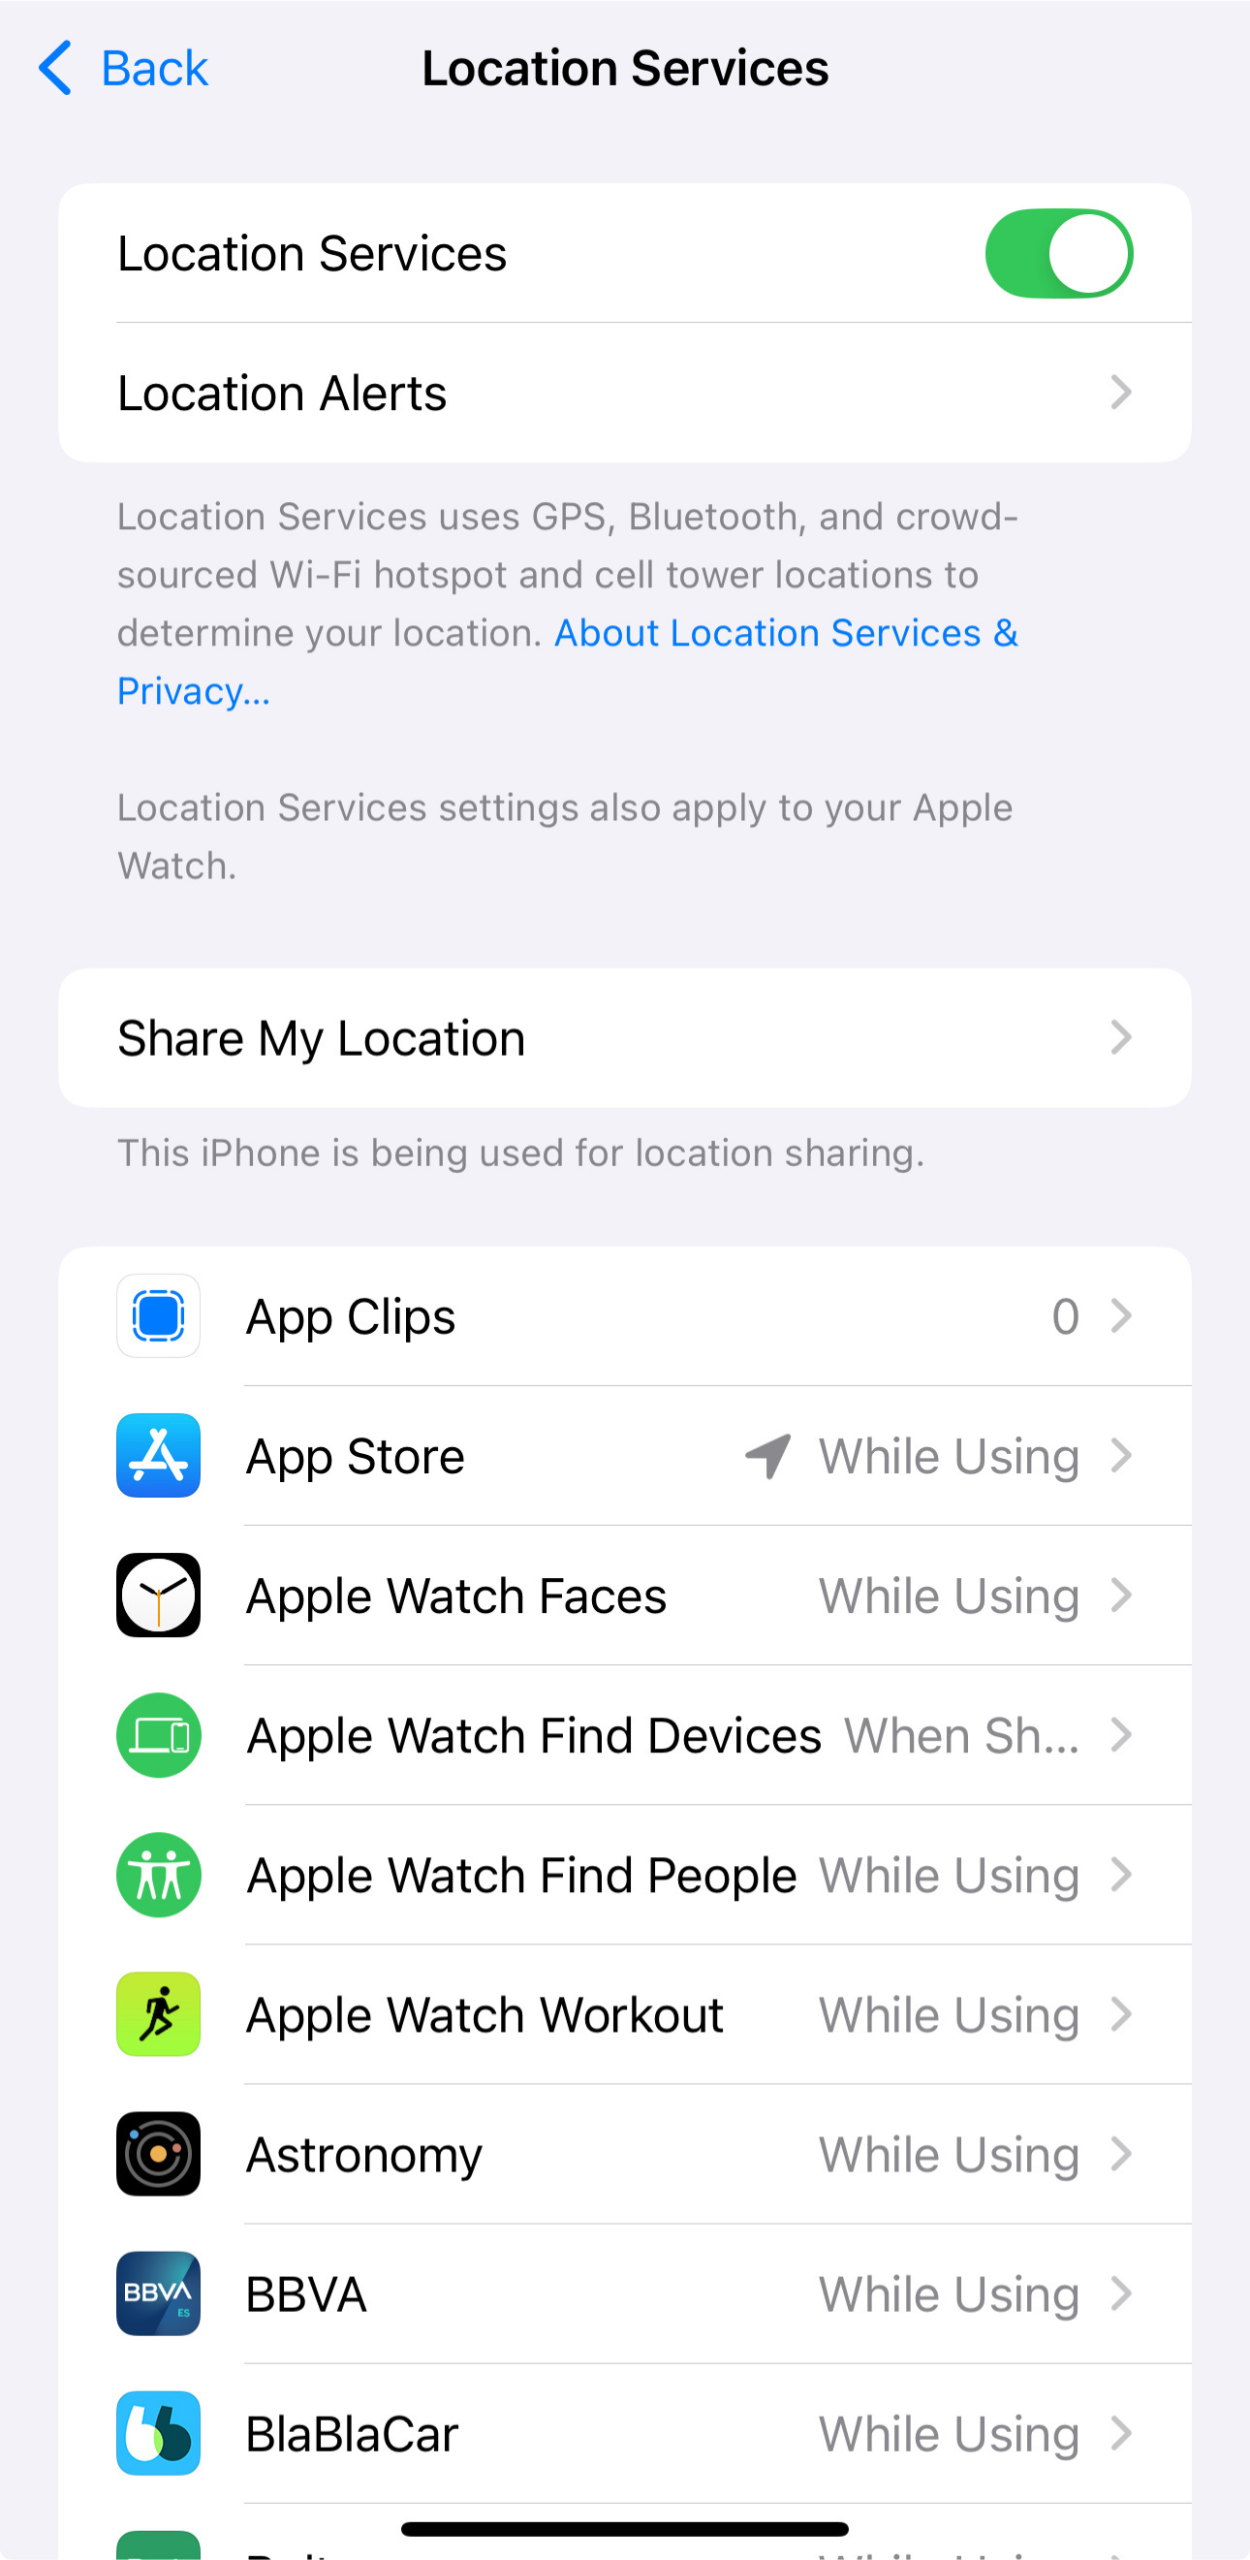
- Tap Location Services.
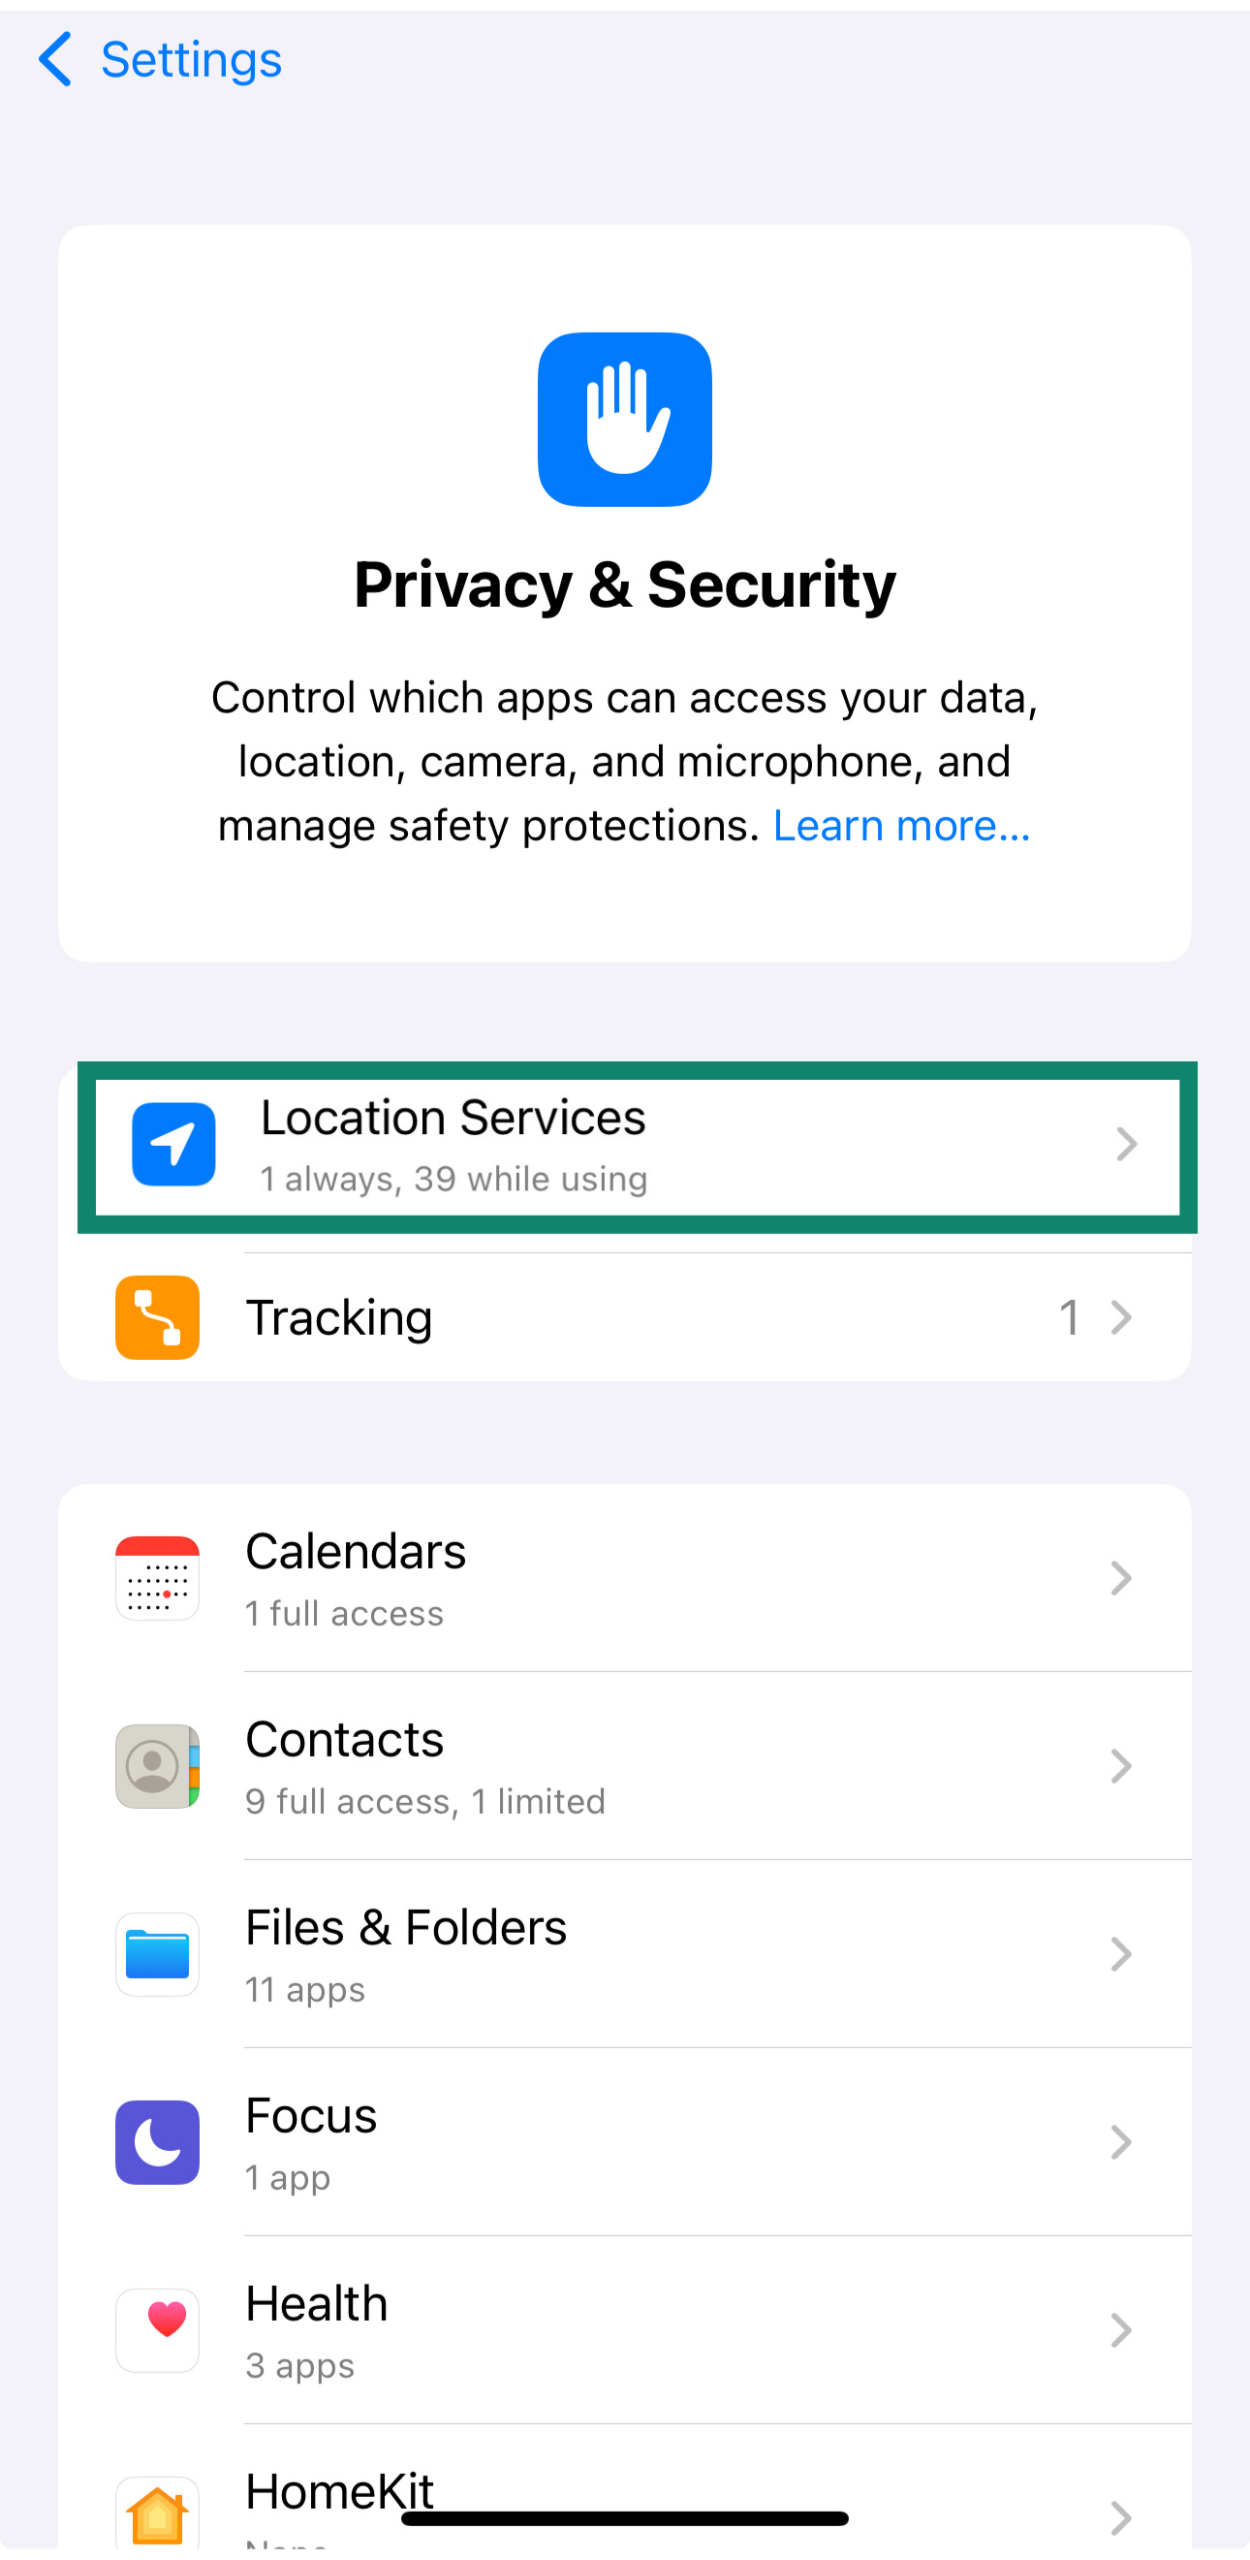
- Scroll through the list and tap each app to change its access.
Adjusting limits as your child grows
What works for a 9-year-old won’t necessarily suit a 13-year-old. Screen Time lets you update limits and restrictions at any time.
To make changes:
- In Settings, go to Family and tap your child’s name, then tap Screen Time.
- Tap the section you want to update: Downtime, App Limits, or Content & Privacy Restrictions. From there, you can make the necessary changes.
Tips for talking to your child about restrictions
Parental controls work best when your child knows they’re there and why they're there. It’s not about control for control’s sake, but about keeping them safe as they explore the internet and apps on their own.
Before setting any limits, have a quick conversation. Explain what you’re blocking and why, and give them space to ask questions. It builds trust and makes it more likely they’ll come to you if something feels off. As they grow, involving them in these decisions can help the rules feel fair and make them more likely to stick.
A recent survey from ExpressVPN on children and social media highlights just how important the trust between parent and child can be when it comes to online safety.
How to turn off parental controls on iPhone
You can turn off parental controls by disabling Screen Time for your child or changing specific settings.
To turn off all parental controls:
- Go to Settings, and tap Screen Time.
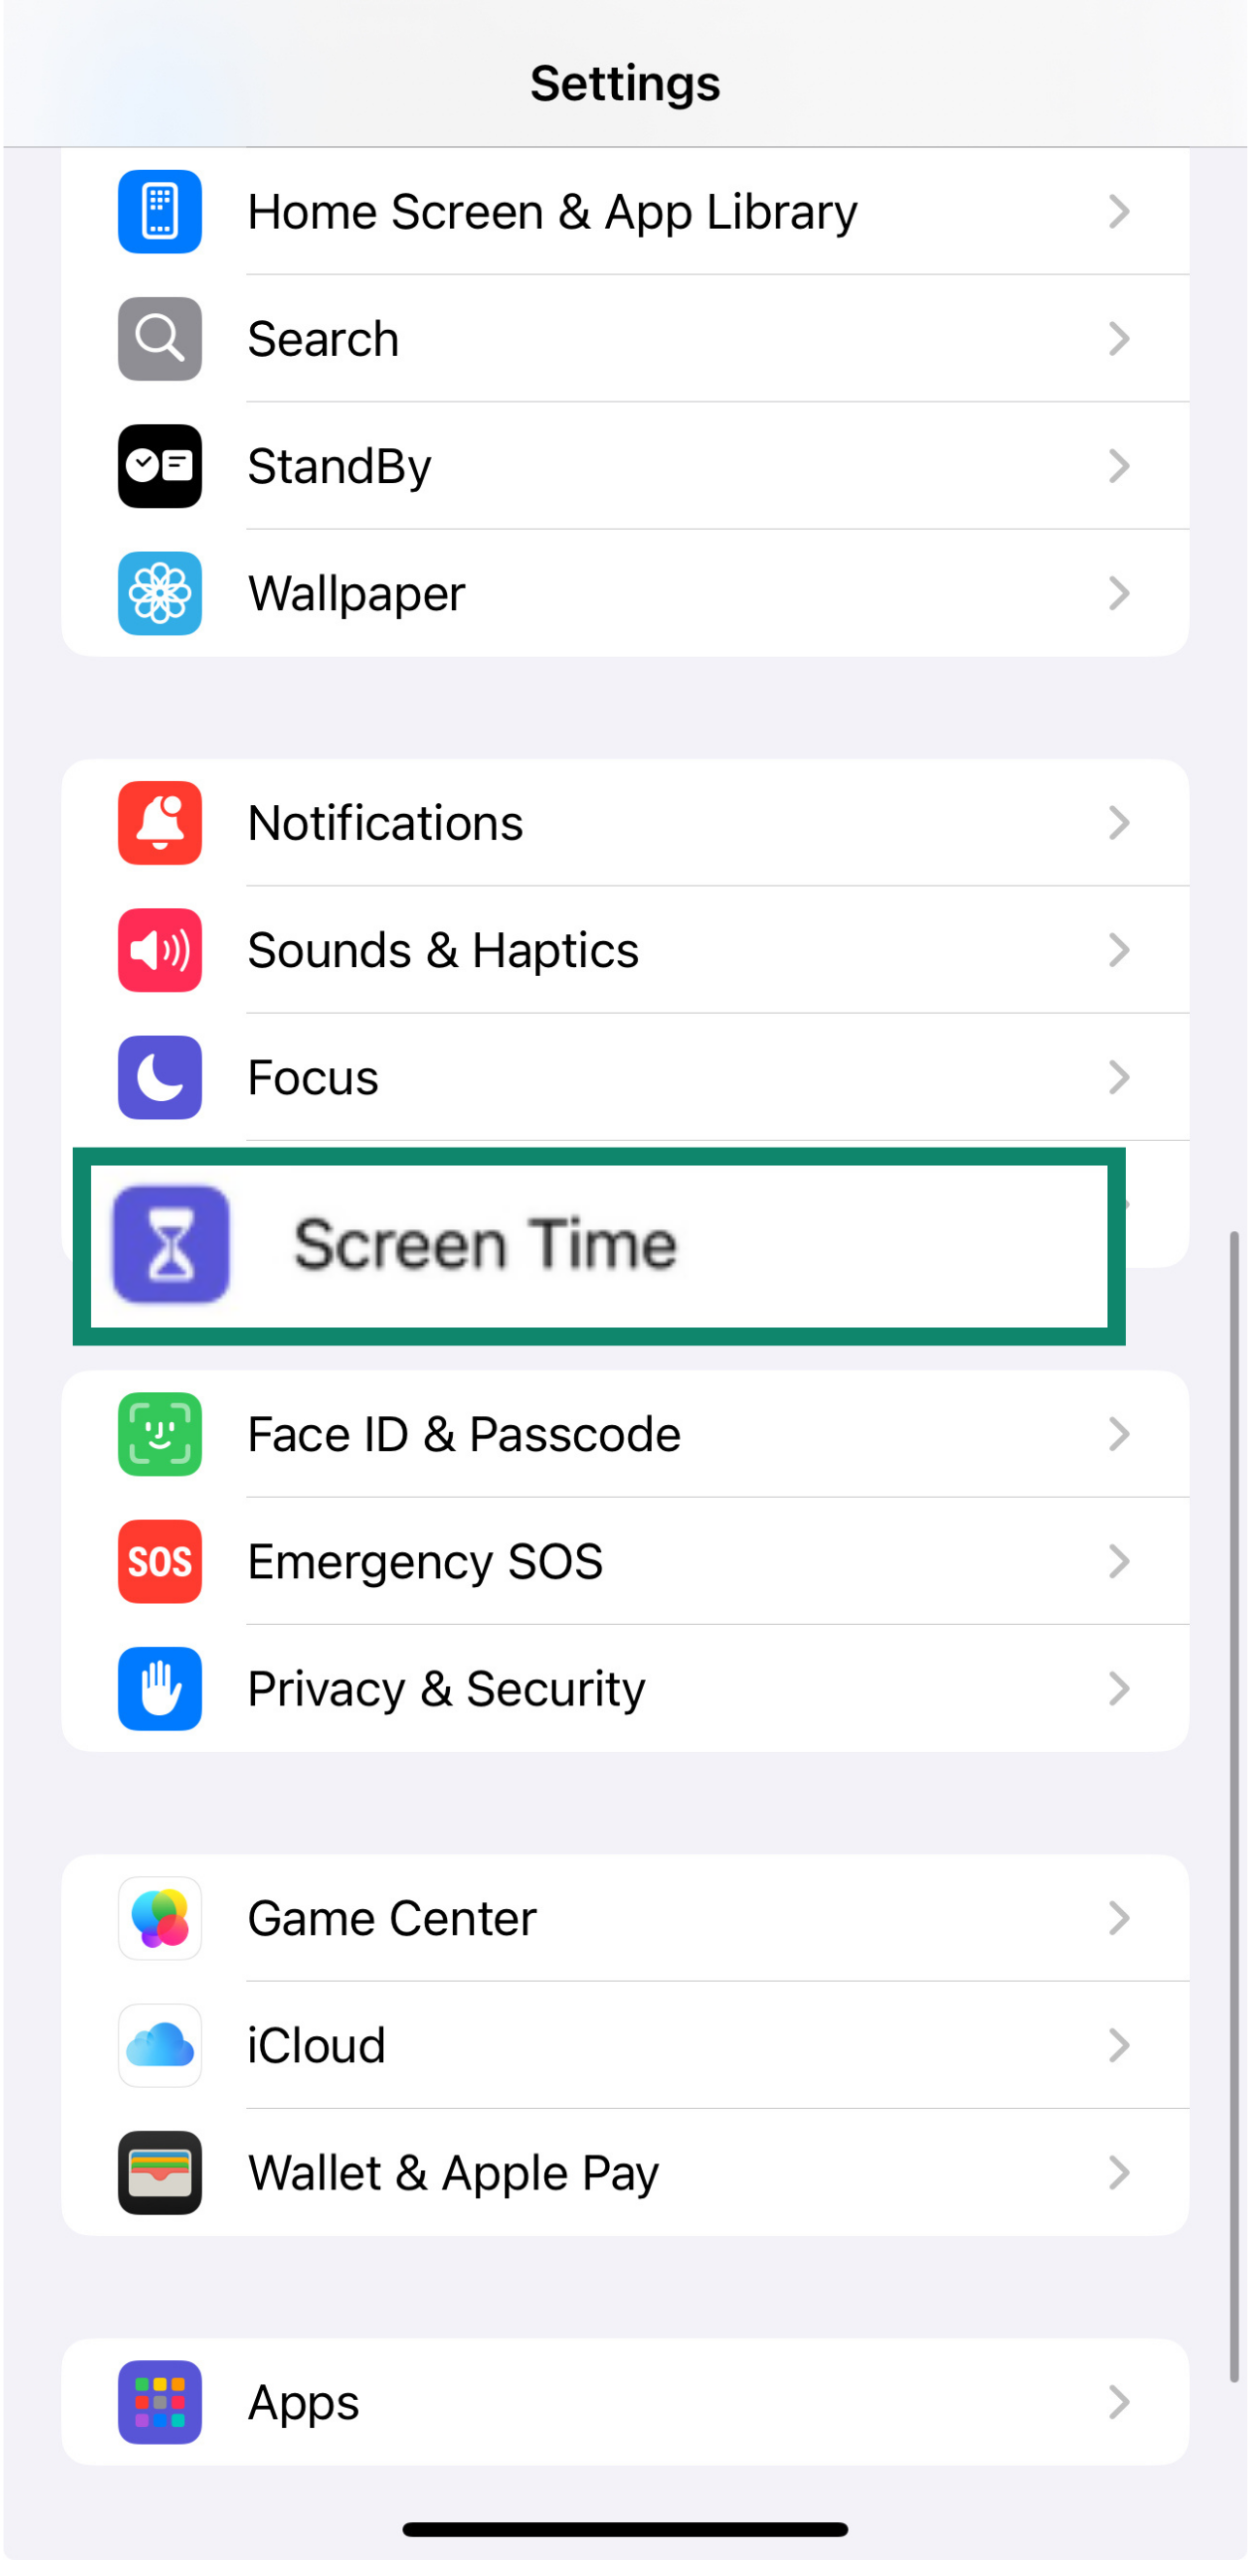
- Scroll down and tap Turn Off App & Website Activity.
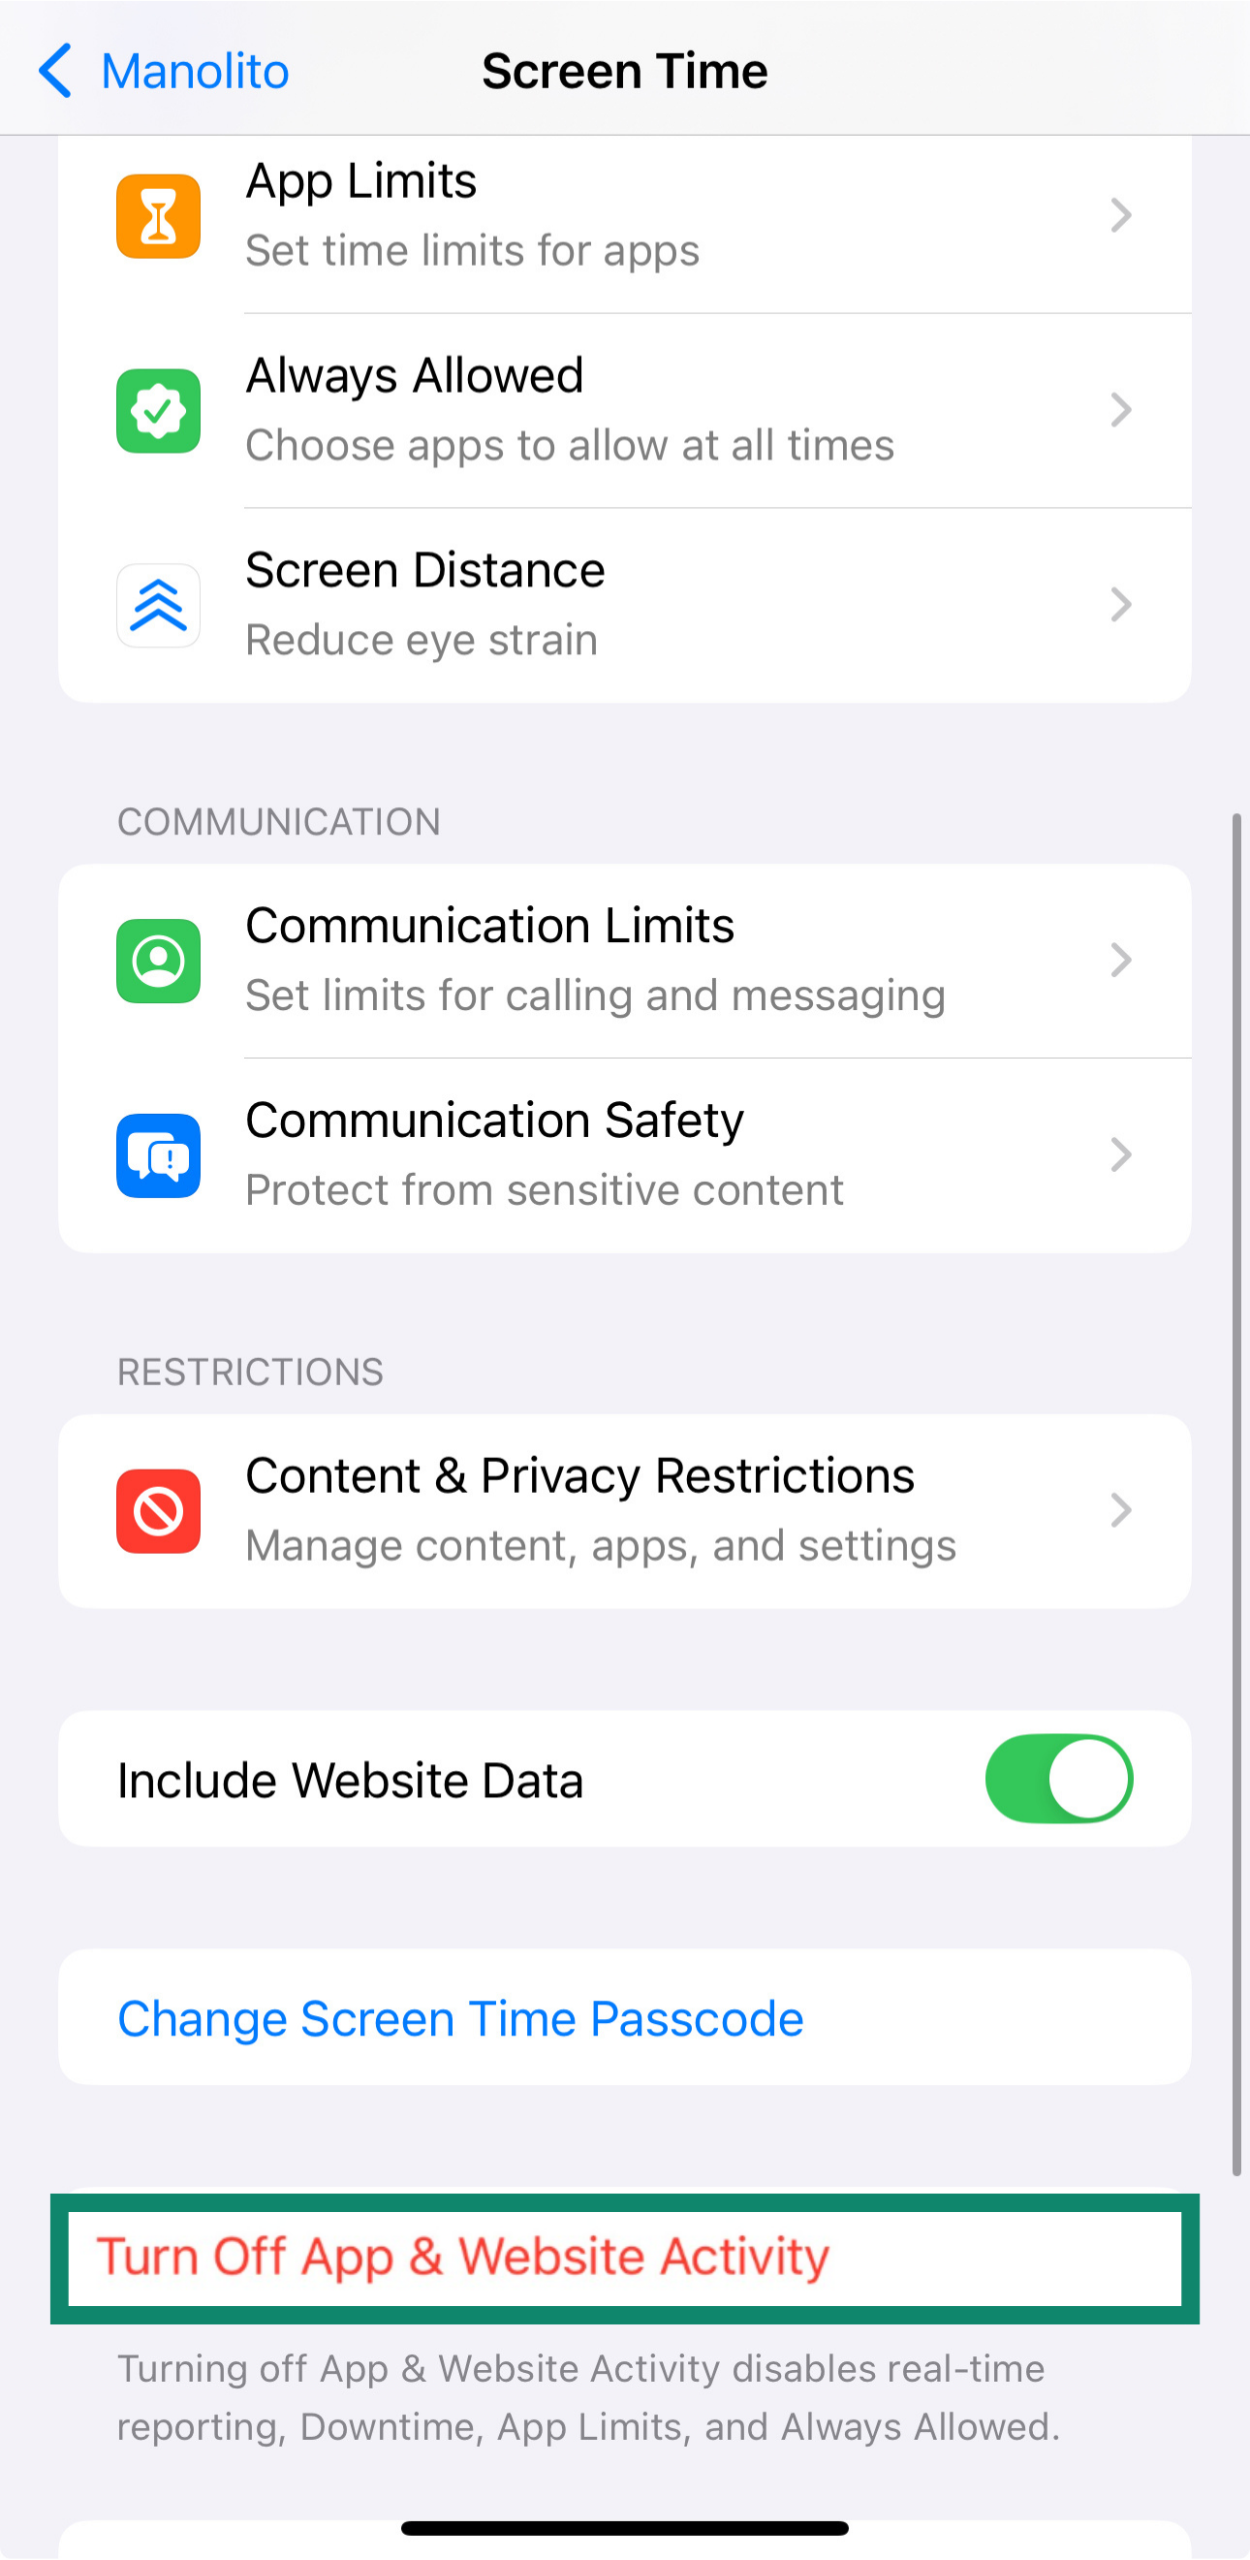
This will remove all limits, restrictions, and tracking associated with Screen Time.
To remove or change the passcode:
From Screen Time, tap Change Screen Time Passcode, and choose either Change or Turn Off Passcode. Then, enter the current code.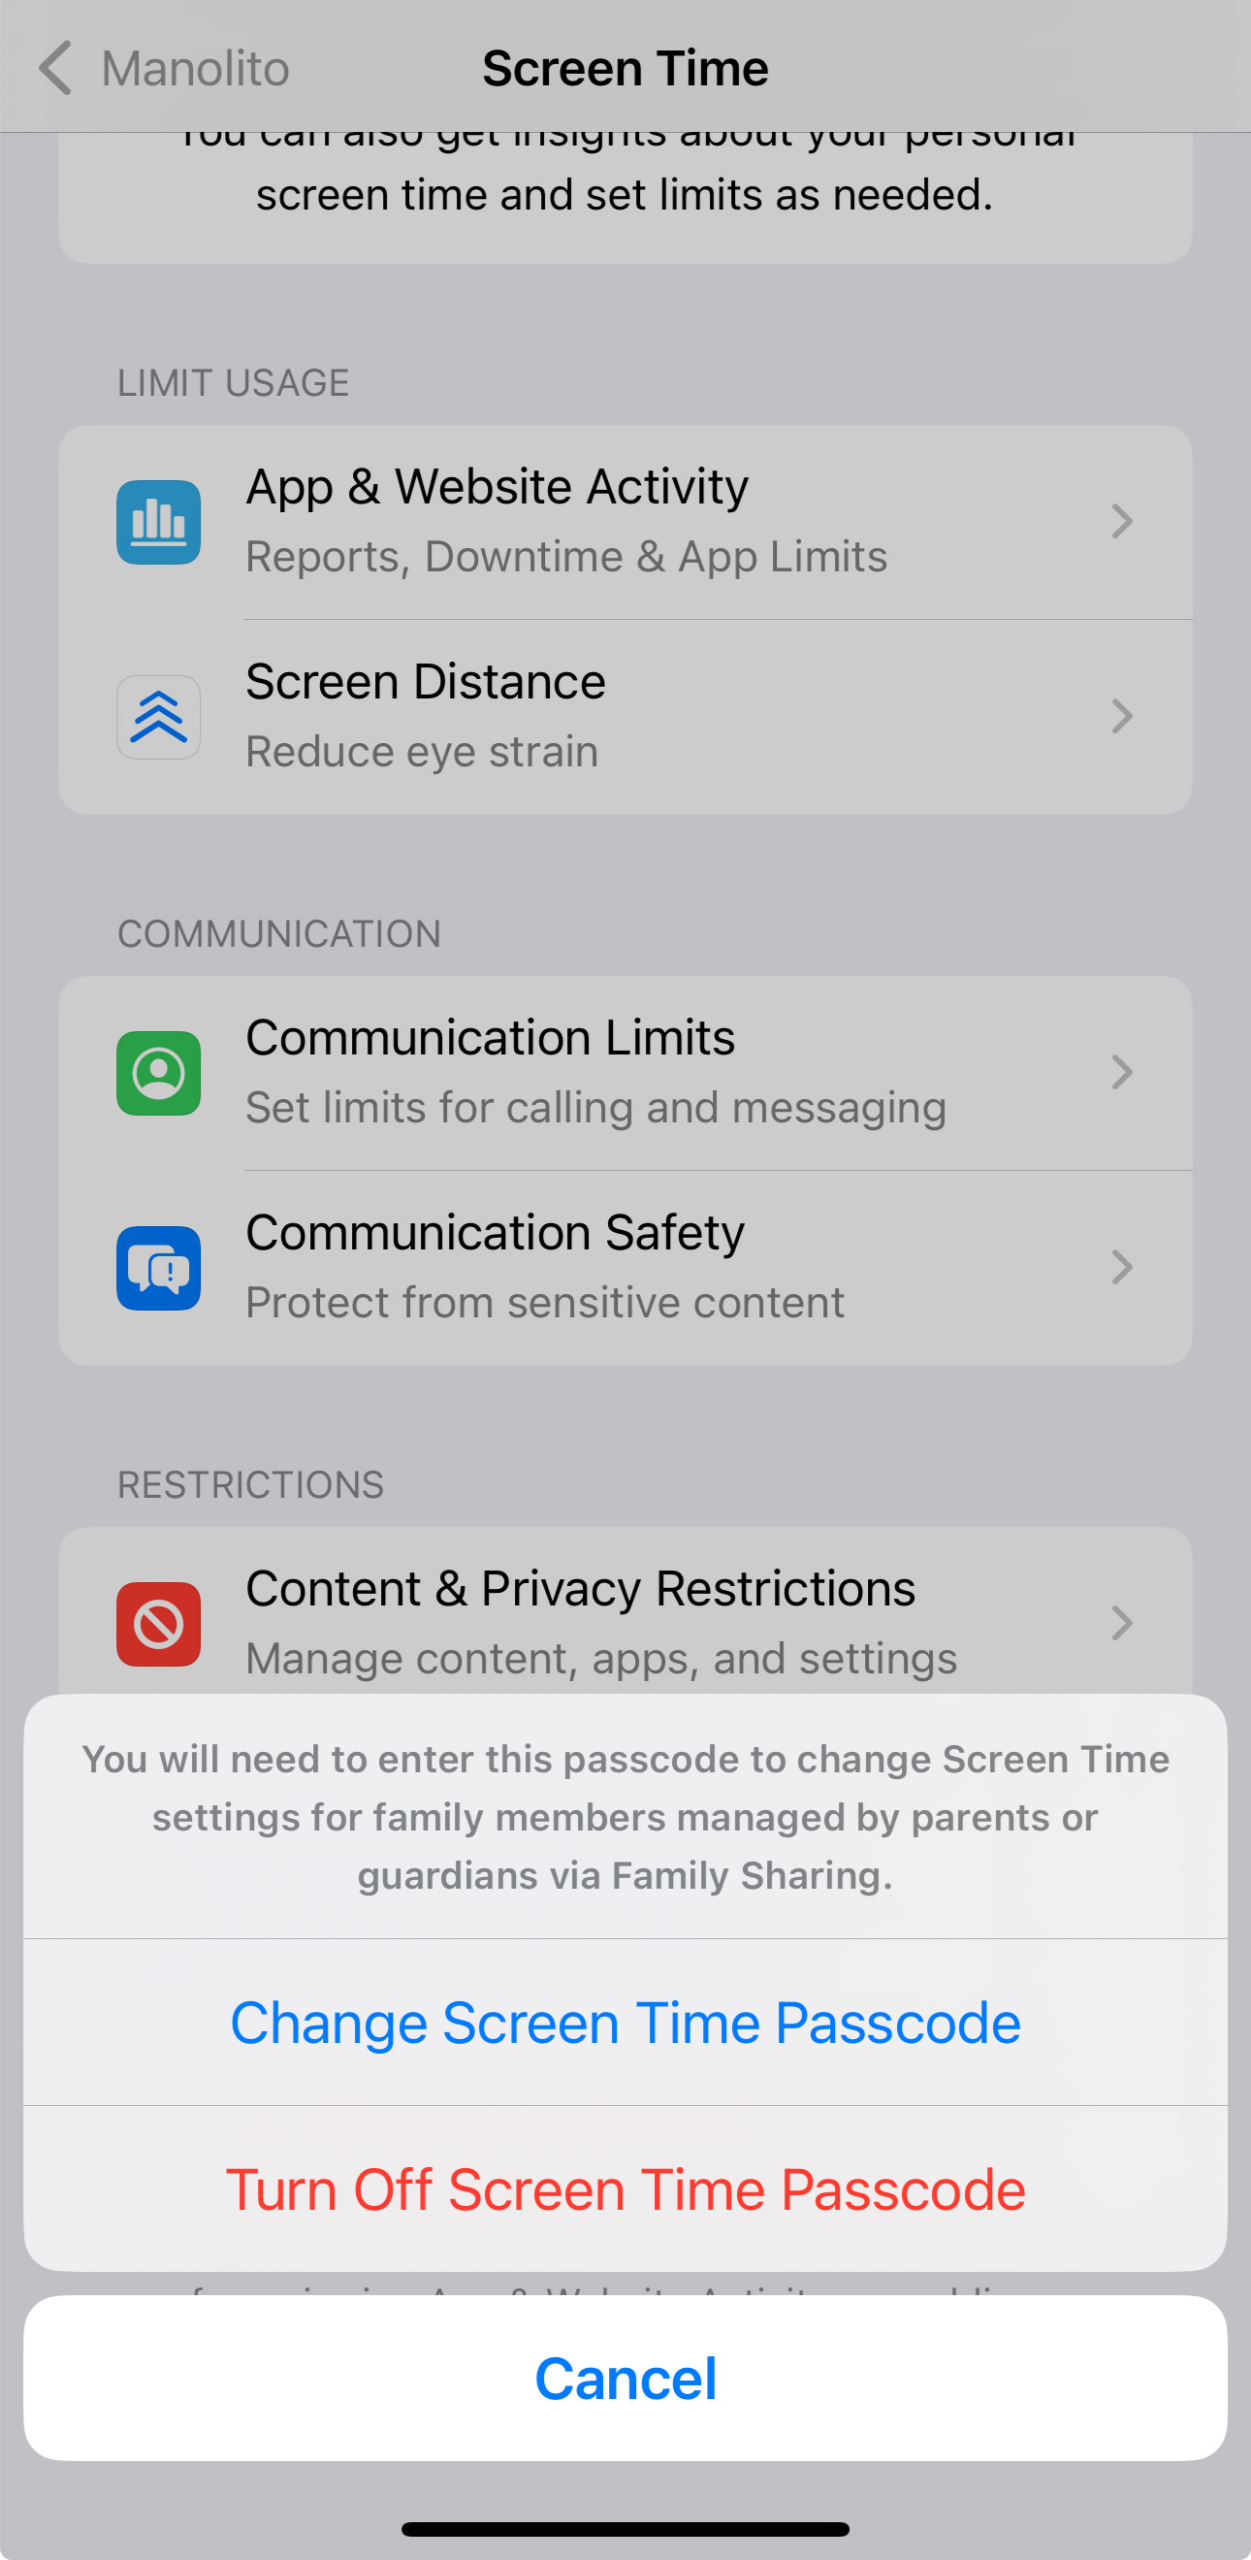
Should you use third-party parental control apps?
Apple’s Screen Time is a solid option for many families. It’s built in, easy to set up, and lets you manage app usage, content restrictions, and daily time limits. But if you need more than that, third-party parental control apps can offer extras like location tracking, real-time alerts, or support for managing Android and Windows devices, too.
These apps usually require a subscription and a bit more setup, but they might be worth it if you're looking for more detailed mobile device monitoring or control across different platforms.
If you're also using a VPN for added privacy, ExpressVPN lets you connect multiple devices at once, making it easier to protect the whole family.
Common workarounds kids use (and how to prevent them)
Kids are resourceful, and some will try to get around Screen Time limits. Common tricks include guessing the passcode, deleting and reinstalling apps to reset time limits, or changing the device’s clock to avoid Downtime.
Some even use Siri or Messages to access blocked content like YouTube links. In more extreme cases, they may try a full factory reset.
Most of these can be prevented with a few quick adjustments, like disabling app deletion, locking the time zone, removing Messages from the always-allowed list, and turning off Siri if needed. The most important step? Keep your Screen Time passcode private. Once you’re aware of these workarounds, staying ahead of them becomes a lot easier.
FAQ: Common questions about parental controls on iPhone
Does iPhone have built-in parental controls?
Yes. Screen Time is built into every iPhone. It lets you set app limits, filter content, and manage communication settings.
How do I put parental controls on my child’s iPhone?
Go to Settings, tap Screen Time, then turn on App & Website Activity. From there, you can set downtime, app limits, and content and privacy restrictions.
Will restrictions apply across all my child’s Apple devices?
Yes, if you're using Family Sharing, the restrictions you set will apply to all devices associated with your child's account.
This means you don't have to repeat the setup on every iPhone or iPad. For example, if you set App Limits or block certain websites, those settings will carry over to any other device your child uses. To enable this feature, go to Screen Time in your settings, select your child’s name, and turn on “Share Across Devices.”
Can I monitor my child's iPhone from my iPhone?
Yes, if Family Sharing is enabled, you can manage your child’s Screen Time settings from your own device.
How can I parental control my child’s phone?
You can use Screen Time in the Settings app to manage your child’s iPhone. It lets you set app limits, schedule downtime, block inappropriate content, restrict communication, and prevent in-app purchases. You can also monitor their activity and screen time.
These controls can be set directly on their device or remotely using Family Sharing. Just make sure to set a Screen Time passcode so your child can’t change the settings.
Explore the web with greater privacy
Get ExpressVPNSign up today for a chance to win FIFA World Cup 2026™ tickets.